Easy 2×4 Wood Flag Decor
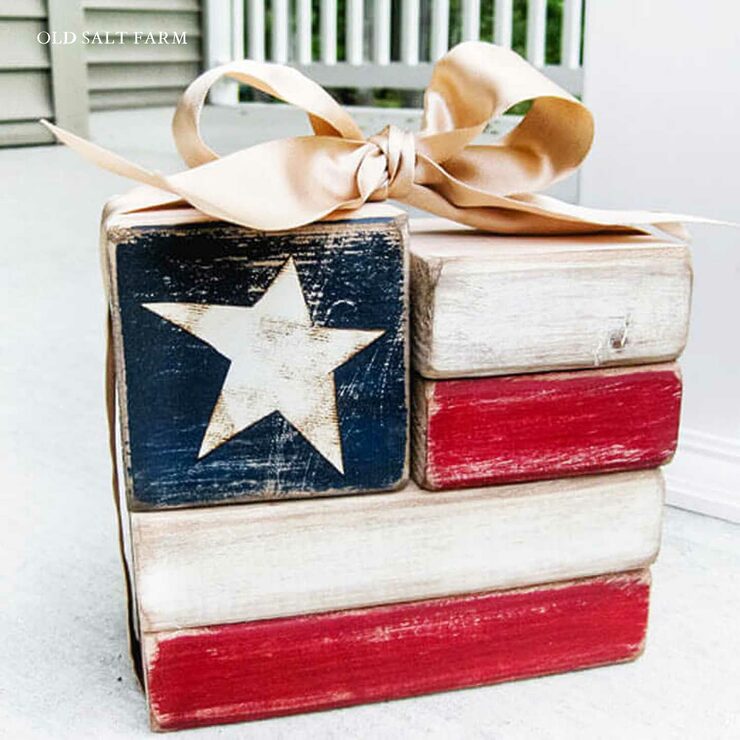
Make your own wood flag blocks for festive and affordable patriotic decor. Easy and fun project for beginners.
This fun project is one of the first I ever posted on my blog, almost 15 years ago, and they’re still one of the most popular…for good reason. So easy and fun to make, they are so cute and perfect on a porch, mantel, shelf, or counter. Not to mention, they’re very cost effective, and great on a budget.
Affiliate links included below for your convenience. Please see my full disclosure.
Raise your hand if you love patriotic and flag decor! Some of my most favorite include a Huge Wood Flag, 15-minute Flag Pillow, and my Patriotic Porch. But these wood flag blocks started it all!
They are so simple to make, totally inexpensive, easy to buy materials in bulk for them (best cost when made in a group), and super cute! This project can easily be done in a large group, or on your own.
After more than 15 years, these are still a favorite project of many. I’ve taught hundreds of people how to make them at craft nights. They’re always a hit, and everyone loves them. They’re perfect for decorating your own home, or even giving as gifts.
Table of contents
Supplies
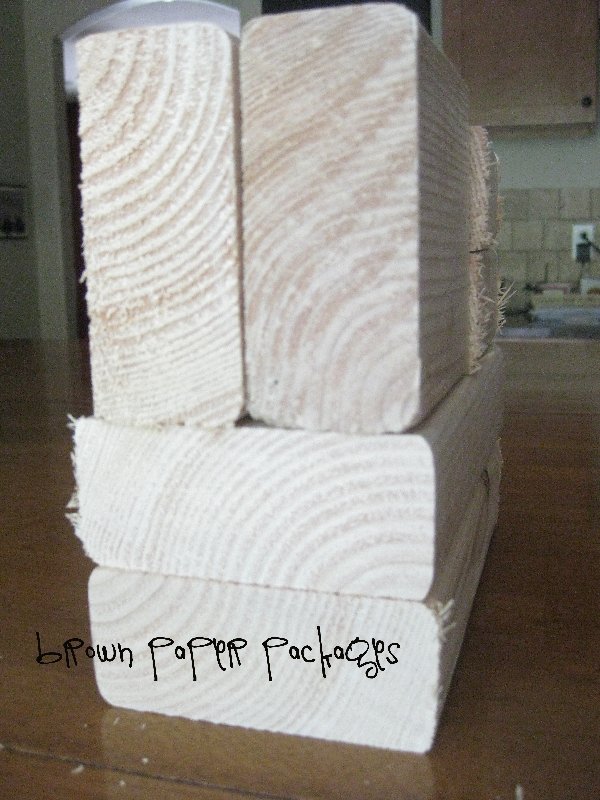
- 2×4 lumber, cut into these pieces: 2-7 inch blocks, and 4-3.5 inch blocks
- Craft paint and foam brush (see paint colors below) OR spray paint
- Sandpaper
- Stain
- White cardstock
- Distress ink
Directions
1. A 2×4 will cost somewhere around $2 ($2.10 at my Home Depot). It will usually come in 8 foot lengths, so one piece of wood will make 3 block sets. That’s 70 cents a piece! The store will cut it for you–just have your measurements ready.
2. Set out your blocks, so you know which of the two sides you want to paint.
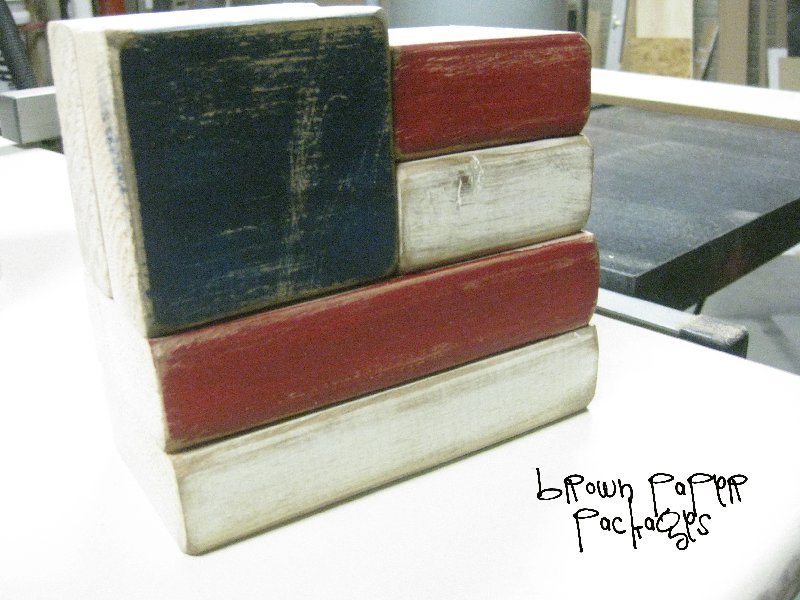
This is how it will look:

I used an extra 3.5 block right behind the star piece. This gave it more stability, helped the star piece sit a little more forward, and made it easier to tie on the ribbon.
3. Paint just the front skinny sides of the wood–one long cream, one long red, one short cream, and one short red. Out of the two remaining 3.5 blocks, you leave one bare, and paint the the bigger side of the second one navy blue.
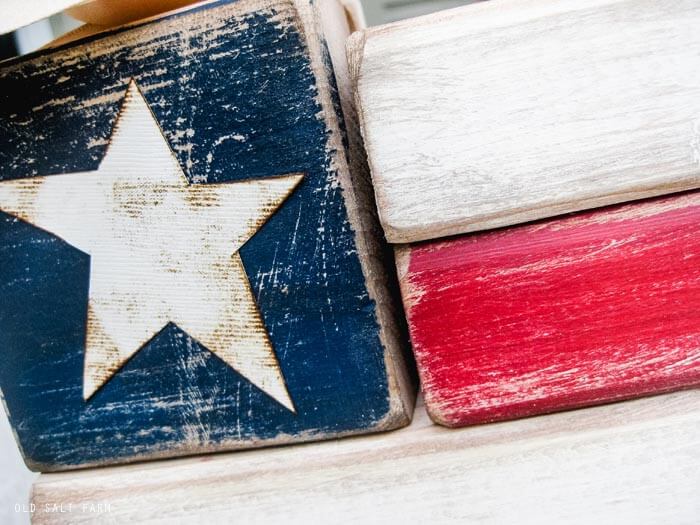
4. Once they’ve dried, sand it well–making sure to get the corners, and fading the paint so it looks really weathered.
5. Wipe off the dust, then apply the stain– I like Minwax Dark Walnut. (Paint cost: $1 each–I could have made at least 4 out of one bottle–so we’re talking 25 cents each, x 3.) You need a VERY small amount. Just dab a corner of a lint-free rag and blot first, then stain around the edges and top of the paint. You can always add more, but you’d have to sand off the stain if you want less.
PAINT COLORS: I’m also very particular about the paint colors I use–especially red. For me, it can’t be too burgundy, or too bright. My favorite it Tompte Red, by Delta (Ceramcoat). I used Navy Blue by FolkArt, and Vanilla, by JoAnn’s.
TIP: You can also use spray paint if you like, but the finish is different.

4. For the star, I just traced one that I liked, enlarged it on my copier (it’s about 3 inches from point to point), stenciled it onto cream cardstock, then cut it out. I distressed all the edges, and adhered it with double stick tape. You can leave it like this, or mod podge it on for extra security.
5. Stack up your blocks, then tie on your ribbon. I suggest using a wire ribbon–the bow will look great, and hold its shape. (Ribbon cost: This is your biggest variable. Using a 40% off coupon at Michael’s or JoAnn’s, my ribbon would be around $2.50, and I used about a third of it for one set, s0 around 80 cents each.) If you’re making them for a large group, and need to save money, tying jute around the blocks a couple of times around, and then a knot or bow at the top looks just as cute, and much cheaper!
You’re done! From start to finish, you’re talking 30 minutes! Total cost? A little over $2.25 per set. You really can’t beat that!
FAQ
Just a tiny amount! Dipping the corner of a lint-free rag into the stain or on the stain lid works great. Blot first, then apply the stain. You can always add more if you like.
That’s totally up to you and your preference! I like just the front painted, but these are your blocks, and you can absolutely paint all sides.
More patriotic ideas
Thanks so much for stopping by! Follow me on Instagram and Facebook for even more ideas and recipes. I’d love to see you there! 🖤

*Originally posted 2010.
Oh these are so cute! Thanks for sharing!!
-Kristi
@ Creative Kristi
love how they turned out! can't wait to make them :)
these are adorable! i saw something like this a friend had in her display case at home but it was of the texas state flag {which is pretty much the blue block and just the first two stripes instead of the four you used} is there anyone with brains that arent totally fried and better with measurements that could help me configure a texas state flag one like this? I know the ladies in my ward would love this for a super saturday project, but im really not good with dimensions.
just in case you want to email me:
kelly-tillotson@hotmail.com
–thanks in advance for any ideas–
I love this!! I definitely plan on making these in the future. My house is full of your projects- I've made the chore chart and the footstool! :)
I think these are so cute!!
What a fun project I think I need to make these too! : )
so cute!
This is perfect!! We had our RS planning meeting yesterday.We are looking for low budget ideas as we have a lot of low income families in our congregation. I am adding this to our list.
THose are so cute!
I'm not very craftsy – but I think I could do this.. this is too cute!!!
These really are super cute. Now I want to figure out what to paint on the other side so they reversible.
Ideas?
Freakin' cute! Love your stuff!
Lovin' these… what a cute idea! Thanks for sharing!
very cute!
Those are really great! I love the distressed look. I'll be following you. :o)
I do believe you are my very favorite craft blog! I love all your crafts and I feature a ton of them, including this one on my new craft blog, http://auntielolocrafts.blogspot.com Thanks for all the inspiration!
Lois
Love, love, love this idea. I need some more detailed direction on the staining step though….please advise. Messed one block up already….don't want to proceed until I find out more. Thanks for your help:)
Okay, staining can be tricky, but here's what I do:
Just dab your rag in the stain (I use what's on the lid, because it's usually just enough), then blot it on a piece of paper, or something else to get the excess off. Then take your rag and wipe it on your block in smooth, straight lines. Take a clean piece of the rag and again, wipe off any excess. You really don't need much at all.
Good luck!
I LOVE this – thanks for sharing!!
Sarah from The House That Ag Built
Great visiting teaching gift idea! Thanks.
LOVE this! Thank you for sharing and for the tutorial! I already made my set and will be helping other sisters at our Relief Society activity on Tuesday :)
Hi! I love these blocks and I featured them on my blog! You can check it out at http://sittingatourkitchentable.blogspot.com/2011/06/me-likey-monday.html
Have a great week!
Amy
This is so adorable! I am making one! I am following your blog and would love it if you would follow me back! Have a great 4th!
Thank you for all of the specifics! So cute, I'm so going to do this. It's so cute!
I featured your blocks as one of the 4th of July projects I wish I would have made. I absolutely love them!
http://thejunkhouse.blogspot.com/2011/07/happy-4th-of-july.html
This is so cute and looks like something I can do! Thanks for sharing!