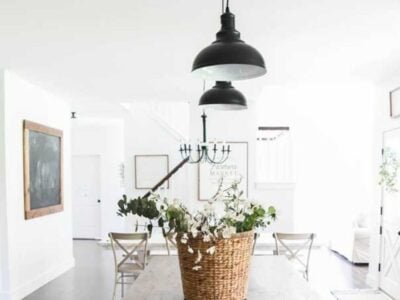
• Home
  • Blog
  • Project Gallery
  • About Me
    • About Old Salt Farm
    • Contact Info
  • Terms of Service & Privacy Policy
  • My Book
    • Email
    • Facebook
    • Instagram
    • Pinterest
    • Twitter

Old Salt Farm

Farmhouse + DIY

  • DIY
    • DIY Home Decor
    • Paint & Stain Projects
    • Re-purposed Projects
    • Woodworking
    • Outdoor Projects
  • For the Home
    • Old Salt Farm
    • Farmhouse Style
    • Home Decor & Styling
    • Cleaning
    • Organization
    • Entertaining
    • Crafts
      • Printables
      • Fonts
      • Silhouette
      • All Crafts
      • Kids’ Crafts
  • Holidays
    • 4th of July
    • Back to School
    • Christmas
    • Cinco de Mayo
    • Easter
    • Fall
    • Halloween
    • New Year’s Eve
    • Spring
    • St. Patrick’s Day
    • Summer
    • Thanksgiving
    • Valentine’s Day
    • Winter
  • Family Life
    • Kids’ Ideas
  • Gift Ideas
    • Birthdays
    • Father’s Day
    • Mother’s Day
    • Teachers
    • Thank you
    • Thinking of You
    • Weddings
    • Babies
  • Lifestyle
    • Travel
  • Recipes
    • Appetizers
    • Breads
    • Breakfast
    • Crockpot
    • Cookies & Bars
    • Desserts
    • Main Dishes
    • Soups
    • Snacks
    • Drinks
    • Holidays
    • Game Day
  • The Farmhouse Finder
  • Shop

Feb 12, 2017

DIY Kitchen Benches

DIY Kitchen Benches

DIY Kitchen Benches that are easy to make, easy on your budget, and perfect farmhouse style!

DIY Kitchen Benches | simply kierste.com

Months before we moved into Old Salt Farm I started searching for kitchen stools. Our plans called for a big island that would fit our six kids, and I wanted stools that would be good for them, plus fit my farmhouse style and our budget.  I ended up finding several stools I liked, but I just didn’t like them enough. 

DIY Kitchen Benches

I started thinking about it some more, and realized that what I needed was a couple of kitchen benches instead of stools. Not only could I fit more kids on them, and based on previous experience, I knew they would be easier to clean than the individual stools we’d always had before. Plus, I could build them for a fraction of the cost, which in my book, is a win-win-win!

DIY Kitchen Benches

I absolutely love our kitchen benches.  Like, I REALLY love them.  They’ve proven to be everything I thought and hoped they would be.  Super easy to clean, plenty of room for my kiddos to sit, darling farmhouse style, and cheaper than just about any other stool I found (and it adds up when you’re buying so many)!

P.S. I get a lot of questions about the hooks on my island—here’s the link! (affiliate)

DIY Kitchen Benches

I’m going to show you how we made them, and give you a cut list plus plenty of pictures…after they were built.  I wish I had more process pictures to share, but we made these very quickly right before we moved, and it was just so crazy of a time.  We were living in an apartment, all of our tools in storage, and someone very kind let us use an empty workshop at a factory to build everything for our home.  But because we had to travel there, we rarely went together, and the pictures just didn’t happen.  However…it’s a pretty easy plan, and I hope with the pictures and the cut list you’ll be able to see what we did.
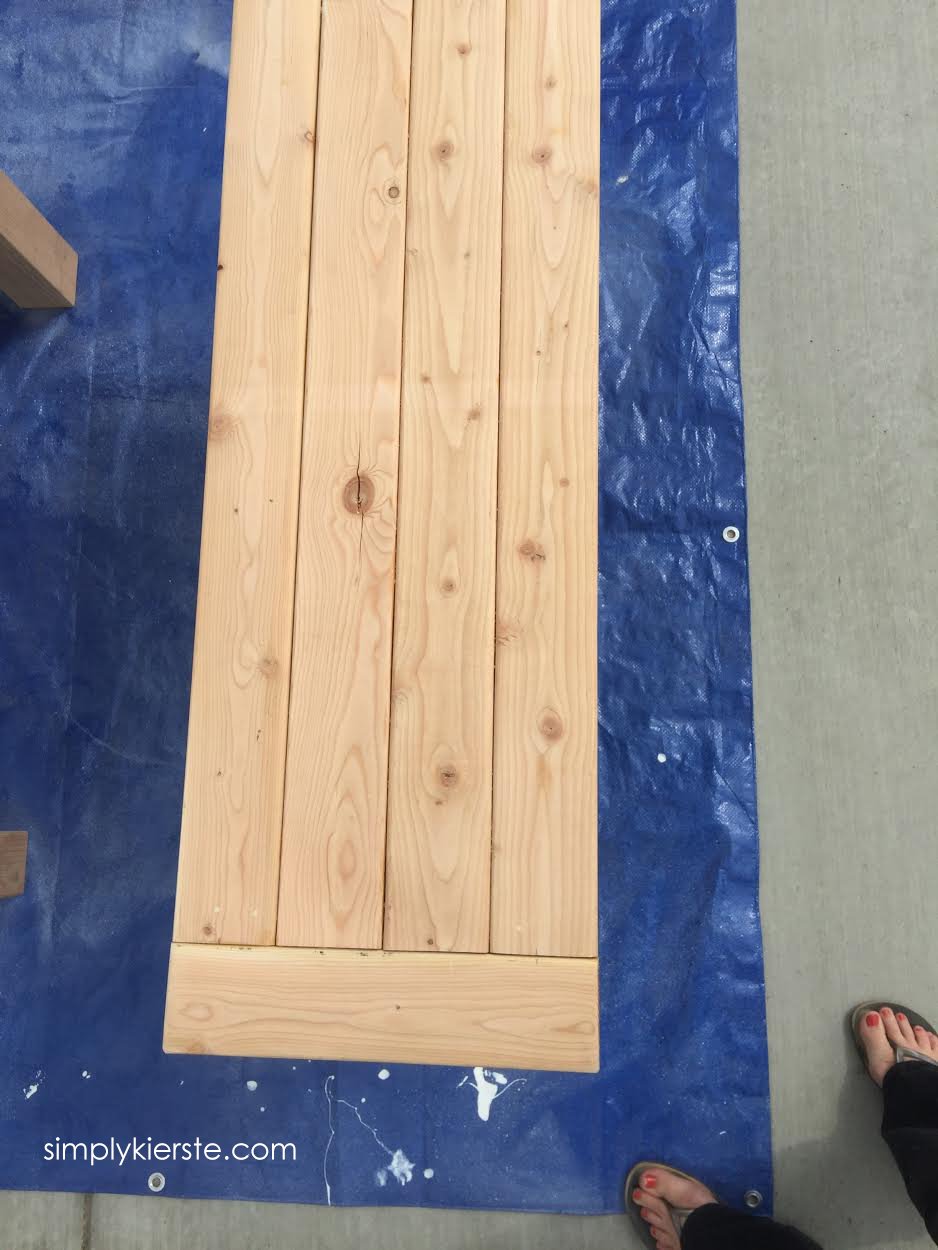
DIY KITCHEN BENCHES

CUT LIST–

Legs–

4×4 posts:  22 in. (4)

Top–

2x4x35 (4)

2×4 x13 3/4  (2)

Frame–

2x4x31 (2)

2x4x33 1/2 (1)

2x4x5 (4)

OTHER SUPPLIES

(Affiliate links are included below for your convenience. If you click on a link and make a purchase, I’ll receive a small commission at no extra cost to you.)

  • –Kreg pocket jig
  • –stain (this is what I used)
  • -lint free rags
  • –painters tape
  • -white paint (I used leftover wall paint)
  • –sander (this is an awesome one!)
  • -medium grit sandpaper

DIRECTIONS

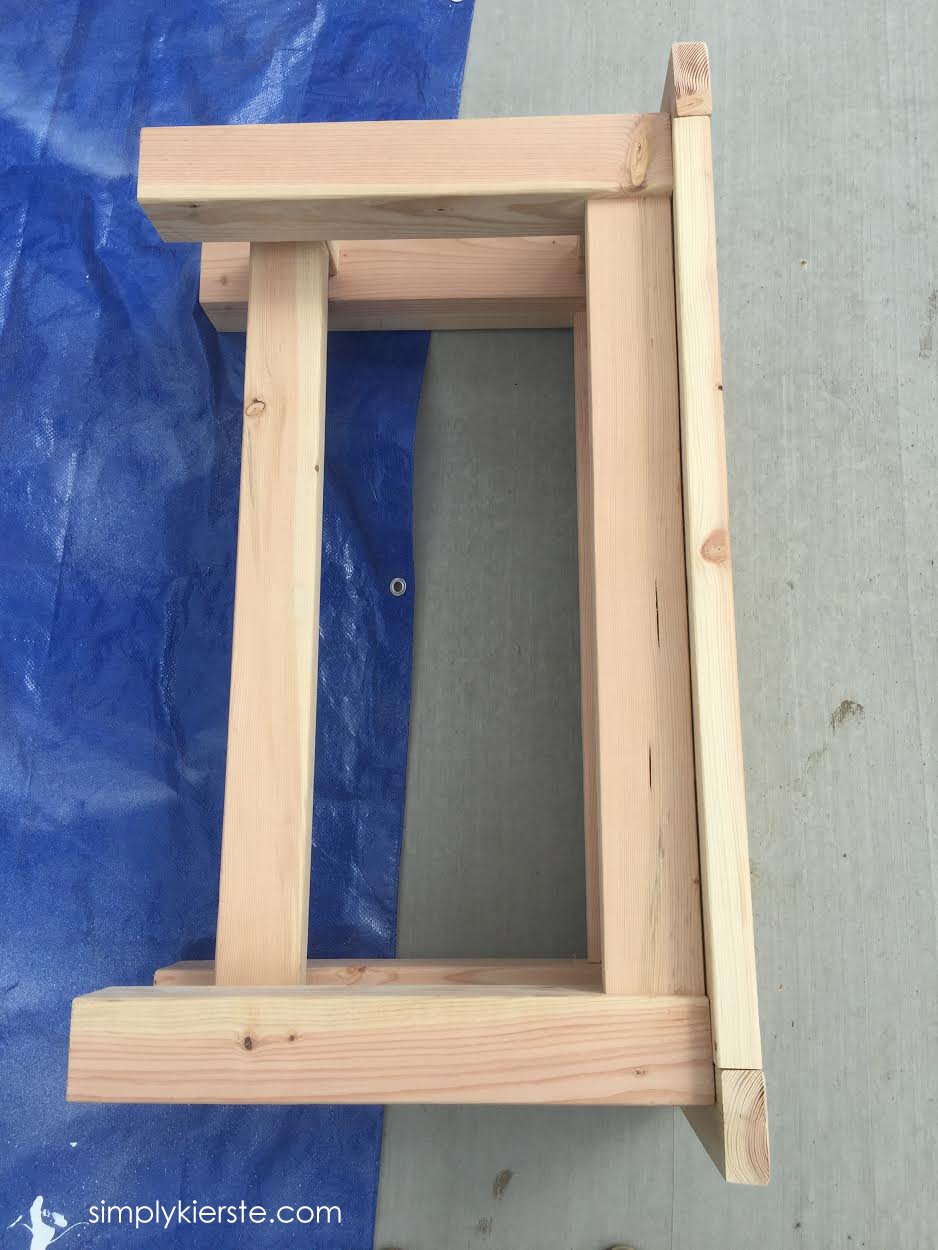
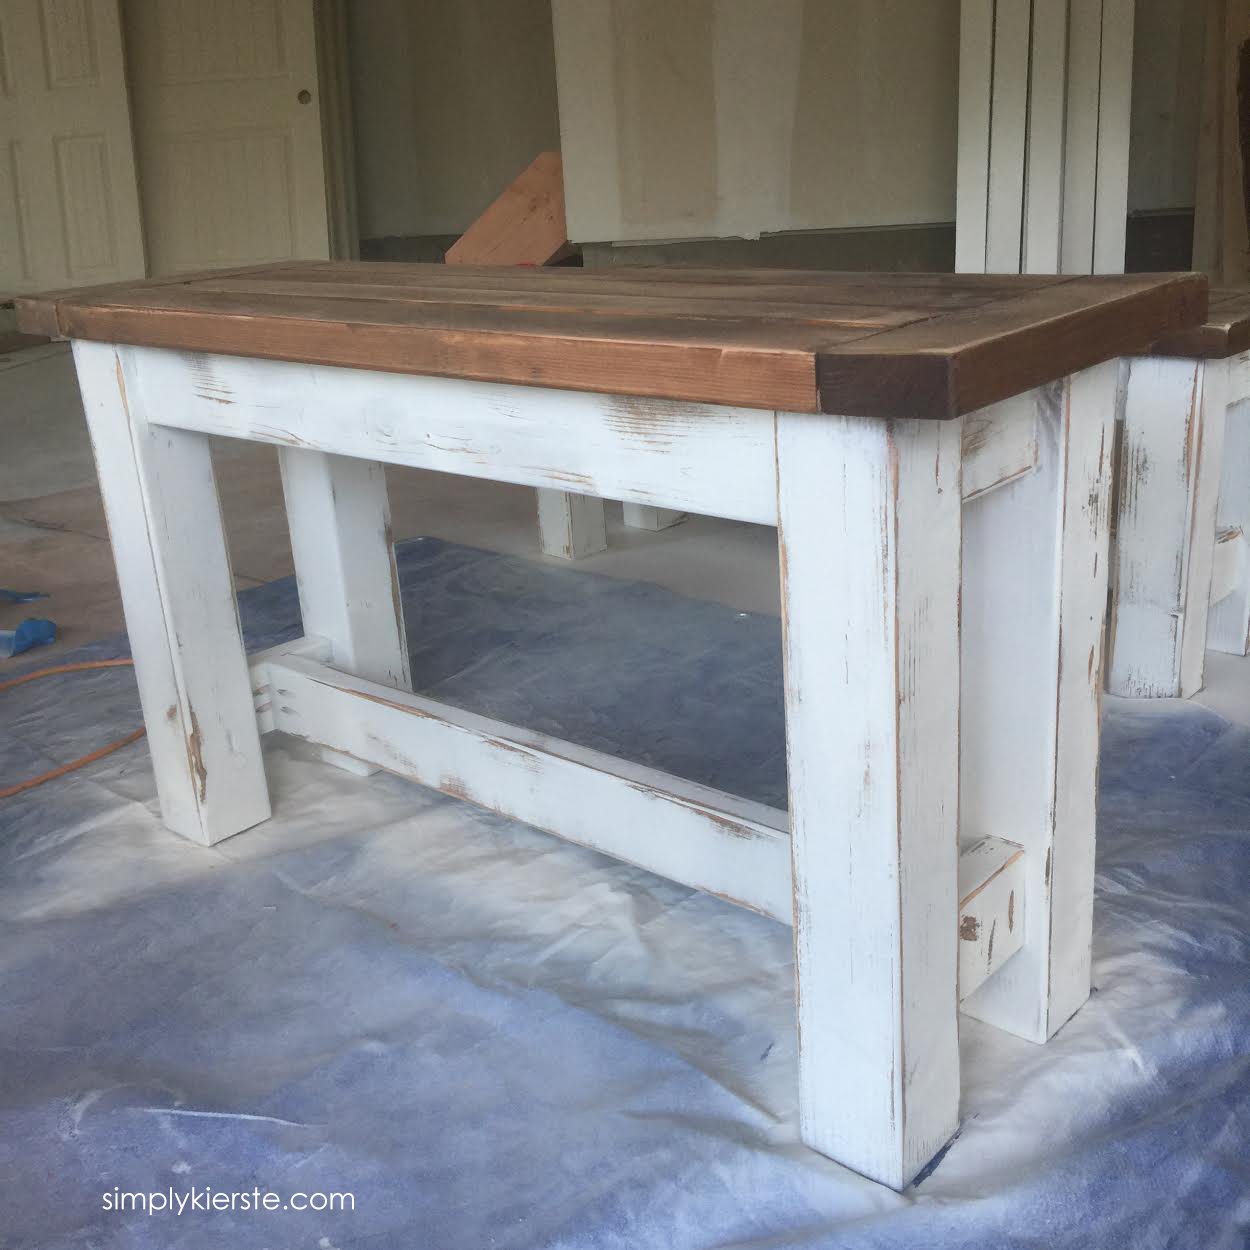
-Start by building the “H” for each side:  the two legs, and the short piece in the middle and at the top.

DIY Kitchen Benches | oldsaltfarm.com

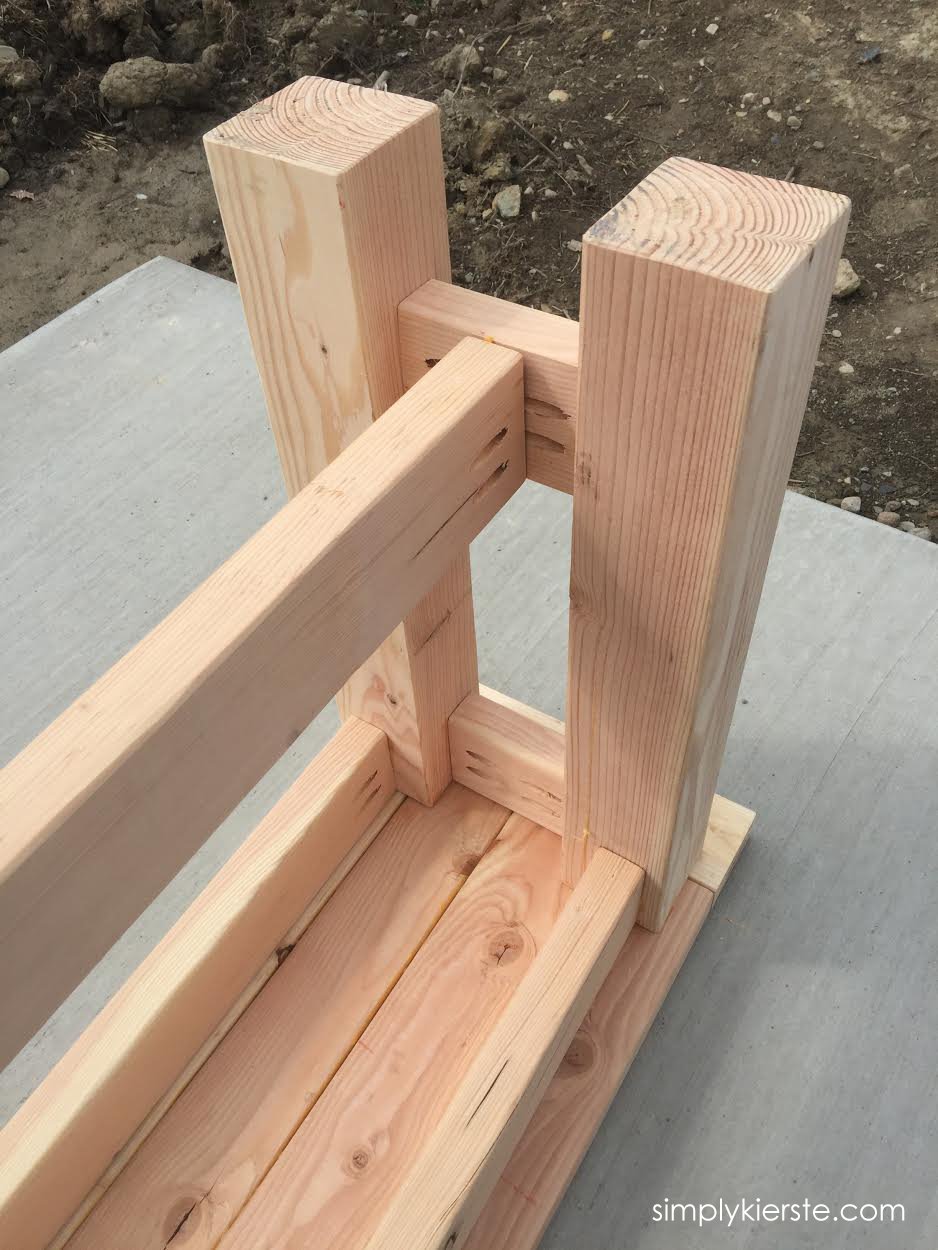
-Attach the two sides together with the long piece in the middle (that hooks into the bottom short pieces), and then the two pieces on each side at the top.

DIY Kitchen Benches | simply kierste.com

DIY Kitchen Benches | oldsaltfarm.com

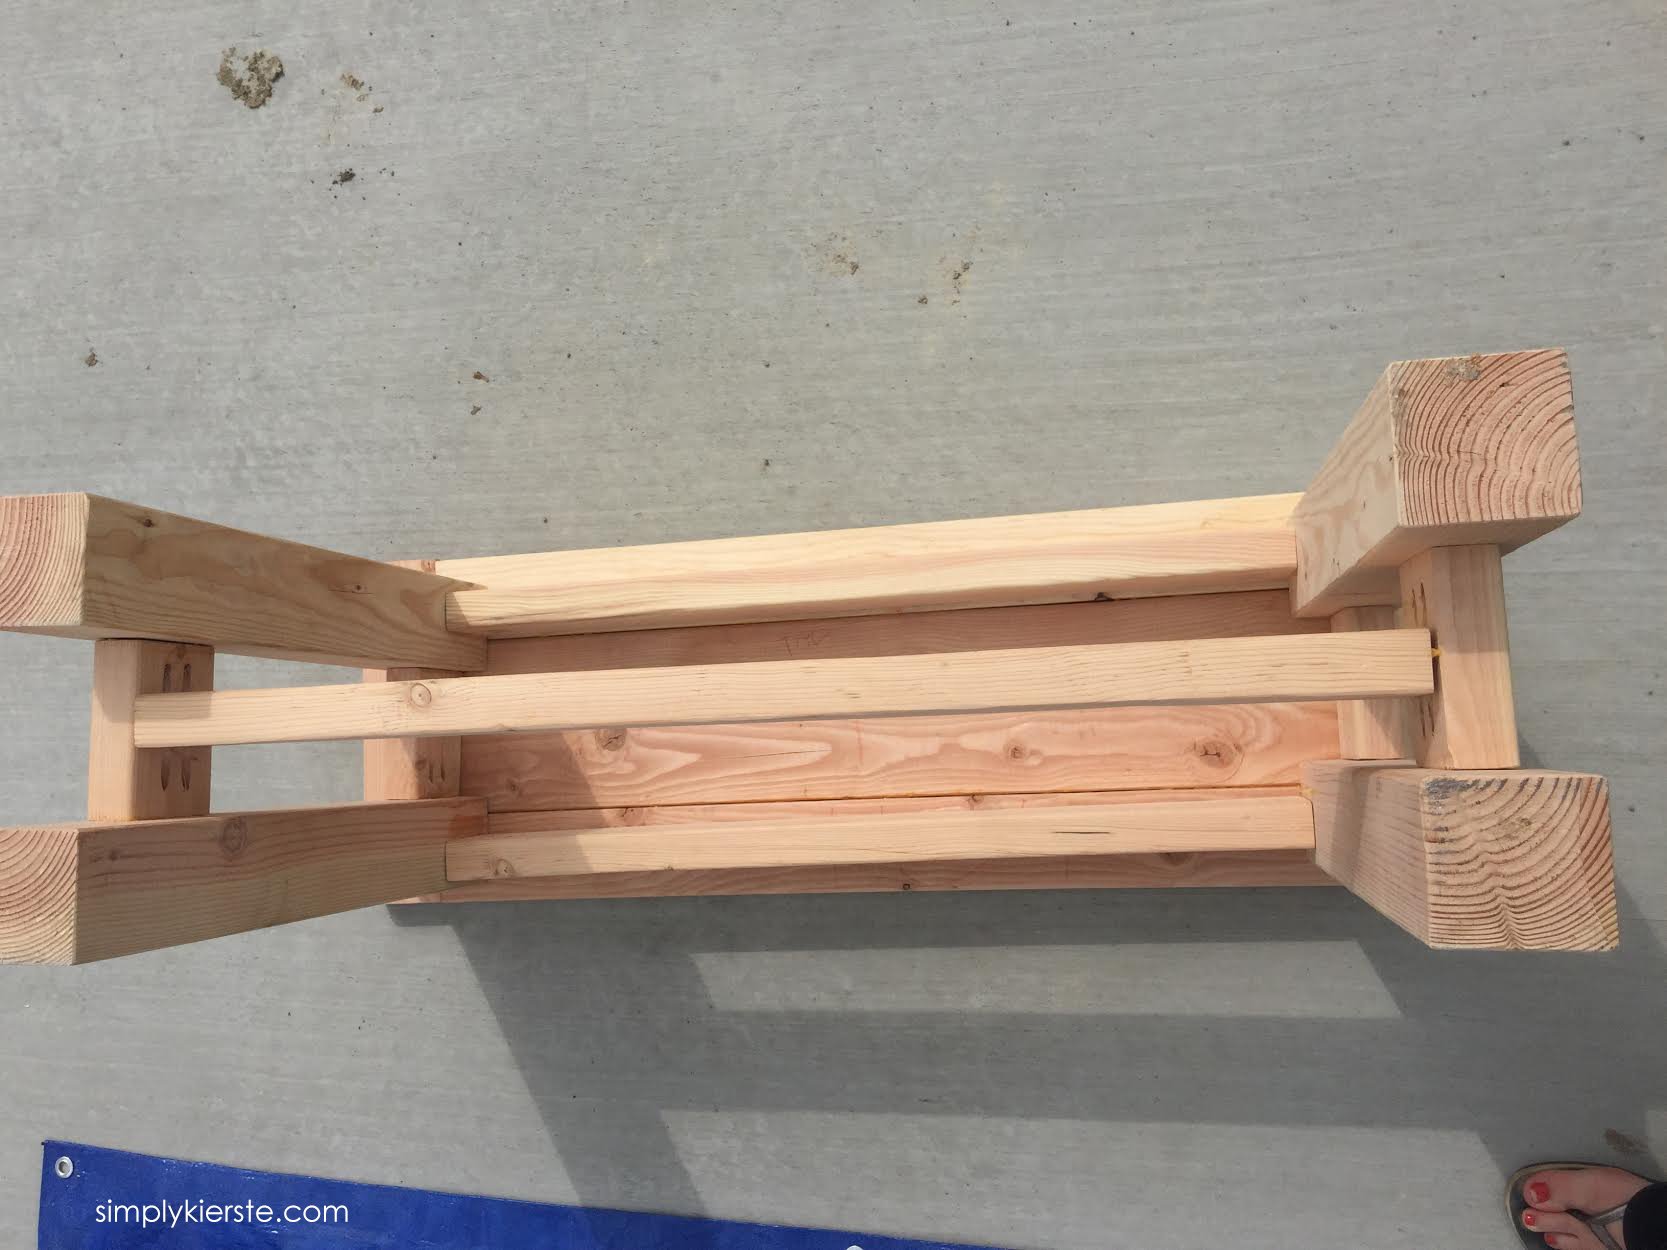
-Put the top together, then attach to the frame.

DIY Kitchen Benches | oldsaltfarm.com

Use a Kreg jig (Kreg Pocket Hole Jig System) to attach the pieces of wood to each other. If you don’t have one, get one. :)  Seriously, if you want to build anything from frames to furniture, it’s the best and easiest way to do it.  You can start out with one that’s only around $39 on Amazon, or check out your local hardware stores to see what their prices are.

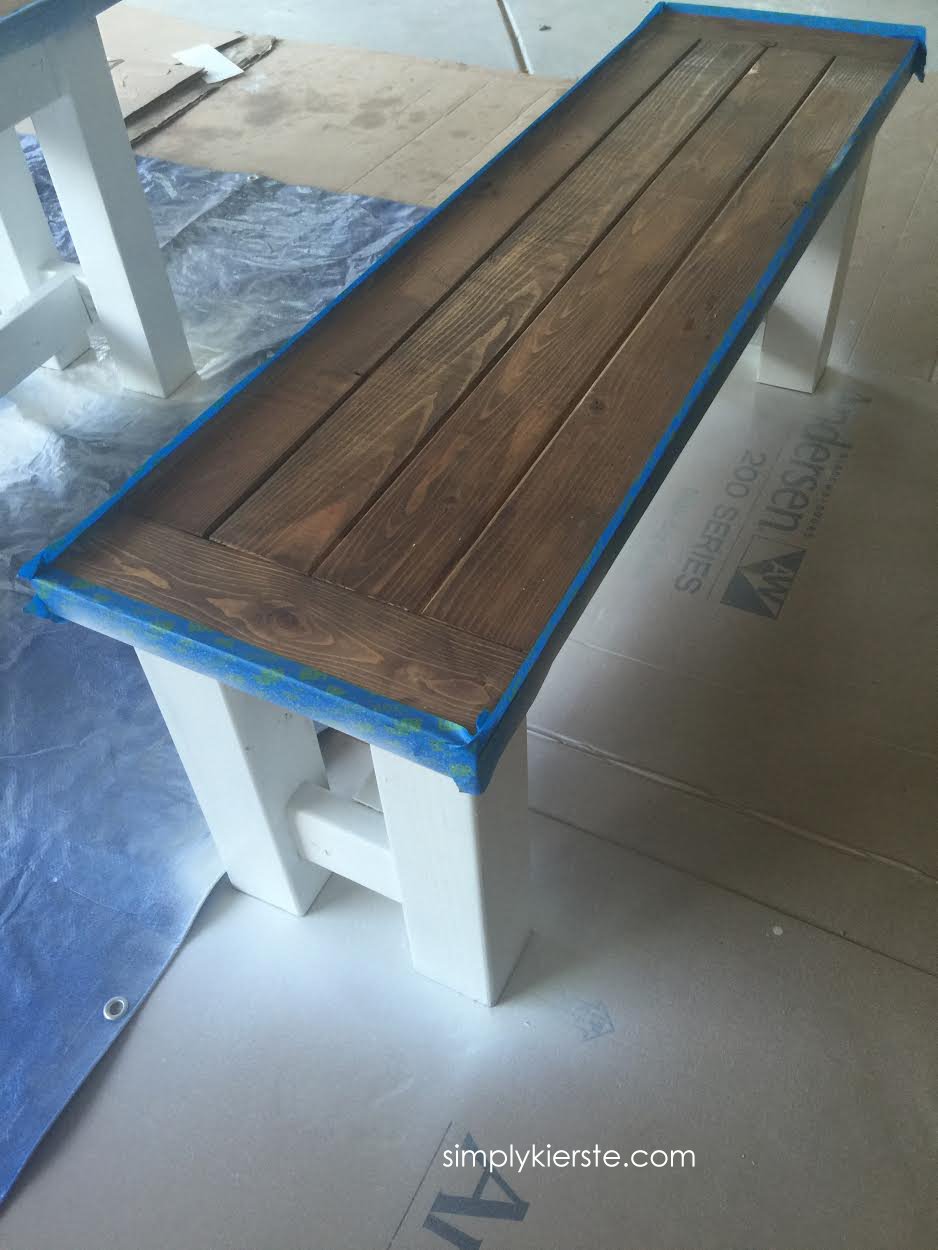
The top was attached using wood glue, and then nails for extra security. (thin nail head, but long enough to go through)

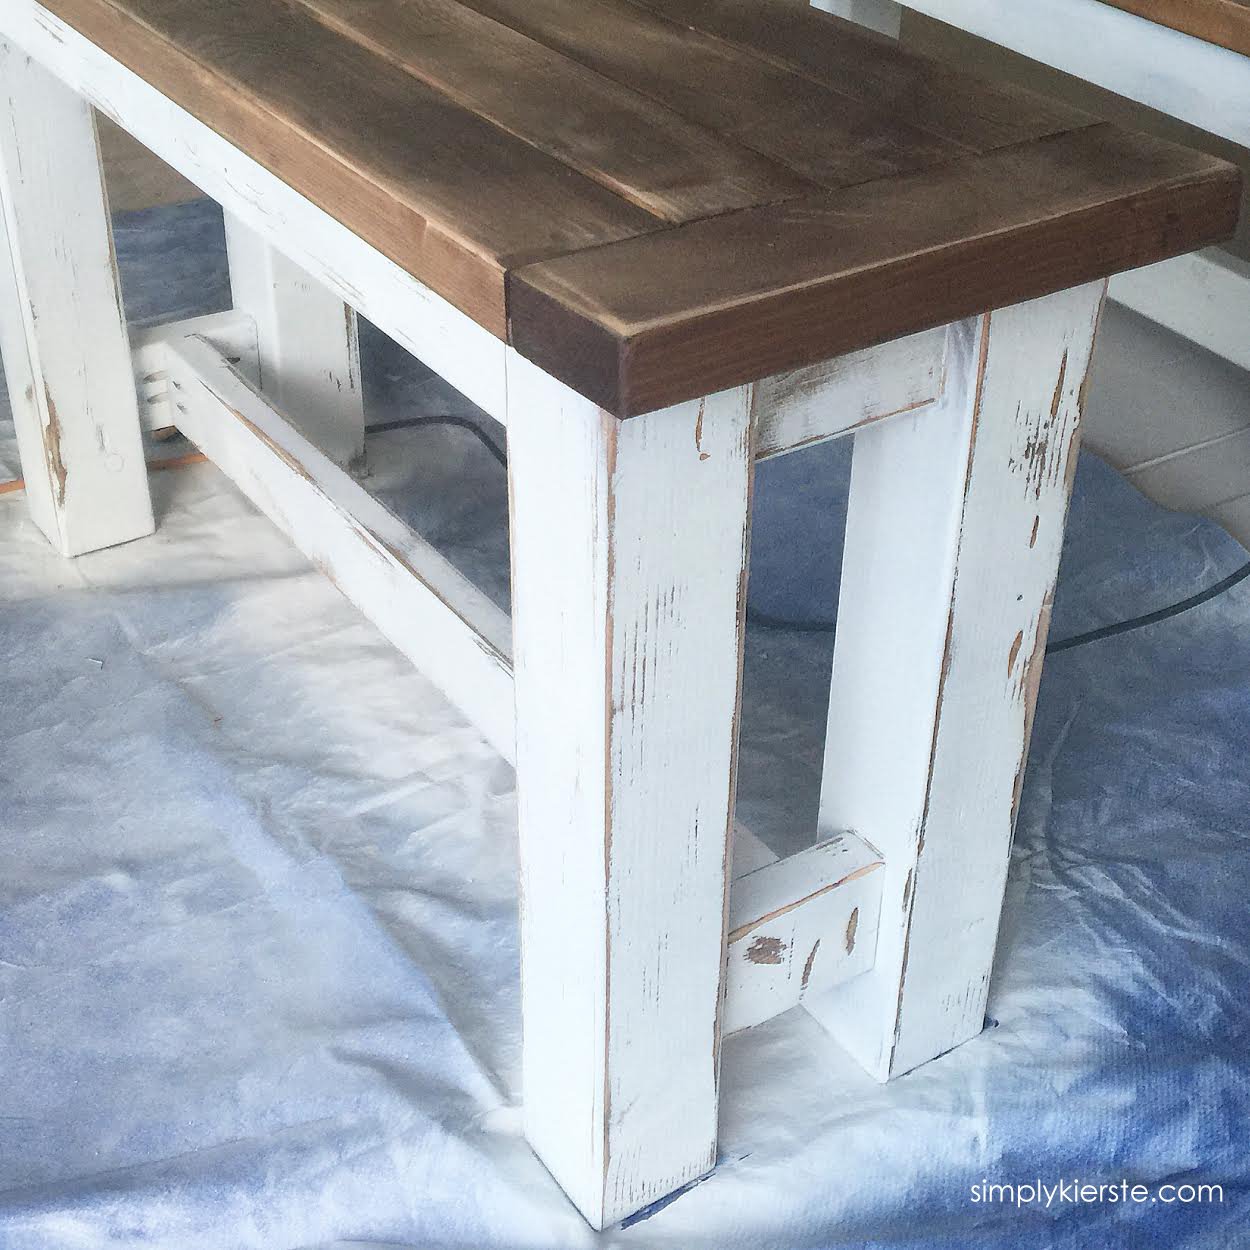
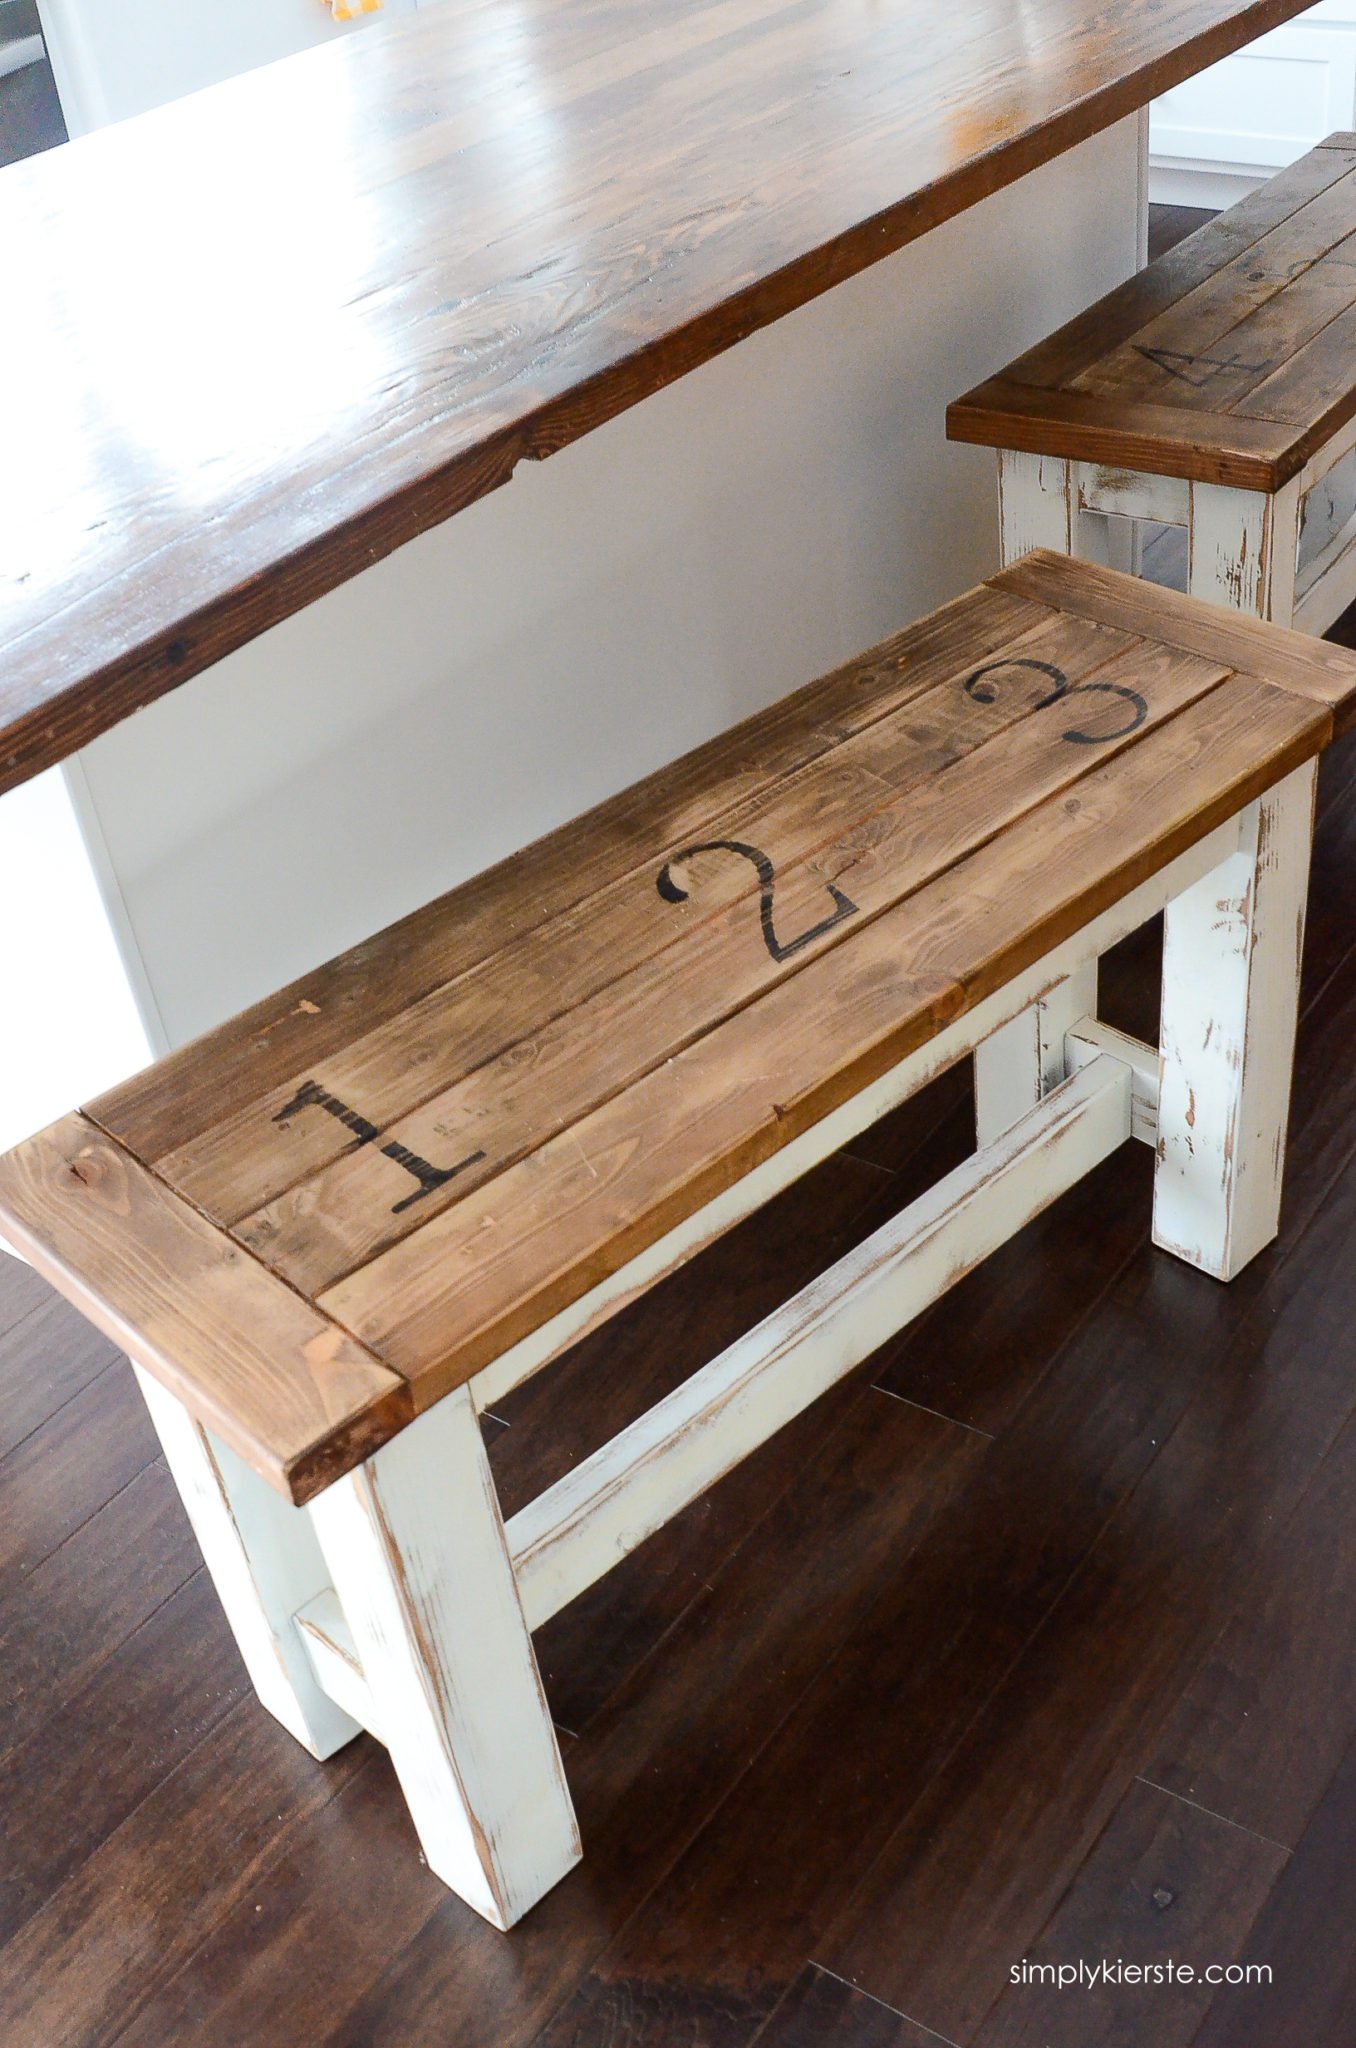
After the benches were built, I stained them (Provincial by Minwax), then taped off the top, and painted the legs and frame white. Once the paint was dry, I used a power sander to distress the legs and frame. The finally step was to stencil numbers on to the top of the benches—1, 2, 3 on one, and 4, 5, 6 on the other one.  ( I used my Silhouette to cut out numbers, and then black spray paint.) My kids each have a number that goes on just about everything, including their “spot” on the bench! I also sanded the numbers a little so they were more faded and distressed.

DIY Kitchen Benches | oldsaltfarm.com

DIY Kitchen Benches | oldsaltfarm.com

DIY Kitchen Benches | oldsaltfarm.com

And you’re finished!

DIY Kitchen Benches | oldsaltfarm.com

We absolutely LOVE them!  It’s been nearly four years since we built them, and they’re still going strong.  They’re perfect for my kids, and I love them in my kitchen. So glad we built them!

DIY Kitchen Benches

OTHER IDEAS YOU MIGHT LIKE:

  • DIY Faux Chalkboard Window
  • Vintage Style Shabby Chic Girl’s Bedroom
DIY Kitchen Benches

Share and save for later!

  • Share
  • Email

Filed Under: DIY, Farmhouse Style, For the Home, Furniture, Old Salt Farm, Paint & Stain Projects, Woodworking | 86 Comments

« Previous post
Next post »

Lovely comments

  1. Jaime Costiglio says

    Feb 13, 2017 at 5:47 am

    Super cute and I love that they can fit multiple kids. Have you considered simple baseboard trim around the island sides and back? It would finish it off so pretty. Thanks for sharing the plans.

    Reply
    • Simply Kierste Design Co. says

      Feb 15, 2017 at 12:42 pm

      Thank you, Jaime! And yes…it’s on our long list of to-do’s, lol. I’m actually considering shiplap as well. :)

      Reply
    • Andrew says

      Apr 17, 2017 at 8:33 am

      LOVE LOVE LOVE these benches!!!! Great job!

      Reply
      • Simply Kierste Design Co. says

        Apr 18, 2017 at 6:42 pm

        Thanks so much!! xoxo

        Reply
  2. Debbie says

    Feb 23, 2017 at 4:17 pm

    I love these benches and everything about your home ! The farm decor is something I love. I don’t know how you do it. What happens when you are sick ? Do you ever have me time ? I never quite knew what that actually meant though ? I am old school so maybe its just my age !! LOL You have so much talent……

    Reply
    • Simply Kierste Design Co. says

      Feb 24, 2017 at 2:52 pm

      Thank you so much, Debbie! I do have me time, thankfully! And actually, this is the kind of stuff that I love to do, it is my “me” time! :) The nice thing is, I fit it in when I can–around my kids and family and everything else! Have a great day! xoxo

      Reply
      • Liz Cheney says

        Nov 9, 2017 at 5:34 pm

        Hi there. Can you share the dimensions for the island? Love it! Thank you!

        Reply
        • Simply Kierste Design Co. says

          Nov 11, 2017 at 11:13 pm

          Sure! It’s 8 feet x a little over 3 feet–we went as wide as we could without having to brace it up. :)

          Reply
          • Liz Cheney says

            Nov 27, 2017 at 5:28 pm

            Thanks! How long is the overhang part that houses the benches underneath?
            Liz

            Reply
          • Rachel says

            Jul 25, 2018 at 12:24 pm

            I would love to know more about the island! Did you make this?!

            Reply
            • Simply Kierste Design Co. says

              Jul 25, 2018 at 2:25 pm

              We did make it! I don’t have a tutorial for it, but we basically found old barn wood that was about the same thickness could be cut to the same length–enough to be the island width and length plus some. We used a planer to smooth the wood–sanded it SO much, filled in the holes so they would be smooth, then stained and put a sealant on it. Rebar goes through the bottom side–I can send you pictures if you’re interested!

              Reply
  3. Erin Higgs says

    Mar 9, 2017 at 1:34 am

    Hi!
    I love these. I’m just getting ready to build a couple. I’m just curious on how you secured the top? Did you use nails or counter sink screws? Thank you!
    Erin

    Reply
    • Simply Kierste Design Co. says

      Mar 12, 2017 at 3:42 pm

      We actually wood glue and a few small nails through the top!

      Reply
      • Jason says

        May 22, 2017 at 12:00 pm

        I had this question as well. If possible, could you update your post with actual pictures showing where you connected the top (a picture showing the Kreg pocket holes would be great)?

        Reply
        • Simply Kierste Design Co. says

          Nov 11, 2017 at 11:59 pm

          Hi, Jason! I’m not sure if you still need these pictures or not, but I’m going to be updating this week!!

          Reply
        • Victor says

          Mar 21, 2018 at 9:28 pm

          Use pocket holes going from 2×4 to the seat in an upward direction. With a 1.5” Kreg screw set at a 1” pocket hole. Hope that helps!

          Reply
      • Deby Stagliano says

        Feb 12, 2018 at 12:12 pm

        I love these benches, too! Thank you so much for sharing. Another option for attaching the top would be pocket holes on the inside of the long pieces on the top of the frame and then screw into the top from underneath. I’m definitely going to make them!

        Reply
        • Simply Kierste Design Co. says

          Feb 13, 2018 at 12:25 pm

          You could do it that way too!! Thanks, Deby!

          Reply
  4. shannaMade says

    Mar 14, 2017 at 11:16 pm

    I love the benches as counter bar seating! Your kitchen is so cheerful I love it!

    Reply
    • Simply Kierste Design Co. says

      Mar 15, 2017 at 11:26 am

      Thank you so much! xo

      Reply
  5. Kandy Koehler says

    Mar 16, 2017 at 3:34 pm

    LOVE LOVE LOVE! Did you spray paint the legs?

    Reply
    • Simply Kierste Design Co. says

      Mar 19, 2017 at 11:54 am

      Thank you so much, Kandy! I did spray the legs, but with a paint sprayer, using latex paint. You could totally use spray paint though! xoxo

      Reply
  6. Elisha says

    Mar 21, 2017 at 2:20 pm

    I absolutely love these benches I am making a long one for my island and I was curious how you connected the 4 x 4’s to the top?

    Reply
    • Simply Kierste Design Co. says

      Mar 22, 2017 at 9:37 pm

      I must have forgotten to add that to the directions, I’m so sorry! We used wood glue and a few small nails through the top of the bench.

      Reply
      • Jeremy Wendling says

        Dec 17, 2017 at 7:07 pm

        Hi. Can you be very specific how exactly you joined the top with the frame? Somewhat new to woodworking and I can’t figure how or where you used the jig and glue to join them…

        Reply
        • Simply Kierste Design Co. says

          Dec 19, 2017 at 10:50 pm

          Hi, Jeremy!

          We didn’t use a jig to attach the top–only wood glue and nails with a small head for extra security–then puttied the nail holes. Hope that helps!

          Reply
  7. Kim says

    Mar 26, 2017 at 12:42 pm

    We are considering building something similar for our kids. We have a counter depth island with a 10 inch overhang, so need a narrow bench. My concern with the narrow bench is how sturdy or top-heavy are they? We have young children, so are worried in general about narrow benches or stools topping over. Love your design!

    Reply
    • Simply Kierste Design Co. says

      Mar 27, 2017 at 9:05 pm

      Ours are really sturdy. The legs are made out of 4×4 posts, so it’s a good, solid base. I have 5 kids that are aged 10 and under, so lots of littles at our house too–I totally understand! We’ve never had a problem with tipping or toppling over. I think it would depend on on how long you made them too.

      Reply
      • Debbie says

        Apr 10, 2017 at 11:20 pm

        I love them. They’re really beautiful & I love rustic country furniture. I toi build furniture & my bis night me a kreg jig a couple of Christmases ago. If this PNW weather would ever dry up I could get to building me some of these benches. You attached the bench top last, right? Thank you so much for the tutorial.

        Reply
  8. B LaMaster says

    Apr 28, 2017 at 10:50 am

    so so so cute, just wondering if you happen to know how tall your kitchen island is. I want to do something similiar to this and would love to copy your dimensions, but your island looks like it might be a tad taller than mine. Love reading your posts, keep up the inspiration girl!!!

    Reply
    • Simply Kierste Design Co. says

      May 1, 2017 at 2:46 pm

      Sure! They measure 36 inches from the floor to the top of the island. If it’s not an exact match, you could just adjust the height of the benches by however many inches it’s off by. Hope that helps! xoxo

      Reply
  9. Anat Zach says

    May 4, 2017 at 2:00 am

    Hi, I love it so much, please tell me how did you attach the top, I can’t see kreg’s holes at the bottom.
    Thanks, Anat

    Reply
    • Simply Kierste Design Co. says

      May 4, 2017 at 9:47 pm

      Hi, Anat! We actually used wood glue and a few small nails through the top of the bench.

      Reply
      • Anat Zach says

        May 5, 2017 at 9:01 am

        OK. Thanks so much (-:

        Reply
  10. Sam says

    May 5, 2017 at 1:31 pm

    I built my own coffee and end table out of pine wood, stained the top and base/leg edges with Briarsmoke by Varathane. I then used Zinsser oil based cover stain primer over the base and legs before painting 2 coats of Rustoleum White Linen chalk paint. I plan on distressing the edges so the stain will show through the white to make it pop and match the stain on the top. I’m now nervous the clear matte topcoat will yellow the white after much online reading, but I need a protective coat over the chalk paint and the edges where I sanded down to the stain. Any suggestions?

    Reply
    • Simply Kierste Design Co. says

      May 12, 2017 at 12:53 am

      Hi, Sam! I like to use a polycrylic vs. polyurethane when using white paint, because it is much less likely to yellow.

      Reply
      • Patsi says

        Nov 11, 2017 at 2:41 pm

        LOVE the benches! They’re absolutely gorgeous! One question: You said above that you don’t ever used oil-based stain? Does Minwax make the Provencial in water based? I couldn’t seem to find it. Thanks!

        Reply
        • Simply Kierste Design Co. says

          Nov 11, 2017 at 11:36 pm

          Thank you, Patsi! And I’m sorry–I mistyped when I wrote that answer! I think I was typing too fast, lol. I edited it so no one else will be led astray. :) I do use oil-based stain, and I did for this project. The gentleman that was asking the question was asking about a completely different project–not these benches–and something he had already stained and painted. So sorry!!

          Reply
  11. Kelly Anderson says

    May 15, 2017 at 3:08 pm

    Hi! Love this! I have the base made but how do you make the top (before attaching it to the base?)

    Reply
    • Simply Kierste Design Co. says

      May 17, 2017 at 10:50 am

      Hi, Kelly! The top is made of 2×4’s. It has four in the middle, with two on the sides, cut to length. We used wood glue and a Kreg jig to put them together, then attach to the base! Hope that helps!

      Reply
  12. Erica Hicks says

    Jun 12, 2017 at 5:47 pm

    Hi! I am wondering what setting you had your kreg jig on when you drilled the holes for the 5″ pieces. I have mine set at 1.5″since the boards are 2″ wide… and they are not close enough to the end of the board to put 4 holes in it…thx!

    Reply
    • Simply Kierste Design Co. says

      Jun 18, 2017 at 1:46 pm

      I’m not quite sure I know what you’re asking, but I’ll tell you that our rule of thumb is to adjust it so that the top of the drill bit pierces the edge of the board–so that will change each time you have a different size. Hope this helps! If it’s not what you’re asking, please let me know!

      Reply
  13. Karen says

    Jun 16, 2017 at 6:21 am

    I love your kitchen and thank you for this tutorial! Wondering where you got the board with 3 hooks on the side of the island?

    Reply
    • Simply Kierste Design Co. says

      Jun 18, 2017 at 1:31 pm

      It’s from Amazon, and I love it! Here’s the link…(affiliate) http://amzn.to/2rF7LlG

      Reply
  14. New to woodworking says

    Jun 16, 2017 at 3:53 pm

    These are great! Question about your island countertop actually. Did you make it? Are they simple 2×6 stock boards? Have you had any issues with it. Considering something similar but i am unsure about the type of wood, how i want to join them, attach to the base, and if it will turn out as nice as yours looks! :-)

    Reply
    • Simply Kierste Design Co. says

      Jun 18, 2017 at 1:50 pm

      Hello! Yes, we did make it. It’s actually made from reclaimed barn wood that we got from an old barn being torn down. We found pieces that were similar thicknesses to make it easier. We used a belt sander to get them super smooth, and Titebond wood glue to attach them together. We stained them, then used an awesome poly acrylic over that. It’s attached using cabinet screws. We LOVE it, and have had no issues, almost a year later. If you have any more specific questions, please let me know!! Good lucK!

      Reply
      • New to woodworking says

        Jun 19, 2017 at 11:37 pm

        Thank you! It looks really good! Do you mind sharing the specific poly acrylic you used?

        Reply
        • Simply Kierste Design Co. says

          Jun 20, 2017 at 10:13 pm

          Sure! This is it: http://www.rockler.com/general-finishes-exterior-450-water-based-varnish-satin

          We LOVE it!!

          Reply
  15. David says

    Jun 30, 2017 at 4:00 pm

    When you were connecting the 5″ 2x4s to the 4x4s, did you have enough room to use your drill? I noticed the 2x4s were lined up in the middle of the 4×4 and I know the pocket hole drill bit is usually long. I was wondering if I should put the 2×4 closer to the edge.

    Reply
    • Simply Kierste Design Co. says

      Jul 1, 2017 at 11:12 am

      Yes, it is a little tricky, but since we really wanted them to be inset, we just turned the jig at an angle, and made it work. It might not be the perfect hole (as compared to others), but you can’t see it, and it still worked! You could also move the 2×4 closer to the edge if you’d rather not mess with it. Either way will work!

      Reply
      • Anthony says

        Jun 30, 2020 at 6:57 pm

        When you say you turned the jig at an angle what exactly do you mean? Thanks for the plans, these benches are beautiful!!

        Reply
        • Old Salt Farm says

          Jul 11, 2020 at 4:09 pm

          Hello! I really want to answer your question, but i’m not sure what you’re referring to. Did this come from the post, or from a comment? Thanks so much!

          Reply
  16. Jessica says

    Jul 8, 2017 at 1:07 pm

    If you don’t mind me asking, what was the total cost in lumber for this project? They look amazing!

    Reply
    • Simply Kierste Design Co. says

      Jul 10, 2017 at 10:55 am

      I don’t mind at all! I’m honestly going to be approximating though, because we bought lumber for a bunch of projects all at the same time. I would say around $25 for each bench, plus or minus, depending on the cost of your lumber.

      Reply
  17. MKG says

    Aug 16, 2017 at 12:01 pm

    What size screws should I use? The ones that come with the jig?

    Reply
    • Simply Kierste Design Co. says

      Aug 17, 2017 at 6:47 pm

      We used 1 1/4 inch screws! Hope that helps. xoxo

      Reply
      • Jessica says

        Nov 8, 2017 at 7:31 am

        I love the benches and just made two of them! They are perfect for seating while we make our dining table! Thank you so much! I do have one question though… what font did you use for the numbers on the bench?

        Reply
        • Simply Kierste Design Co. says

          Nov 8, 2017 at 10:00 am

          Yay! So glad you made them and love them!! The font is called Adobe Ming Std.

          Reply
          • Jessica says

            Nov 10, 2017 at 8:44 pm

            Thank you Kierste!

            Reply
  18. Kim says

    Aug 17, 2017 at 11:18 pm

    Hi there! These look awesome! Just wondering what the height of the bench would be if I was to make them for a bar height counter (rather than counter height)? Thanks very much in advance!!

    Reply
    • Simply Kierste Design Co. says

      Nov 11, 2017 at 11:37 pm

      I’m not sure I know the difference between bar height and counter height! I’m sorry!!

      Reply
  19. alexi says

    Nov 20, 2017 at 3:18 pm

    Hi! I was wondering if you have DIY instructions on how you created your island? I love it!

    Reply
    • Simply Kierste Design Co. says

      Nov 20, 2017 at 9:52 pm

      Thank you, Alexi! Our island is one of my favorite things!! I haven’t done a tutorial yet for it, but if you have any questions, let me know, and I’ll be happy to answer them.

      Reply
  20. Tim says

    Dec 4, 2017 at 9:31 am

    Nice looking benches and thanks for sharing.

    Quick question:
    I’m looking to make these but, did I miss something in the instructions for the top?
    (4) 2X4 put together gives me a dimension of 14″.
    the posted dimension of 13.75″ for the sides would leave it short.
    Did you split the difference and offset the sides? Picture’s make it look like its almost flush.
    Or, remove some stock from the (4) 2×4’s?

    Reply
    • Simply Kierste Design Co. says

      Dec 5, 2017 at 10:49 am

      Hi, Tim! Because 2x4s can differ so much in actual width, 13.75 is the dimension that our 2x4s added up to be on their own.

      Reply
  21. Susan says

    Dec 17, 2017 at 12:24 pm

    Do you have a tutorial for your kitchen island? I love it and are just in the beginning stages of building and i want an island just like this

    Reply
    • Simply Kierste Design Co. says

      Dec 19, 2017 at 10:52 pm

      Hi, Susan! I don’t have a tutorial on my blog, but I can write up some basic instructions if you are interested!! Just let me know–

      Reply
      • Rachel says

        Jul 25, 2018 at 12:26 pm

        I am!

        Reply
        • Dave says

          Mar 20, 2019 at 5:22 pm

          Me too!

          Reply
  22. Rachel says

    Dec 28, 2017 at 4:05 pm

    Hello!! I’ve had one of these photos saved for inspiration for a kitchen reno we are about to start!! I have been SEARCHING for a similar pendant light and am wondering if you have ANY idea where you purchased it from?

    Thanks in advance!!

    Reply
    • Simply Kierste Design Co. says

      Dec 29, 2017 at 11:30 am

      Sure! I purchased it on amazon (not sure if it’s still available), but World Market also has a similar one too! https://www.worldmarket.com/product/four-sided+glass+hanging+pendant+lantern.do?sortby=ourPicks&from=Search

      Reply
  23. Tricia Barnabe says

    Jan 10, 2018 at 9:45 am

    Love the look, where did you get the hooks on the side of the counter ?

    Reply
    • Simply Kierste Design Co. says

      Jan 10, 2018 at 9:56 am

      Thanks, Tricia! Here’s the link to the hooks: (affiliate) http://amzn.to/2qMiVVH

      Reply
  24. Sean McAlum says

    Jan 16, 2018 at 11:23 pm

    Can you tell me where to get untreated 4×4’s?? I cannot find any anywhere!! Thank you for your time.

    Reply
    • Simply Kierste Design Co. says

      Jan 19, 2018 at 12:01 pm

      They can be tricky to find sometimes–it really depends on your lumber stores. There have been times I couldn’t find them either. I can usually get them at Home Depot–but it can vary by location. Good luck!!

      Reply
  25. Denise Masters says

    May 30, 2018 at 5:32 am

    I love your space! Can you tell me what you use under the legs to protect your floor?

    Reply
    • Simply Kierste Design Co. says

      May 31, 2018 at 11:08 am

      Sure! I use little round felt circles with sticky backs–they protect the floor when the benches are moved. I found them at Home Depot!

      Reply
  26. Laura says

    Feb 24, 2019 at 9:34 pm

    Love your kitchen!!! Do you remember what color your cabinets are painted? And what kind of countertops do you have?

    Reply
    • Simply Kierste Design Co. says

      Feb 24, 2019 at 9:45 pm

      Hi, Laura! The cabinets came white…they’re by Kraftmaid. The countertops are quartz–they’re white/gray like marble. The name of it is Neve by Zodiaq!!

      Reply
  27. Stacie Valdivia says

    Feb 10, 2020 at 2:23 pm

    Can you give me the measurements of the top? I want this to be one solid piece of wood.. please

    Reply
    • Old Salt Farm says

      Apr 30, 2020 at 10:44 pm

      It’s 14 inches wide!

      Reply
  28. Candi Campbell says

    May 23, 2020 at 5:06 pm

    We are making a dining table and benches similar to your design, the table top has a few knot holes and although we have sanded a ton, there are still a few holes. I have read conflicting views on stainable wood filler and don’t want to ruin the table with patchy spots. I plan to stain with Minwax and then use a wipe on poly after. Will the poly “fill” the holes or is there a dependable product to use before we stain?
    Thank you
    Candi

    Reply
    • Old Salt Farm says

      May 28, 2020 at 10:09 pm

      Hi, Candi!

      I’ve never see a stainable wood filler that looks like wood–it’s not made. Even though it’s stainable, that just means it will absorb the stain, not look like wood. If you use a a wood filler, there will be patchy spots. How big are the holes? Do you want the holes? Or are you concerned about protection?

      Reply

Trackbacks

  1. Feed Your Inner Designer with 20 Kitchen Barstool Ideas says:
    Mar 18, 2017 at 1:11 pm

    […] today. Just because it’s a kitchen barstool doesn’t mean it can’t be a bench! These wide rectangular kitchen benches are super-practical since they can be pushed flush with the cabinet under the kitchen counter […]

    Reply
  2. 100 Best Farmhouse Kitchen DIY Ideas - Prudent Penny Pincher says:
    Feb 2, 2018 at 8:17 am

    […] DIY Kitchen Benches wood posts & boards + saw + stain + painter’s tape + white paint + sander + sandpaper […]

    Reply
  3. 11 DIY Farmhouse Kitchen Decor Ideas For Your Fixer Upper Home says:
    Jun 11, 2018 at 3:39 pm

    […] Source: Simply Kierste […]

    Reply

Leave a Reply Cancel reply

Your email address will not be published. Required fields are marked *

Recipe Rating


This site uses Akismet to reduce spam. Learn how your comment data is processed.

search

COPYRIGHT POLICY

The images, tutorials, and content on oldsaltfarm.com are protected by copyright laws. DO NOT distribute or copy the content without written permission. You may not use any images without permission. DO NOT edit or remove watermarks from any image. Pictures are not to be changed or altered in any way, shape or form without my consent. Please do not copy text or reprint recipes without my permission. All ideas and printables are for your personal use only. By downloading any files or printables, you accept that they are FOR PERSONAL USE ONLY. My patterns, ideas and tutorials are NOT intended for resale or re-distribution.

Interested in sharing one of my photos or projects? Fill out my Old Salt Farm Feature Agreement.

Please contact me with any questions. oldsaltfarm@gmail.com

© Old Salt Farm (Kierste Wade)

CREATE AT YOUR OWN RISK

Any and all content on this website is created for inspiration purposes only. Creating with my suggested methods, products, instructions, tutorials, and tools is at your own risk. Please ensure you are following proper guidelines with anything used, and seek professional advice if you don’t know how to do something.

Old Salt Farm is for entertainment purposes only. All tutorials and demonstrations are not intended to be professional advice, nor substitute as such, and I make no guarantees as to the procedures and information here.

Read my full disclosure here.

AMAZON DISCLOSURE

Kierste Wade (Old Salt Farm) is a participant in the Amazon Services LLC Associates Program, an affiliate advertising program designed to provide a means for sites to earn advertising fees by advertising and linking to amazon.com. Amazon offers a small commission on products sold through their affiliate links. When you make a purchase after clicking on one of those links, I earn a small commission that helps support this blog, at no extra cost to you. Read my full disclosure here.
Copyright © 2021 Old Salt Farm, Custom site by Moonsteam Design.

Cookies

This website requires the use cookies. By using this site, you are agreeing to our Privacy Policy.