Vintage Style DIY First Aid Sign
A vintage style DIY First Aid Sign that’s easy to make and perfect for vintage and farmhouse decor.
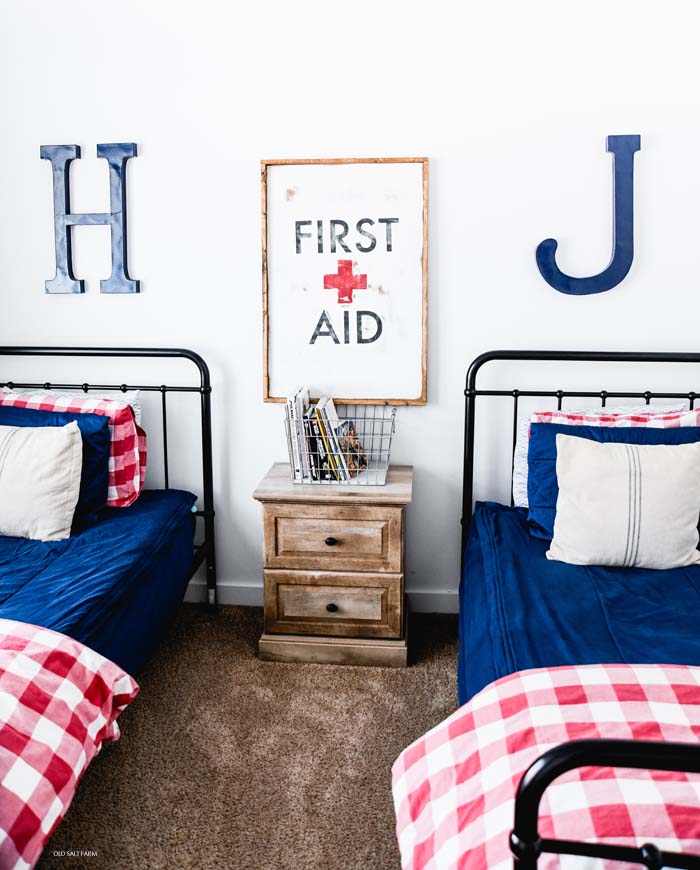
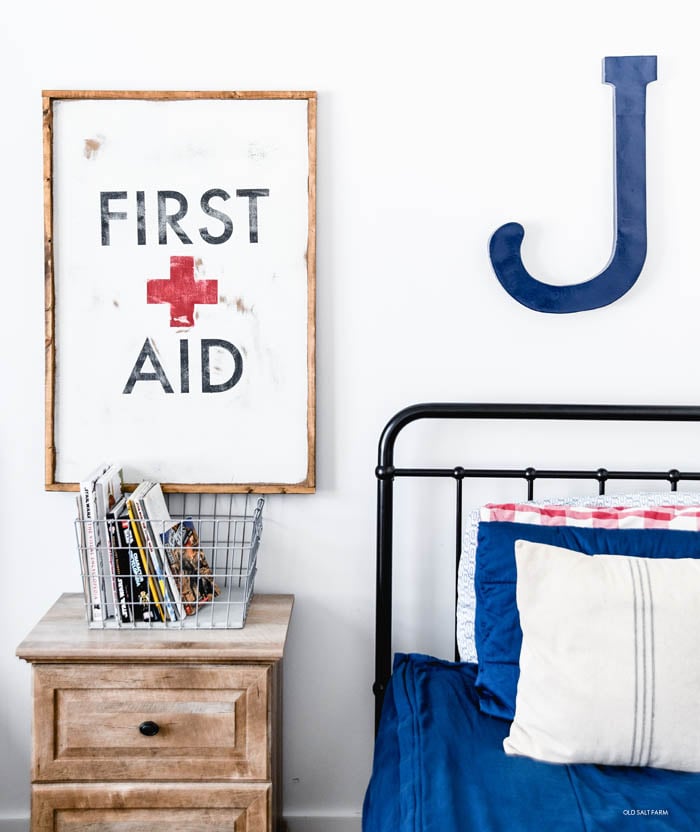
Over the past few years I’ve seen some really cute First Aid Signs, and filed the idea away for future use. When I re-did my twin boys’ room in a vintage style and red accents, I knew it was the perfect time to make one.
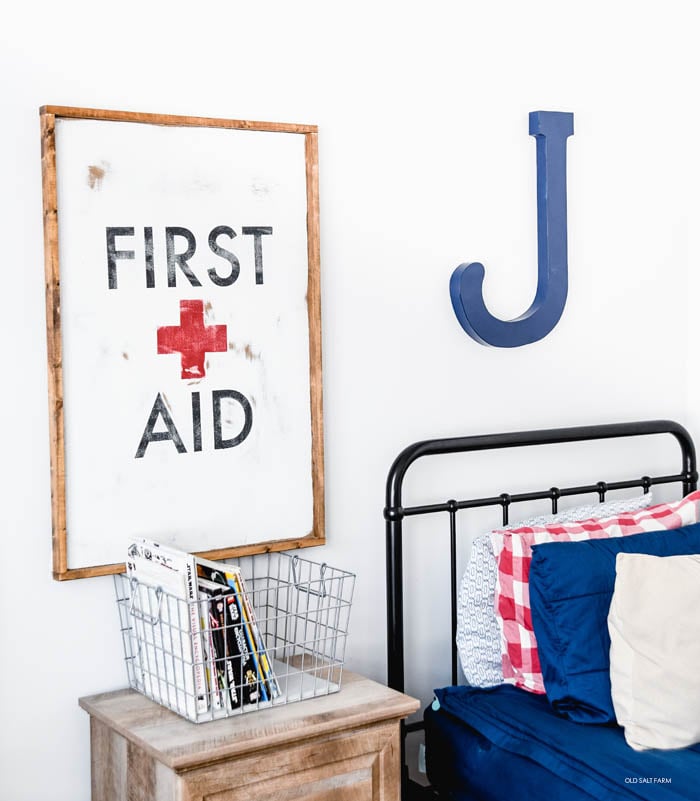
I LOVE how it turned out. Because it’s such a simple design with few letters, it really is so easy to make and customize. I wanted mine to be very large to fill this blank wall, but you can make yours whatever size you like to fit your space.
I used my Silhouette Cameo (LOVE the new Cameo 4!) and then cut out the text and design. I’ve made many signs using my Cameo, and it’s one of my favorite ways to create farmhouse decor that I love on a budget. With just this one large sign, I’ve already paid for the machine! (As opposed to purchasing the sign.)
This sign is so versatile, and would be perfect in a bedroom, playroom, bathroom, or any room, really! Here’s how you can make one too:
DIY FIRST AID SIGN

I’m really kicking myself, because I’ve accidentally deleted most of my process photos. Thankfully I’ve got other wood sign tutorials, and the process is exactly the same. I’ll link to them below.
TUTORIAL #1: This is the Farmhouse sign in my kitchen…details out how to frame the wood sign.
TUTORIAL #2: Farm Fresh Christmas Trees Sign…gives additional/different details.
SUPPLIES:
- MDF, cut to desired size (mine is 2 feet x 3 feet)
- furring strips
- stain
- white paint
- black paint
- red paint
- cut file (download below)
DIRECTIONS:
Step 1: Cut out MDF to size. You can maneuver the cut file to whatever size you need, so this is really customizable.
Step 2: Paint MDF white, let dry completely.
Step 3. Cut furring strips to size, stain, and let dry completely.
Step 4. Cut out vinyl stencil. (Make any desired size changes first.) I prefer to use the vinyl as a stencil, rather than applying the vinyl straight to the wood. It lasts longer this way, and gives you a much more authentic and vintage feel. I can also sand it a bunch to make it even more distressed! I also like to use a different color vinyl than the paint I’m using if possible—just so it makes it easier to see the outline of the stencil when I’m painting. If all I have on hand is black or white, then I’ll use it–but a brighter color (which is what I used this time) makes it a little easier.
Step 5: Apply transfer tape to the negative space of the design (when using as a stencil), and then the stencil on to your painted board. I like to map out where the stencil is going before application–using a pencil to mark just the right spot. I kept all the design elements separate, which is very easy to do with this design. This way I could move the pieces around and decide on spacing right before painting. I also had to keep them separate because my sign was so large, and the text wouldn’t fit on my machine as applied.
Step 6: Once your stencil is in place, and all the edges have been pressed firmly in place, you can paint. Let dry completely
Step 7: Once the paint is dry, use a power sander to distress as much as you like. I did a lot for this sign, which I love!
Step 8: Add the furring strips along the edges of the sign.
DOWNLOAD SILHOUETTE CUT FILE
Isn’t it the cutest? I love love what it adds to the entire space. The Silhouette Cameo really has changed my ability to decorate my home–the create things that I love and a space that is ours.