How to Make a Giant DIY Chalkboard
Make this easy giant DIY chalkboard in an afternoon! (Or any size you like.) It’s simple farmhouse style, works with many other home styles, and perfect for a playroom, office, family room…or anywhere in your home. You’ll love how easy this project is, and it’s perfect for beginners.
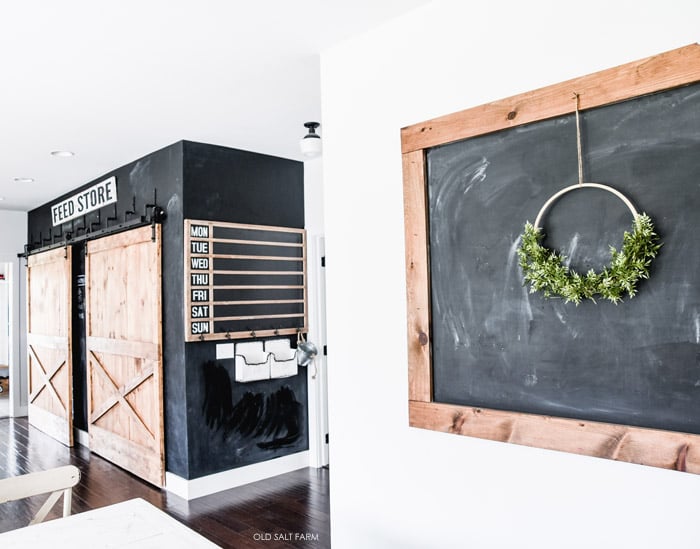
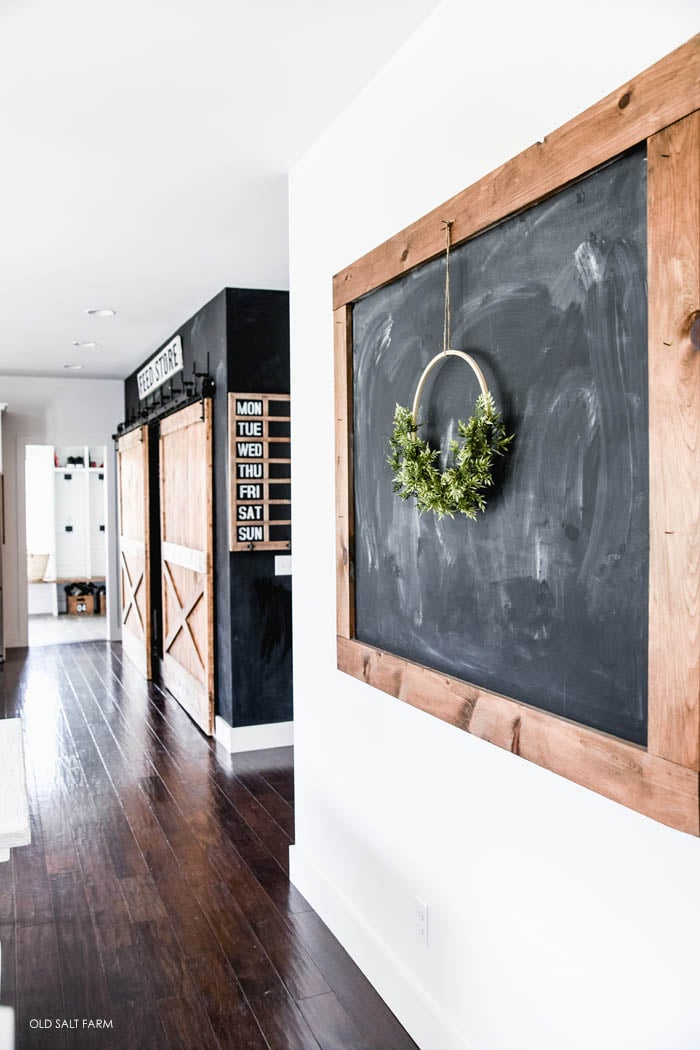
While we were building Old Salt Farm, in addition to a chalkboard wall in the kitchen, I knew I wanted to make a giant chalkboard for a large wall in our dining room. I’ve always loved them–not only because they’re super cute, classic, and the epitome of farmhouse style, but because they’re so versatile! Since then, I’ve made several more, and each one has added so much to the whole space they’re in.
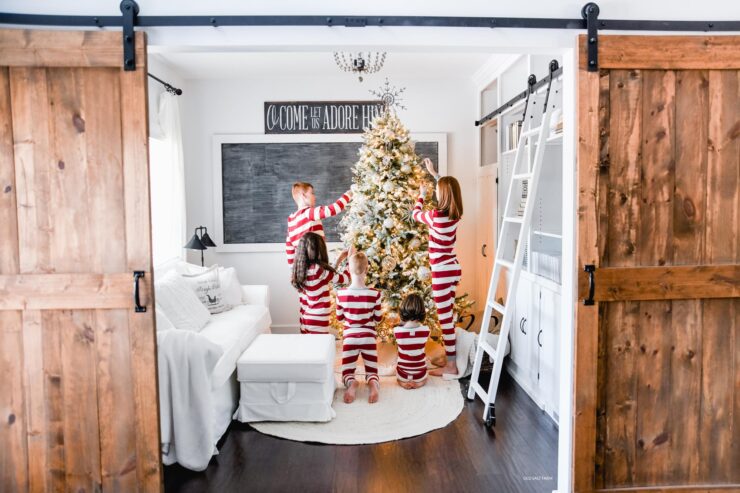
There are so many options for utilizing a big chalkboard. On the dining room chalkboard, I’ve hung several different wreaths, and strung twine to hang Christmas cards and paper sacks for a countdown. I’ve written messages and quotes on it, and left it plain. It’s where our birthday banners go, and any other celebratory, seasonal, or holiday banners. I put little nails on each side of the frame so it would be easy to take them off and on.
I love having so many options. It’s also pretty inexpensive to make, considering it can cover a huge space! Ours is 4×6, and we spent less than $40 to make it. You just can’t beat that price for a large piece of farmhouse decor. It’s an inexpensive project that’s both functional and adds a ton of style.
Table of contents
It’s seriously one of my favorite things, and I just finished another one that’s 8 feet x 4 feet for our library. I painted the frame on that one white, and it’s so so cute. Two different farmhouse looks, and I love them both!
If you have been thinking about making one…do it! They’re perfect for that large wall you want to fill: on a mantel, over a bed, in the office or playroom, on a craft room wall, in a long hallway, or a kids’ art room or school room.
You don’t have to make it a giant size–it’s super easy to customize for whatever space you need or want it in. For example, a chalkboard is super cute for writing down your dinner menu, and you can make one to fit a kitchen wall. Or what about outside on a back porch, for your kids to draw on outside? You could even create a permanent calendar once your chalkboard is built.

Affiliate links included below for your convenience. Find my full disclosure policy here.
Supplies
- 1/4 in. birch plywood
- 1×6 pine boards
- Stain (I like Minwax Dark Walnut)
- Wood glue (this is my favorite brand!)
- Nail gun and 3/4 inch nails (or hammer and nails)
- Foam brushes
- Lint-free rag
Directions
I’m so sad I don’t have any pictures of the process for you! I made this in the week or so before we moved, and it was pure chaos. I know I took some, or at least I think I did…lol. It really is an easy project and very straightforward, and I’ll spell everything out in the directions below. Just let me know if you have any questions!
We used 1/4 inch birch plywood for a couple of reasons. First of all, it’s lightweight, and since I was going to hang it on the all, and because it was going to be quite large, I wanted to reduce the weight. Secondly, I was able to purchase it in a 4×8 sheet, which is the largest I could find at my local Home Depot. (You can check your local hardware store as well, if they carry lumber.) It was around $25, which for that size is a great price. The plywood comes 8 feet wide. For the dining room chalkboard I needed it to be 6 feet, so we cut it down to size–which is 4×6. The library chalkboard is the full plywood size, so we didn’t have to cut it down at all. That made it even easier!
On these massive chalkboards, I prefer using a pine board for the 6 inch width frame. But you can also use 4-inch furring strips, which are less expensive.
I painted the whole board with three coats of the chalkboard paint using a foam brush, letting each coat dry before adding the next. I didn’t find it necessary to do any coats of a dark paint first–the chalkboard paint worked great all on its own.
For the 4×6 chalkboard: While the paint was drying, we cut the frame to size. The frame sits right on top of the plywood, and our 4×6 board was going to sit with the long side horizontally, so we cut 2-six foot pieces for the bottom, and 2 pieces that for the sides that were 37 inches long. How did we get 37?
The top and bottom boards cover a portion of the sides. They are 5.5 inches in width, and 5.5 x 2 = 11. We subtracted 11 inches from 48, to get 37. Here’s a diagram that shows how it works–it uses different dimensions, but it’s a visual that explains how it works:

For any other size, just change the measurements accordingly.
Once the boards were cut, I stained them with Minwax Dark Walnut. It’s a darker stain, a classic color, with no red tones. It’s my favorite, and I use it often. Once the stain is dry completely, use a lint-free rag for best results, or a clean paintbrush. The other alternative is to paint the frame. I painted the library chalkboard frame white, and it’s the perfect contrast against the blackboard.
We attached the boards to the chalkboard frame first with wood glue, and then with 3/4 inch nails. We used a nail gun, but you could also use a hammer!
IMPORTANT: The last step was to season the chalkboard to avoid any “ghosting”. That means if you write on it without preparing it, you will never be able to fully erase it–a faint image will remain there forever. Seasoning it takes just a few minutes–use the side of a piece of chalk to completely chalk over the entire board, first vertically, then horizontally. Wipe it all off with a lint-free clean rag, and remove the excess dust. That’s it! You’re ready to hang your chalkboard!
Variation
Instead of black chalkboard paint, use green chalkboard paint instead! It gives you that old-fashioned schoolhouse vibe, which I love. That’s next on my list! You can also wipe down your board with a dry rag, instead of a wet rag. That leaves a bit of that chalky residue, which lends itself more to vintage feel.
FAQ
Yes–just alter the measurements as needed. It’s easiest if you keep one of the sides at 4 feet, so you have less cutting, but it’s still very doable.
Yes, I’ve done both. Whichever is your preference!
More DIY projects
Thanks so much for stopping by! Follow me on Instagram and Facebook, and sign up for my newsletter for even more ideas and inspiration. I’d love to see you there!
XX, Kierste