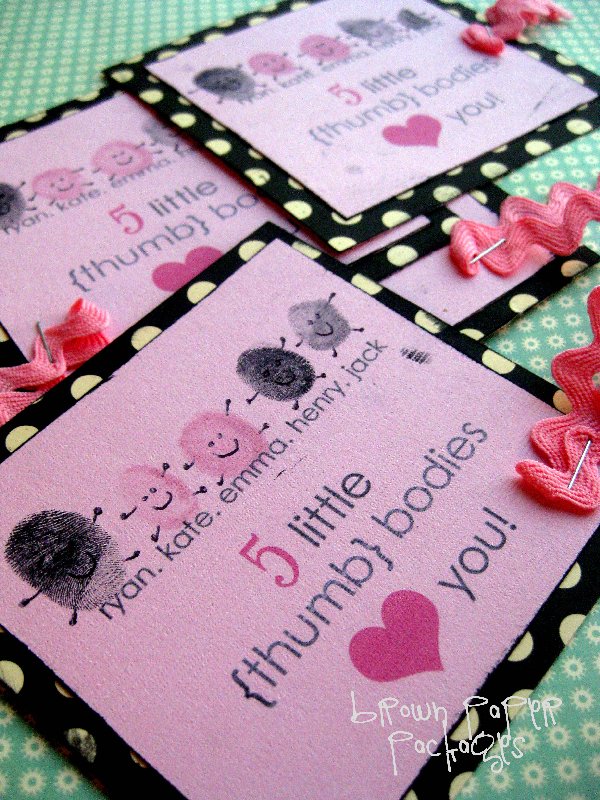
“Thumbody” loves you: thumbprint valentines

I love homemade valentines, especially when they’re easy to do and allow for kids to help—and personalizing for the person that will be receiving them. These darling thumbprint valentines are SUPER cute, and are sure to get rave reviews from any recipient!

(2015)

Thumbprint valentine | oldsaltfarm.com

I originally made these in 2011 (original below), but since having another baby, wanted to update it with another cute fingerprint!  (above)

thumbprint valentines | oldsaltfarm.com

You can use just one thumbprint that’s perfect for friends, neighbors, teachers, and visiting teachers, especially attached to a fun treat–in a bag, box, or wrapped around a bar of chocolate or other candy.

You can always change the wording for school valentines…{thumb} body likes you, or {thumb} body wants to be your valentine–or anything you like!

I made a few special ones for grandparents and family, using all my kids’ thumbprints, and I LOVE them!

 Thumbprint valentine | oldsaltfarm.com

SUPPLIES:

-white cardstock

-printer

-black ink pad

-black pen

-scrapbook paper or colored card stock

-double stick tape


DIRECTIONS:

1.  Download and print the printable valentine on to white card stock.  (Located at the end of the post.)

2.  Cut it to the size you want and need it to be.  You can keep it large, cut it small–whatever works for you!

3.  Take note of where you want the fingerprints to be in order to have them centered on the paper. Carefully press your child’s finger onto the ink pad, then on to the paper.  Wash those cute hands!  I keep baby wipes close by–they work really well.

4.  Use the black pen to make eyes, arms, and legs on each fingerprint.  I also used black Distress Ink to distress the edges of the paper, but that’s optional.

5.  Mat the valentine onto scrapbook paper or colored card stock, using double stick tape or other paper adhesive that’s intended for paper crafting.

***COPYRIGHT SIMPLYKIERSTE.COM.  FOR PERSONAL USE ONLY.  NOT INTENDED FOR RESALE OR DISTRIBUTION.

DOWNLOAD:

Pink & Gray

All Gray

If you would like the original text image, click HERE to download!

DIRECTIONS FOR SCALL:

I used my Silhouette to cut out scalloped and regular circles in different sizes, then distressed all the edges. You certainly can do this without one–scallop and circle punches work great, and so does tracing a glass on card stock and cutting it out! You can even opt for a regular card style, or square pieces of paper just using your paper trimmer. Lots of options, depending on what you like! The kids’ card is a 4 inch square piece of scrapbook paper, with a 3 inch square piece of card stock on top. Using double stick tape, I attached the layers to each other, then punched a hole at the top and tied ribbon through it!

Share and save for later!

34 Comments

  1. Awww, those are adorable kierste! I wish I had little ones to make them with. Ya think my 17 yr old daughter would do it? Have a great weekend.

  2. This is so cute, I LOVE this idea!!! Can't wait to have my little boys make these for their grandparents!

  3. Adorable! I'm sure my parents' and grandparents' would love to get these in the mail from my boys!

  4. The faded printer ink gives them the illusion of being stamped instead of printed. I love them!

  5. These are so cute I think I will have my kindergarten class make these for the elderly. :) Thanks for sharing.

  6. The hearts…?! Were those printed too? Or were those stamped? Where do you get a heart in your processing/fonts? Thanks. Want to make these as a craft at my daughters party.

  7. Amanda–

    Everything was printed! I actually did the text in Photoshop, so the heart came from there, but there is also a heart in Microsoft Word, under symbols. I also just attached a pdf file of the image for download, as well as the image file, so you can just use mine if it saves time!

  8. Those are ADORABLE!!!!!! They will be on our list for next year for sure. Thanks for sharing!

  9. Just blogging around this afternoon and found your blog. I used to have a sewing machine just like the one in your picture. But when my ex-husband and I got divorced, I let him have it back since it was his before we got divorced. Thanks for letting me visit.
    http://amazingcouponanddiscountdeals.blogspot.com
    http://susan-livinghealthywithchallenges.blogspo.com

  10. How adorable! I've already got my 6 little ones sitting at the kitchen table with their thumbs at the ready! ;) It's such a simple idea that I'm even going to do it with my preschool classes for their parents…I think they'll all love it!
    –K. Cosgrove

  11. Great idea! If i don't use this for Valentine's day, I'll use it for Mother's Day cards or something!

  12. This is such a darling idea…I will just have to try it! I love your blog!

    www.alove2create.blogspot.com

  13. That is so great! I love these! I made some Valentine's that are great for teachers! Check them out here….

    http://whattheteacherwants.blogspot.com/2011/01/valentine-for-my-valentine.html

    -Rachelle
    www.whattheteacherwants.blogspot.com

  14. Perfect idea for visiting teaching! Thanks for mentioning that because it didn't even cross my mind!!

  15. Thank you so much for the great project! I just completed a few, and put a pic on my new blog!! I put a link to this fabulous tutorial!! Thanks!

    Here is a link to the pic of my try at it:
    http://jpslittleblog.blogspot.com

  16. This is great! As a new blogger, I LOVE your blog…and am learning so much from you! Thank you! :)

  17. Thank you!! I just printed them and am eagerly awaiting the kiddos to wake up from naptime so I can finish these! I don't normally anticipate them waking from naps, but today I am!!

  18. I was looking for something to do with my kids today, typed THUMB PRINT VALENTINES into my search engine, and up you popped! These are great! I've been here before, and I'll definitely be back again!

  19. Done (at 9PM last night!)
    http://onthebanksofsquawcreek.blogspot.com/2011/02/thumb-love.html

  20. Everyone who received our "Thumb" Valentine's LOVED them. Thanks so much for the idea!! I look forward to reading your blog everyday!

  21. I posted about your cute idea! Thanks for sharing! I love following your blog.

    Britli
    bits-of-this-and-that.blogspot.com

Comments are closed.