Picture ABC Books
One of my absolute favorite things to make for my kids is Picture ABC Books. I make them each their very own book, and it is most definitely a treasured possession. In their book, each letter of the alphabet is represented by a picture of them or someone in our family, so it’s not a only a great way to reinforce the ABC’s, but also an adorable little mini memory book. This month is my twin boys’ birthday, and it’s their turn for this very special gift!
![]()
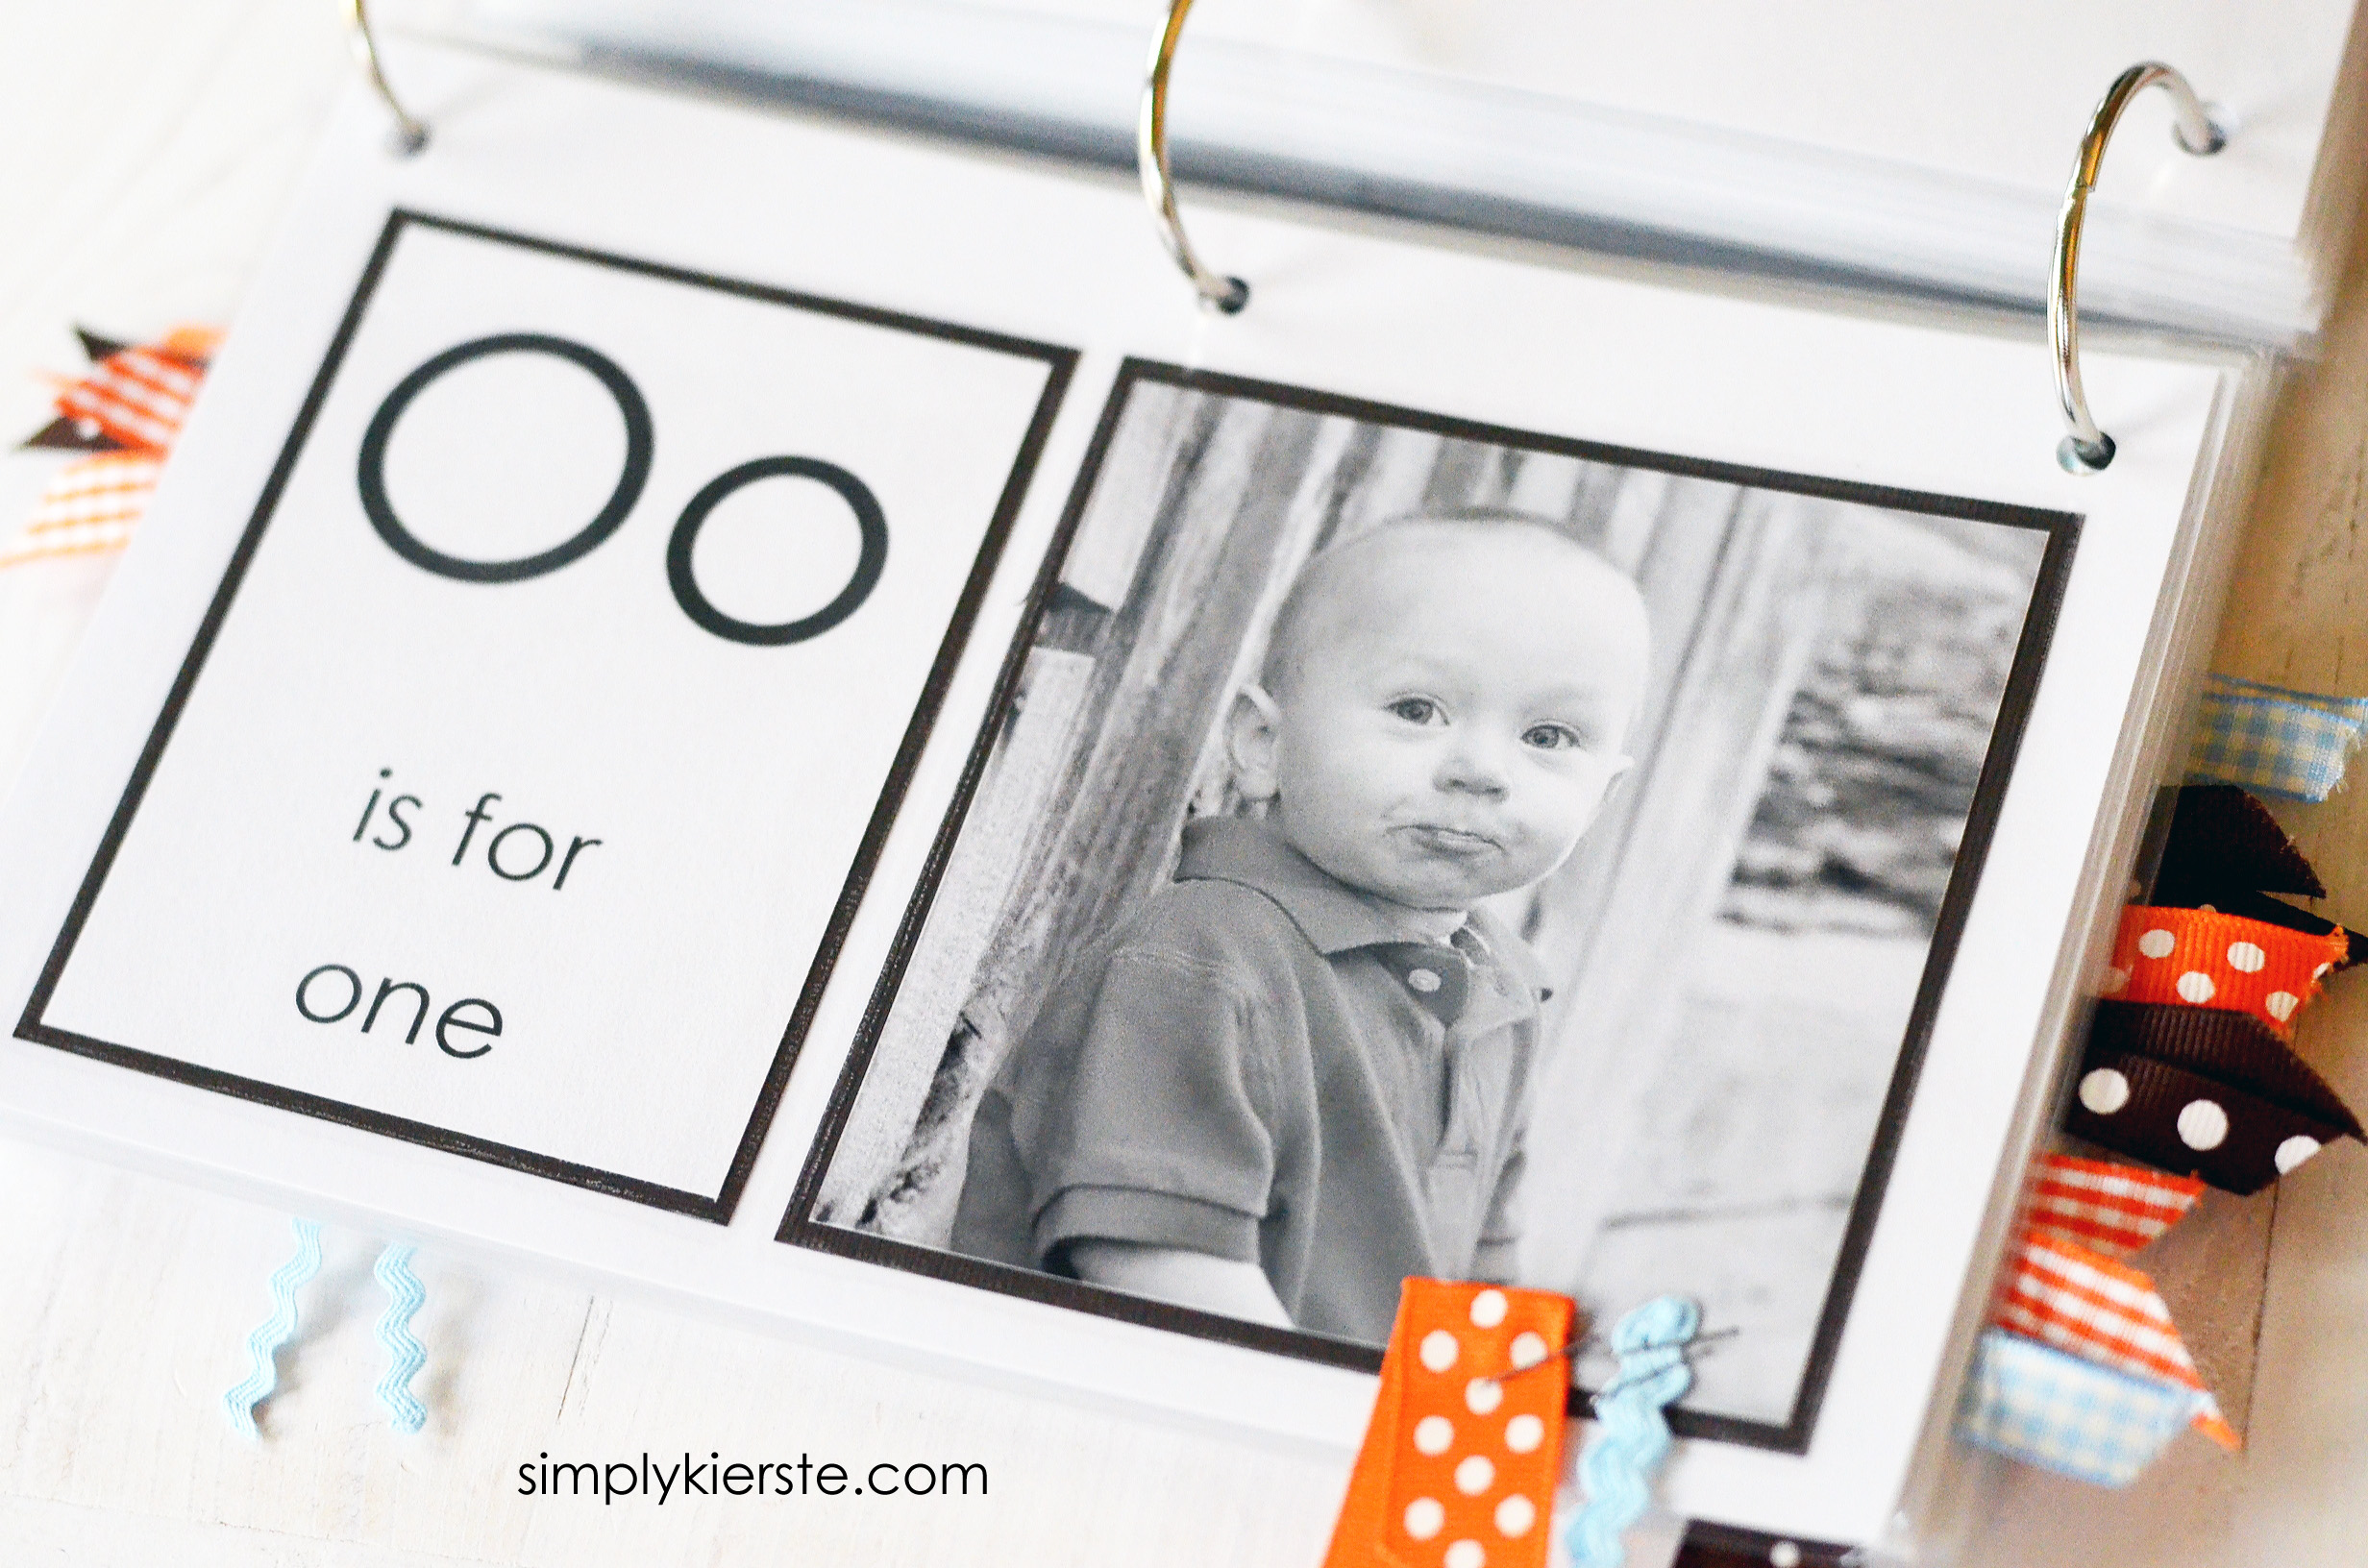
My kids LOVE to see themselves in pictures. We snuggle up on the couch or in their bed at night, and it doesn’t matter how many times they’ve seen the pictures, they always ask me a million questions—what, why, where. It’s a piece of their history, and even at such a young age, they can feel it. My girls just turned 8 years old, and well past needing to learn their alphabet, but they still keep their books on their bookshelf, we still look at them together, and I still get the questions, even though they could give me all the answers. It’s no wonder they connect to these books so easily, because it’s really a part of them.
Take a peek inside…
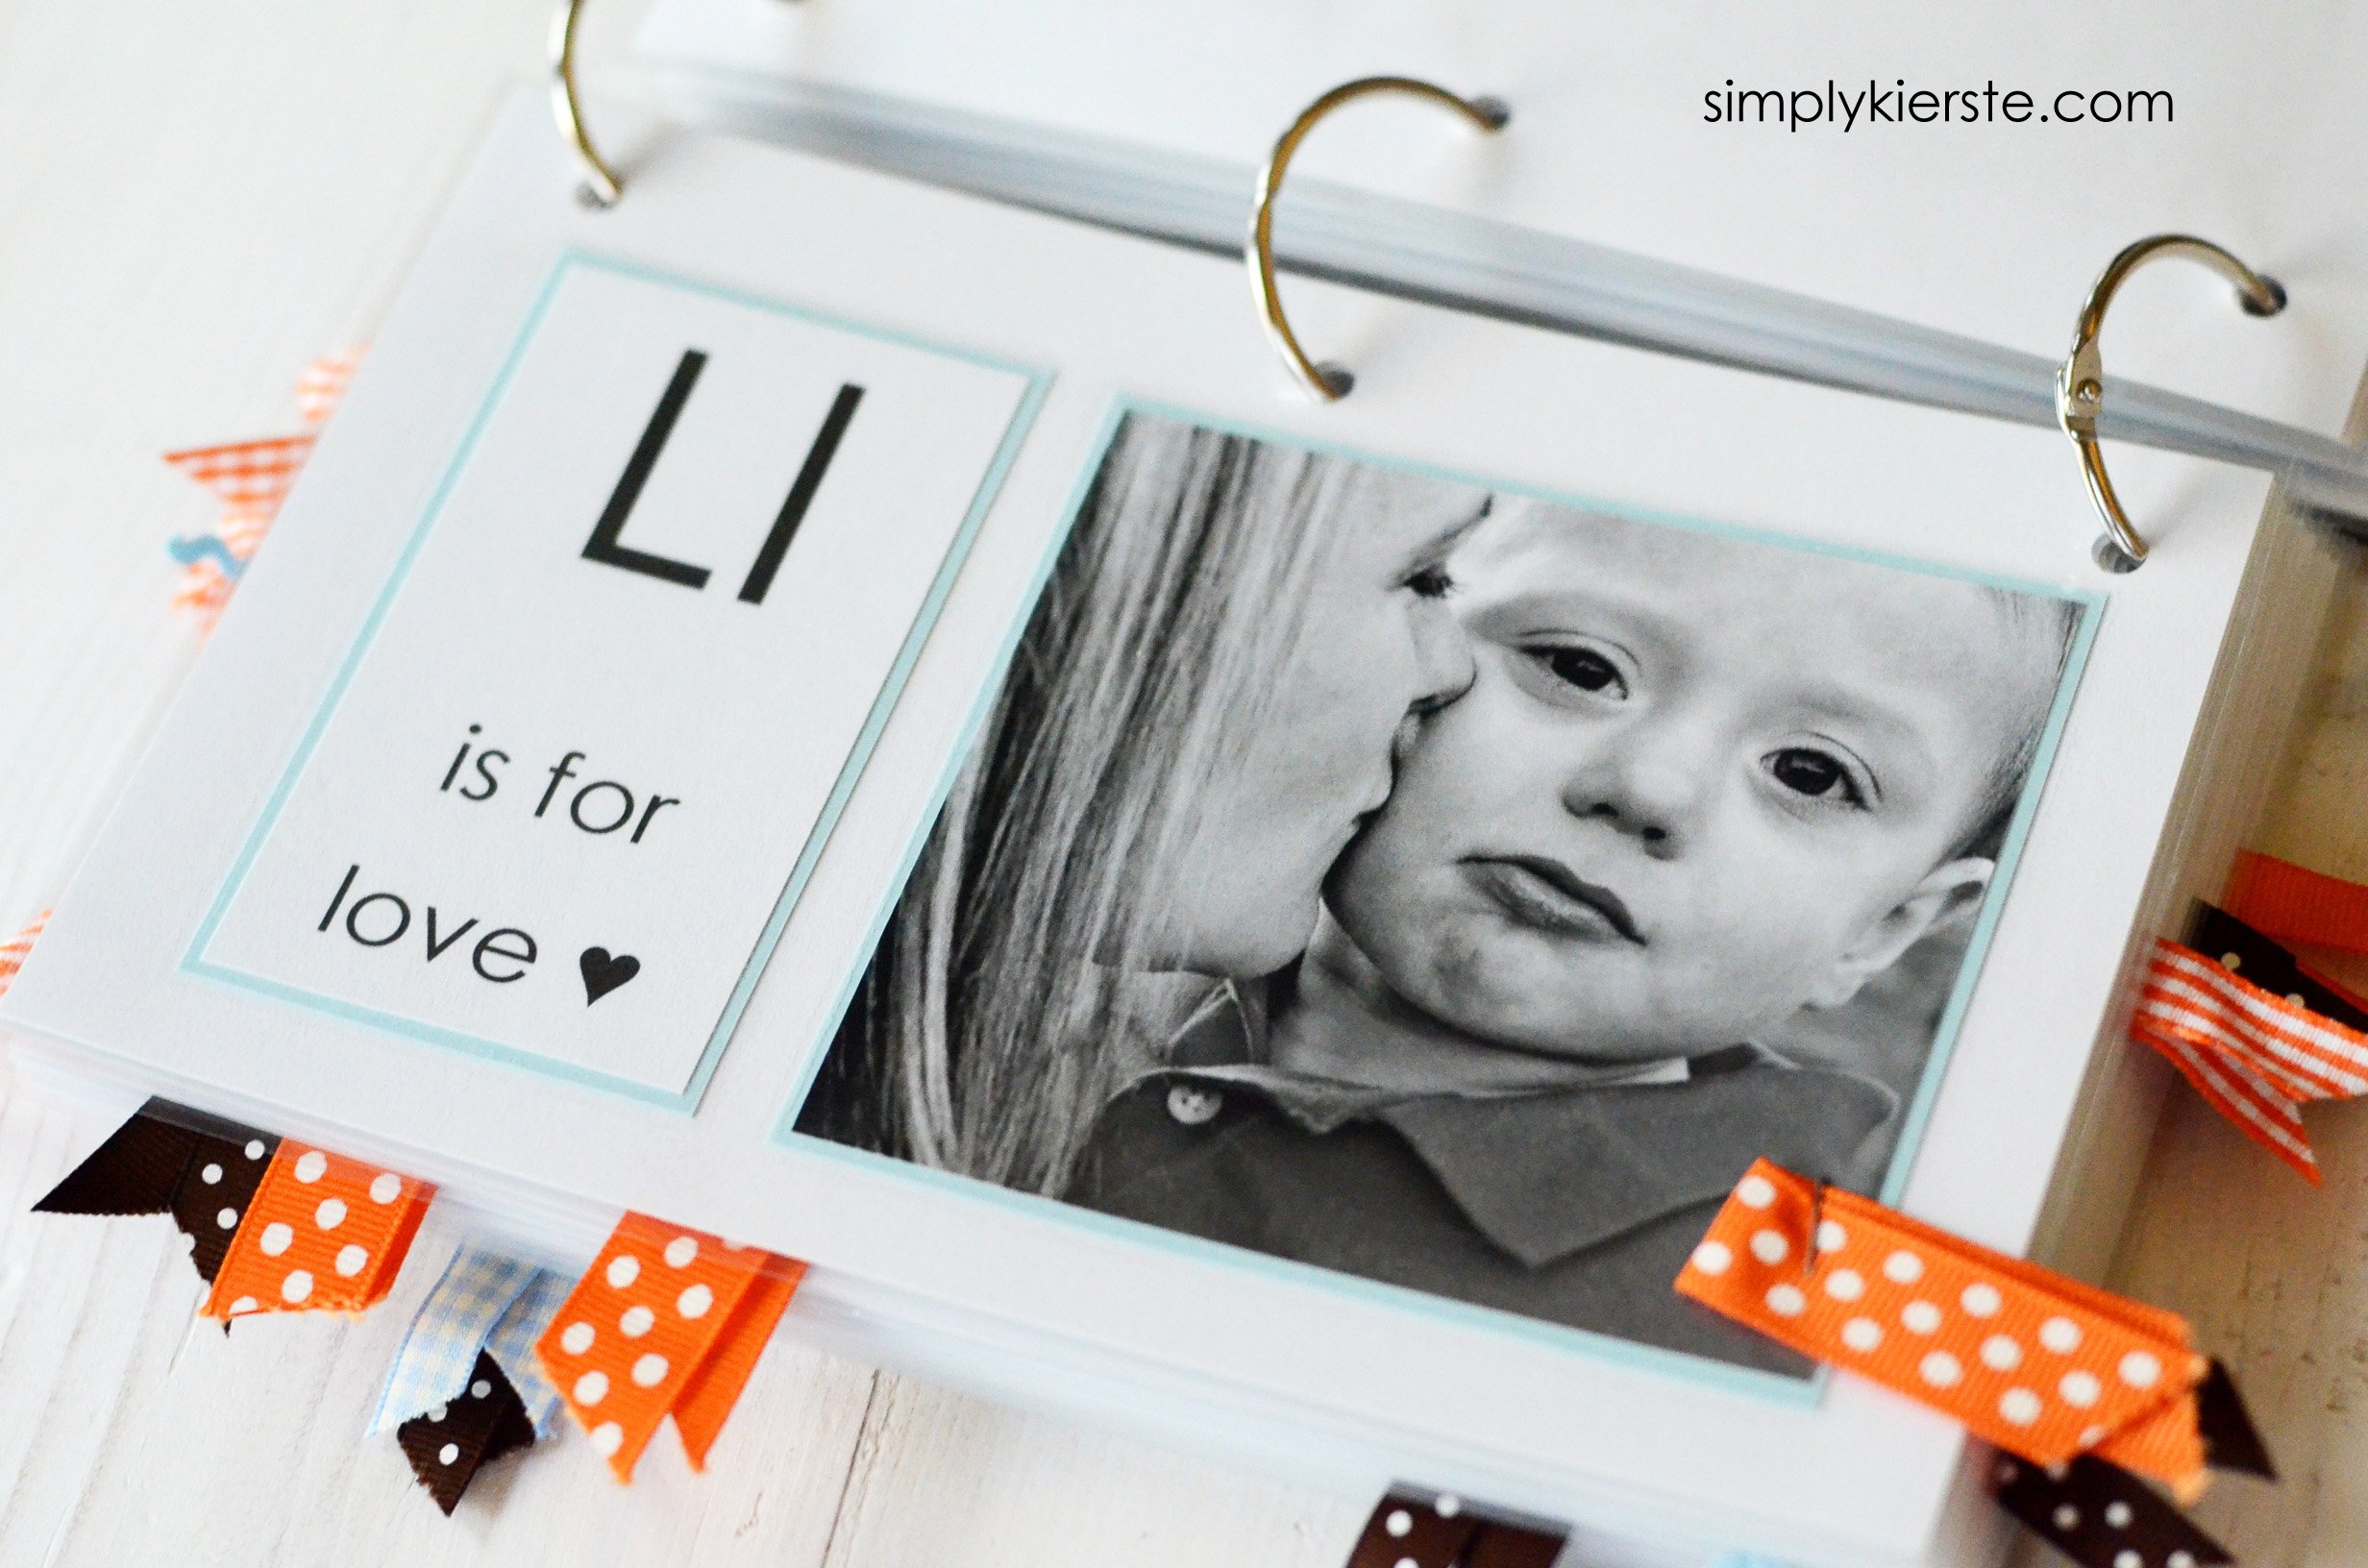
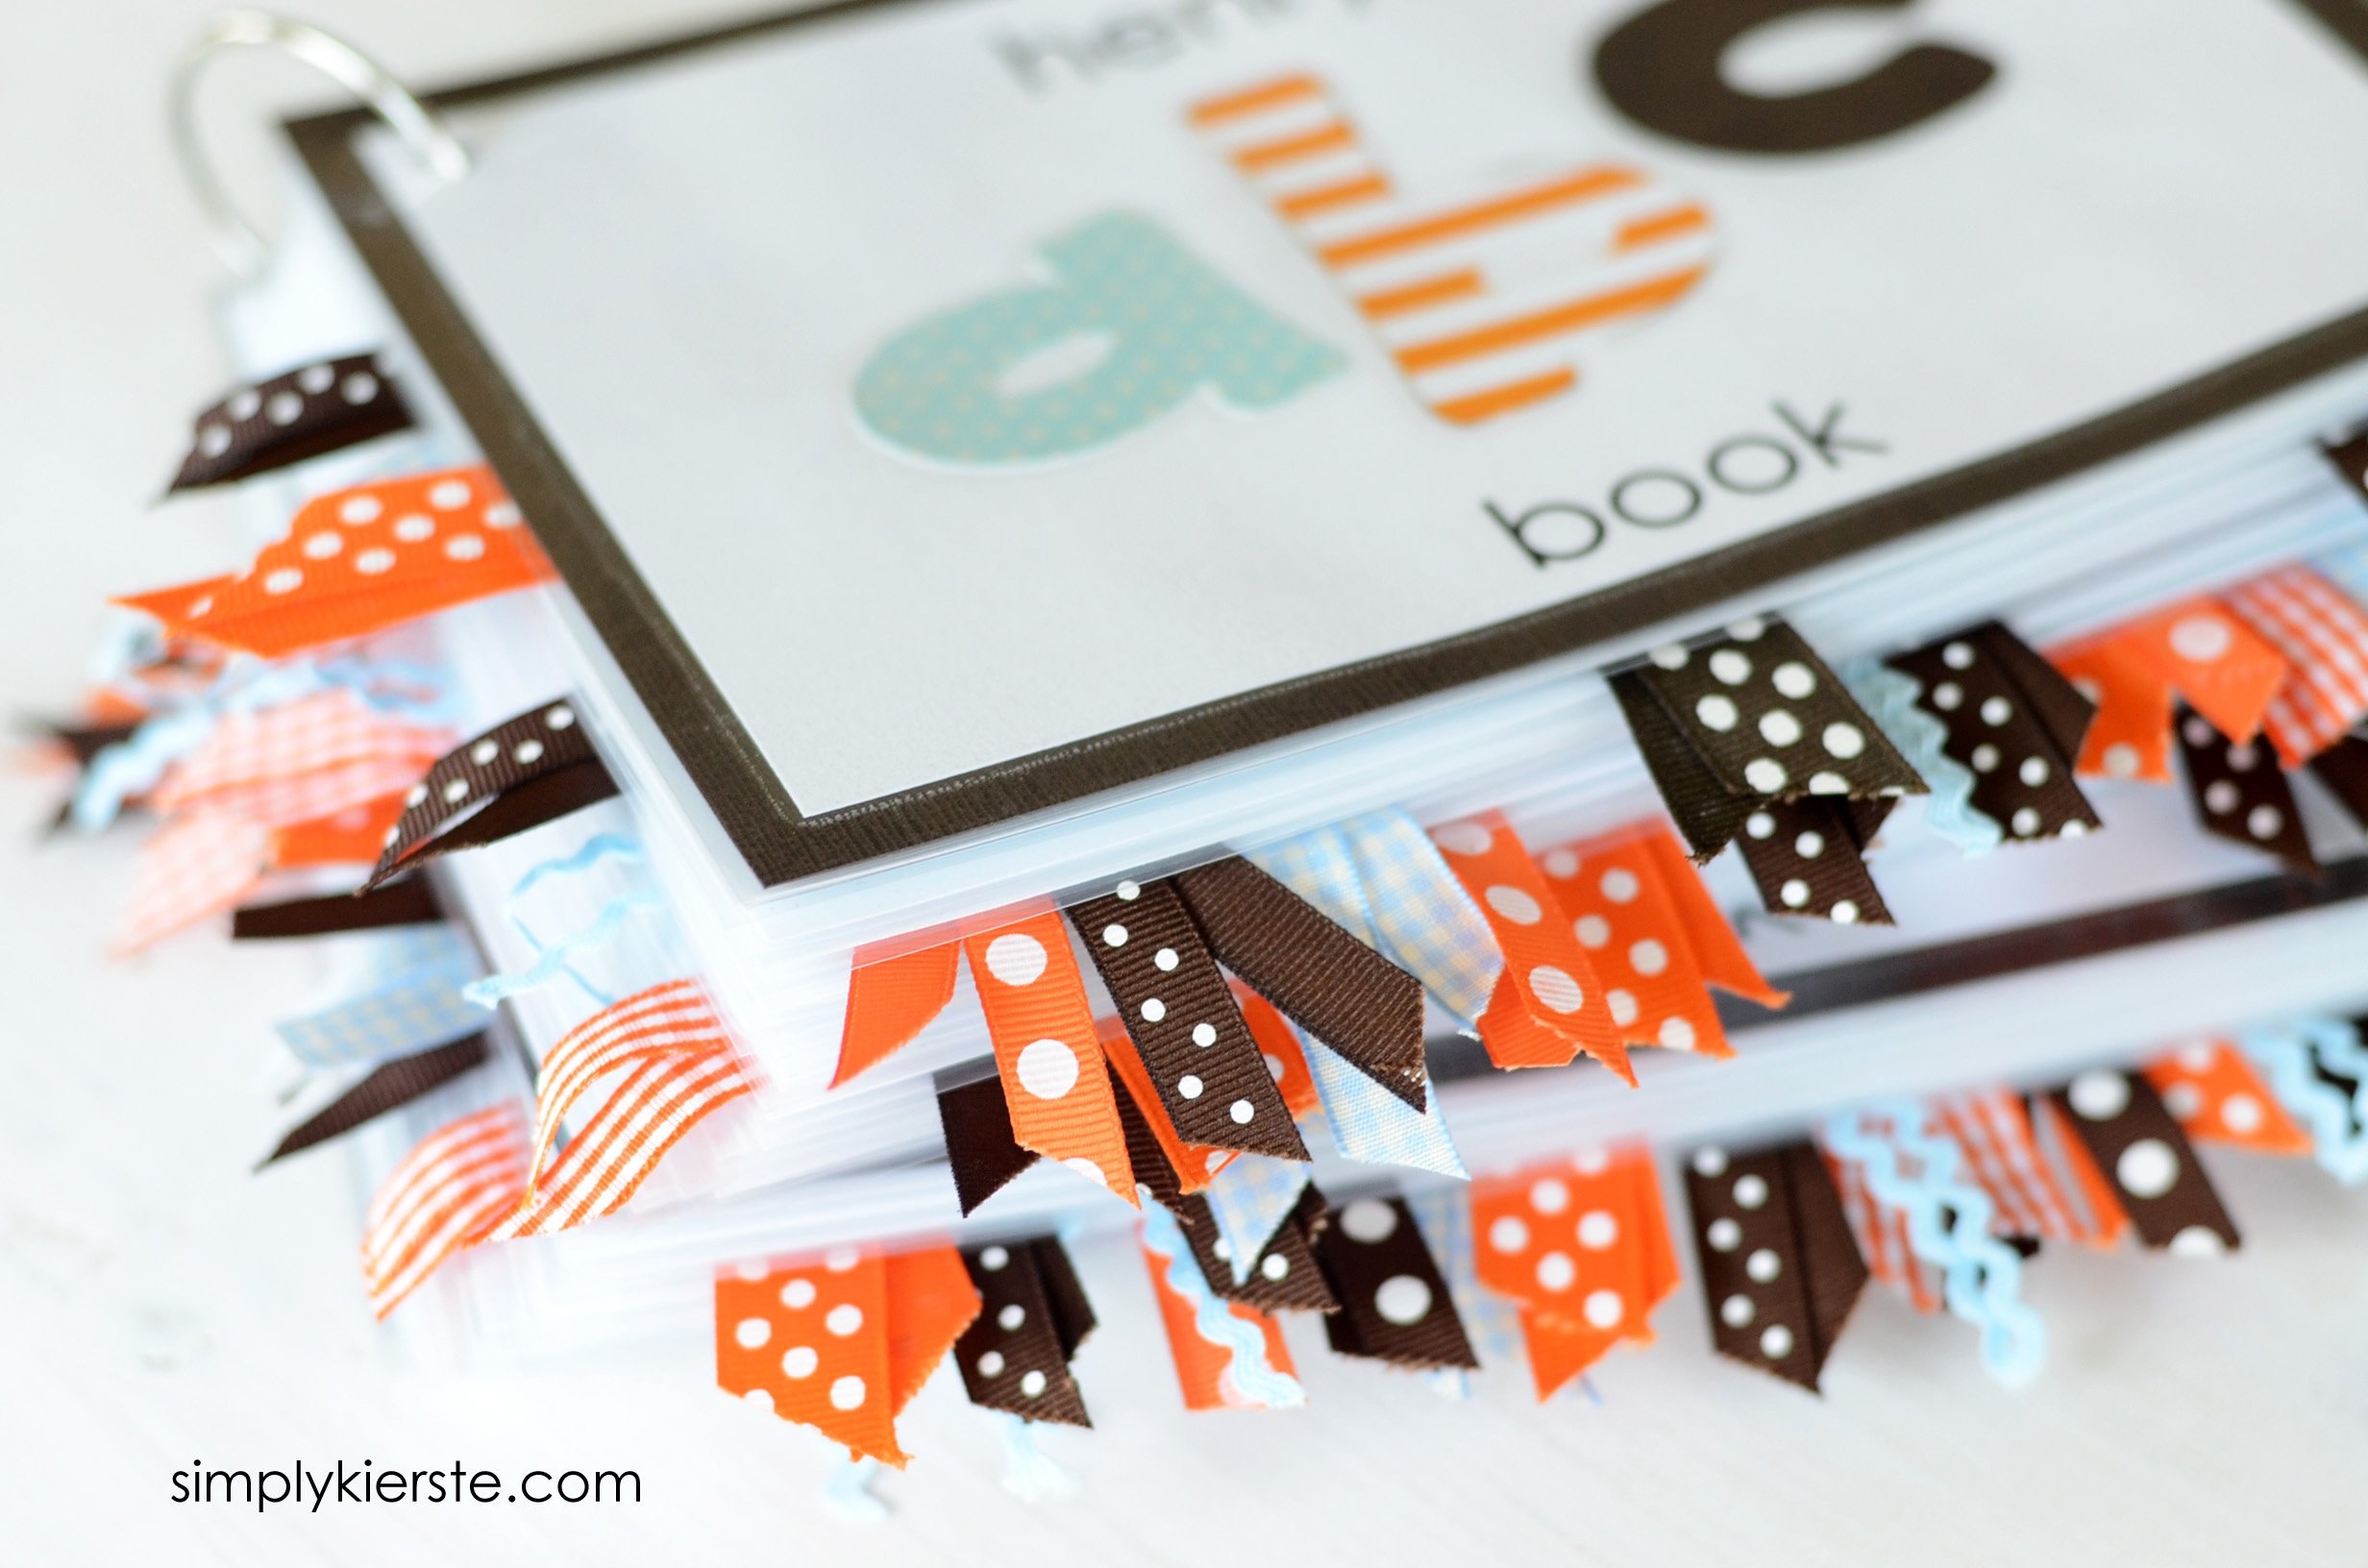
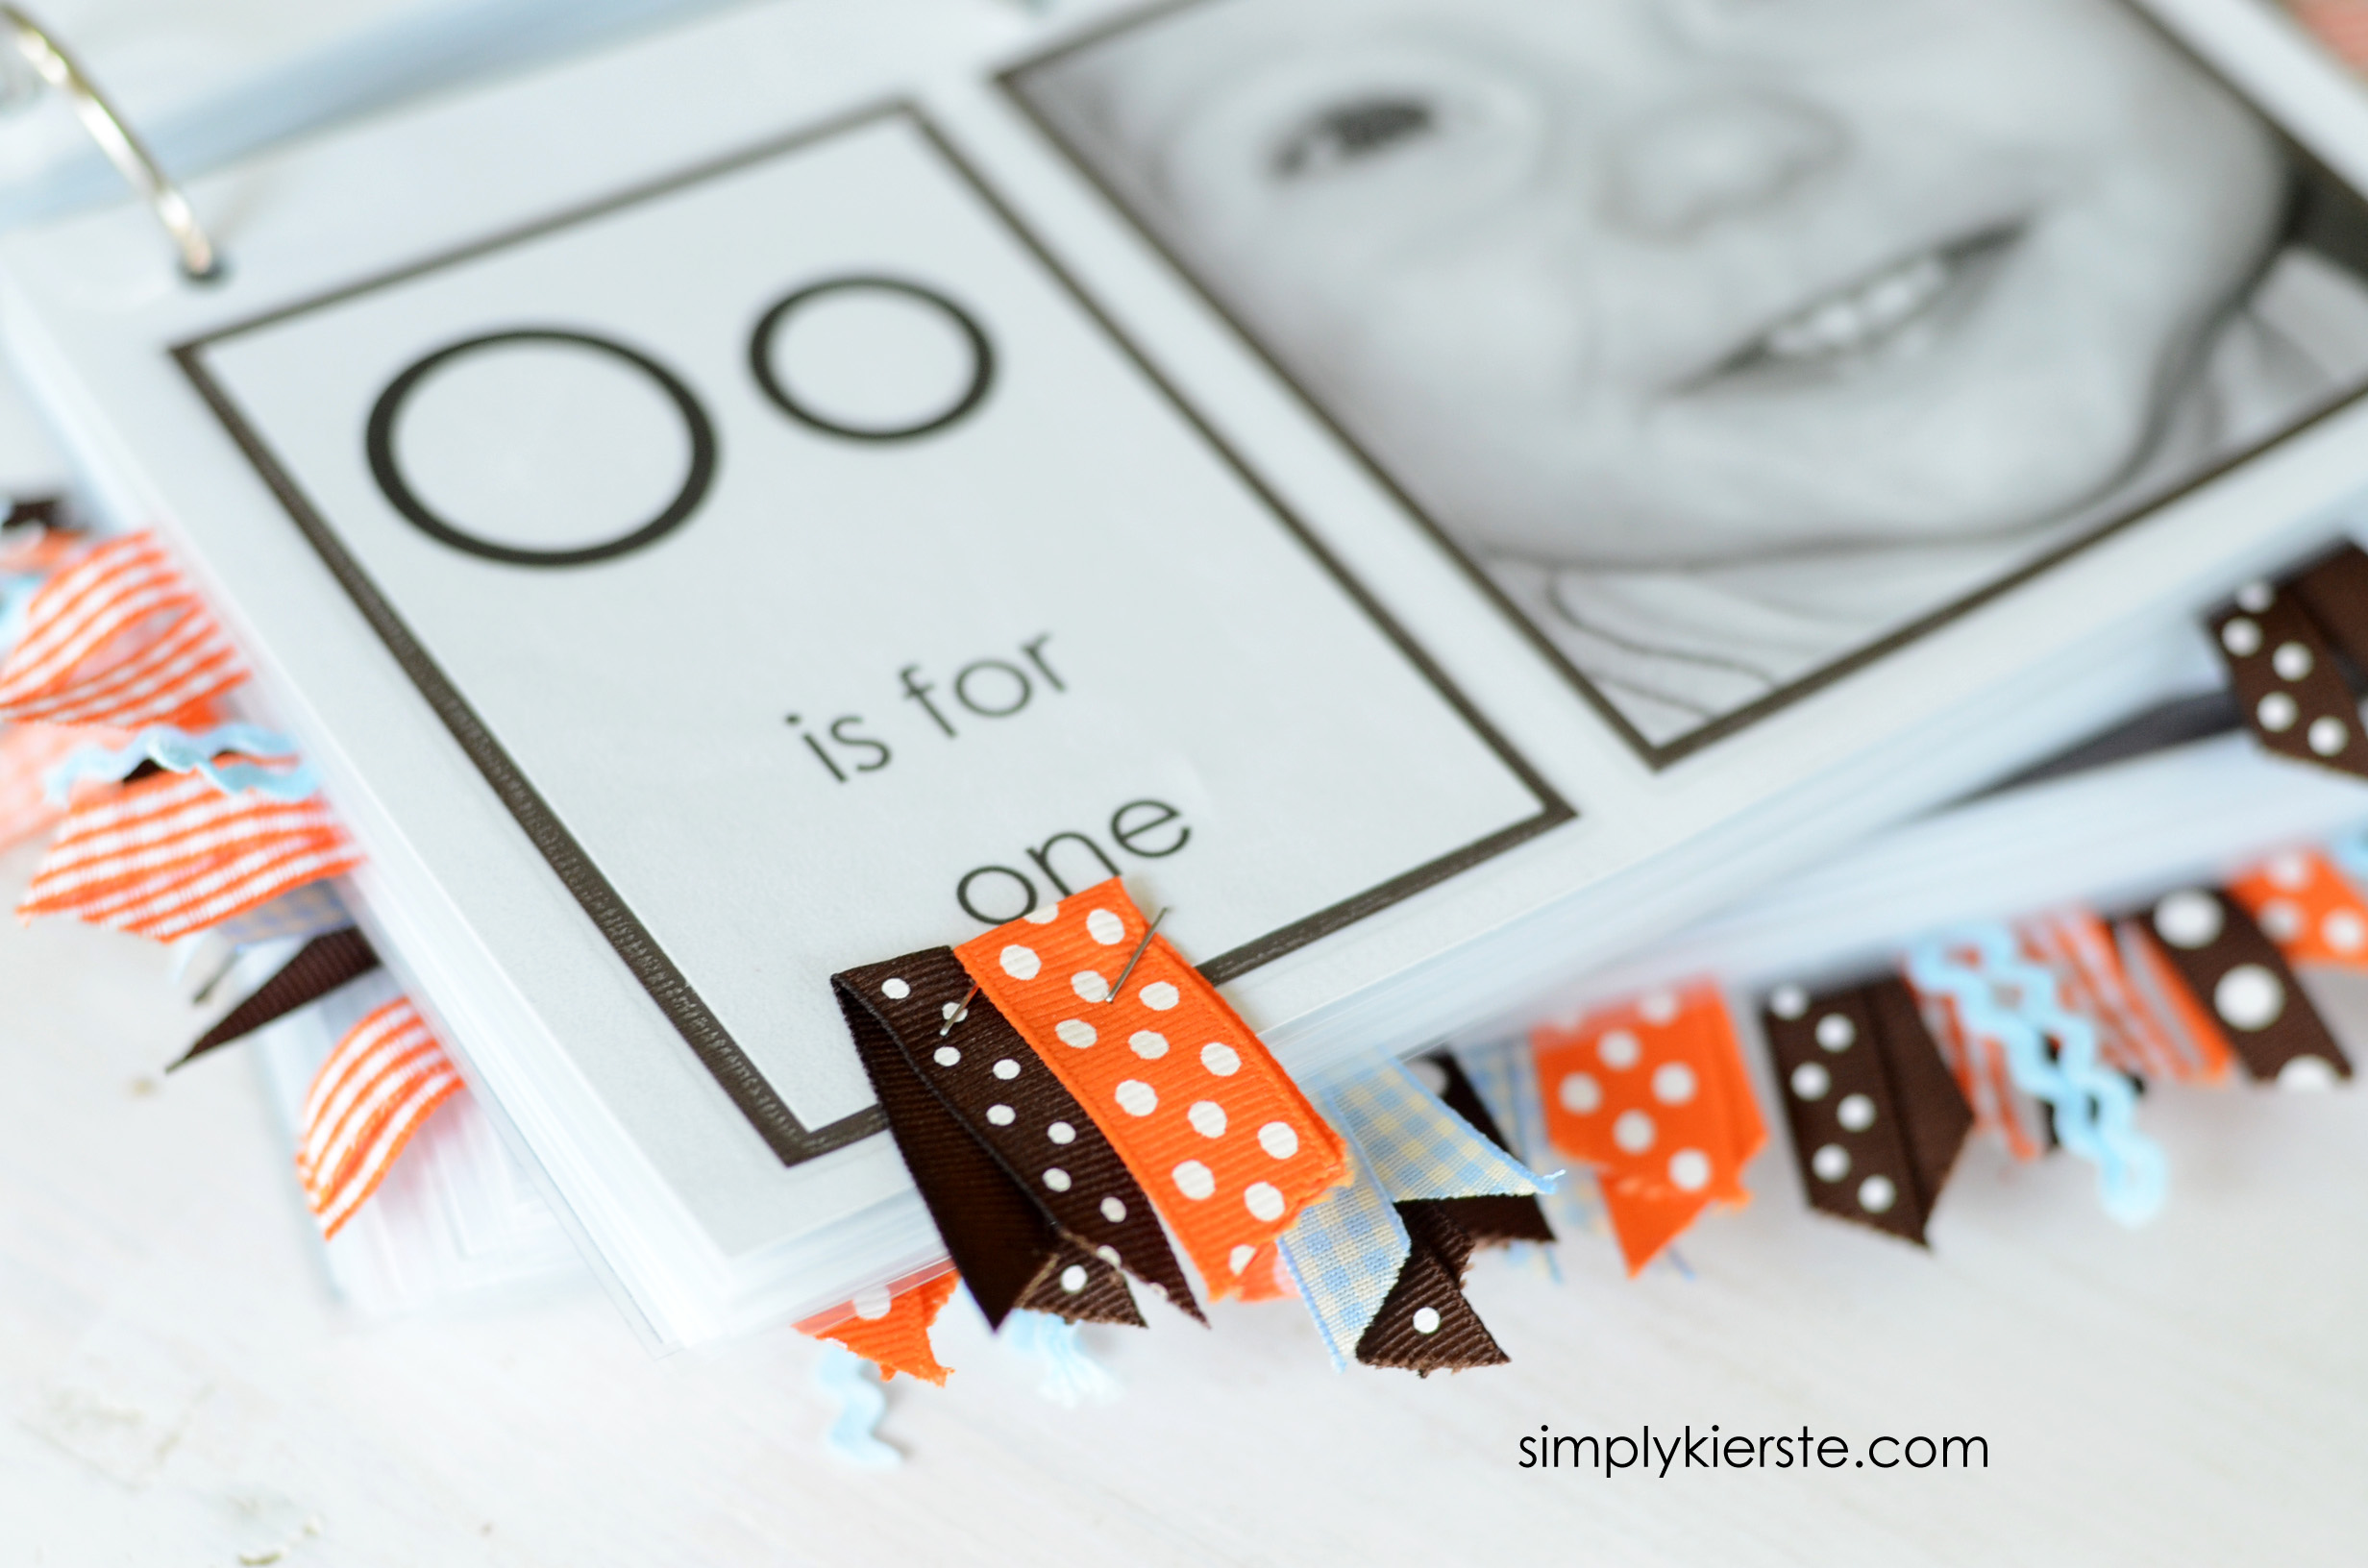
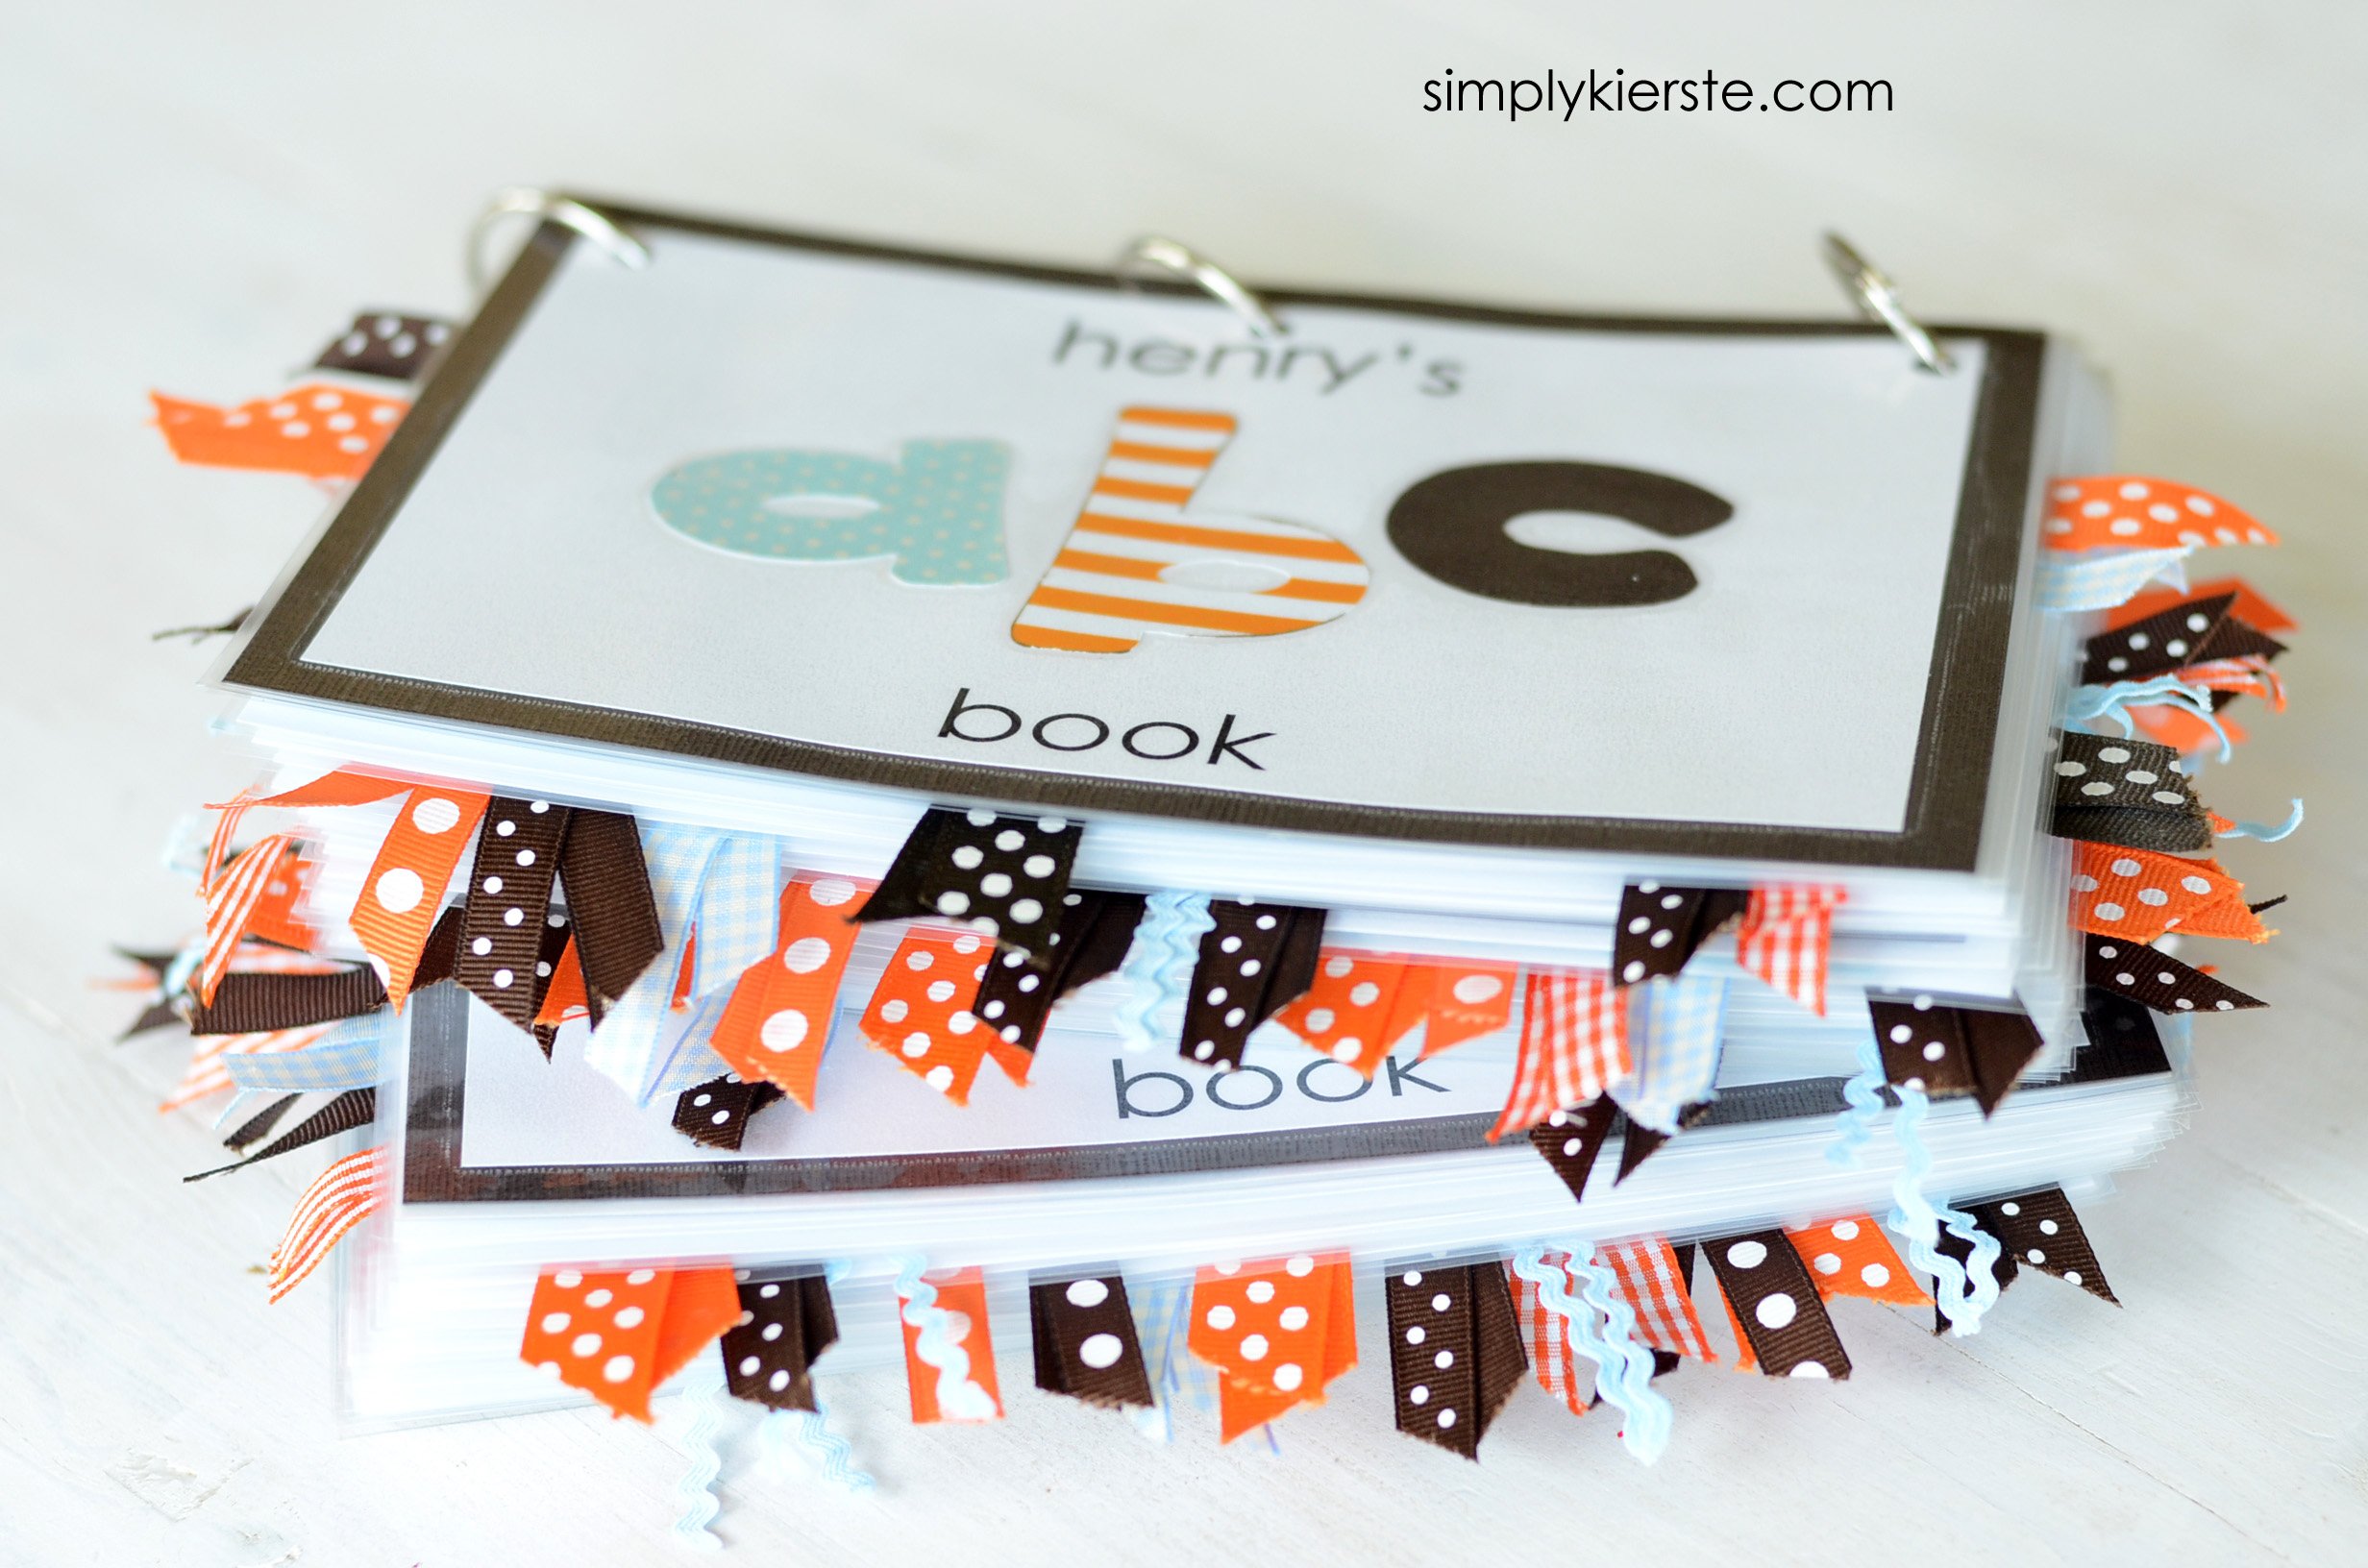
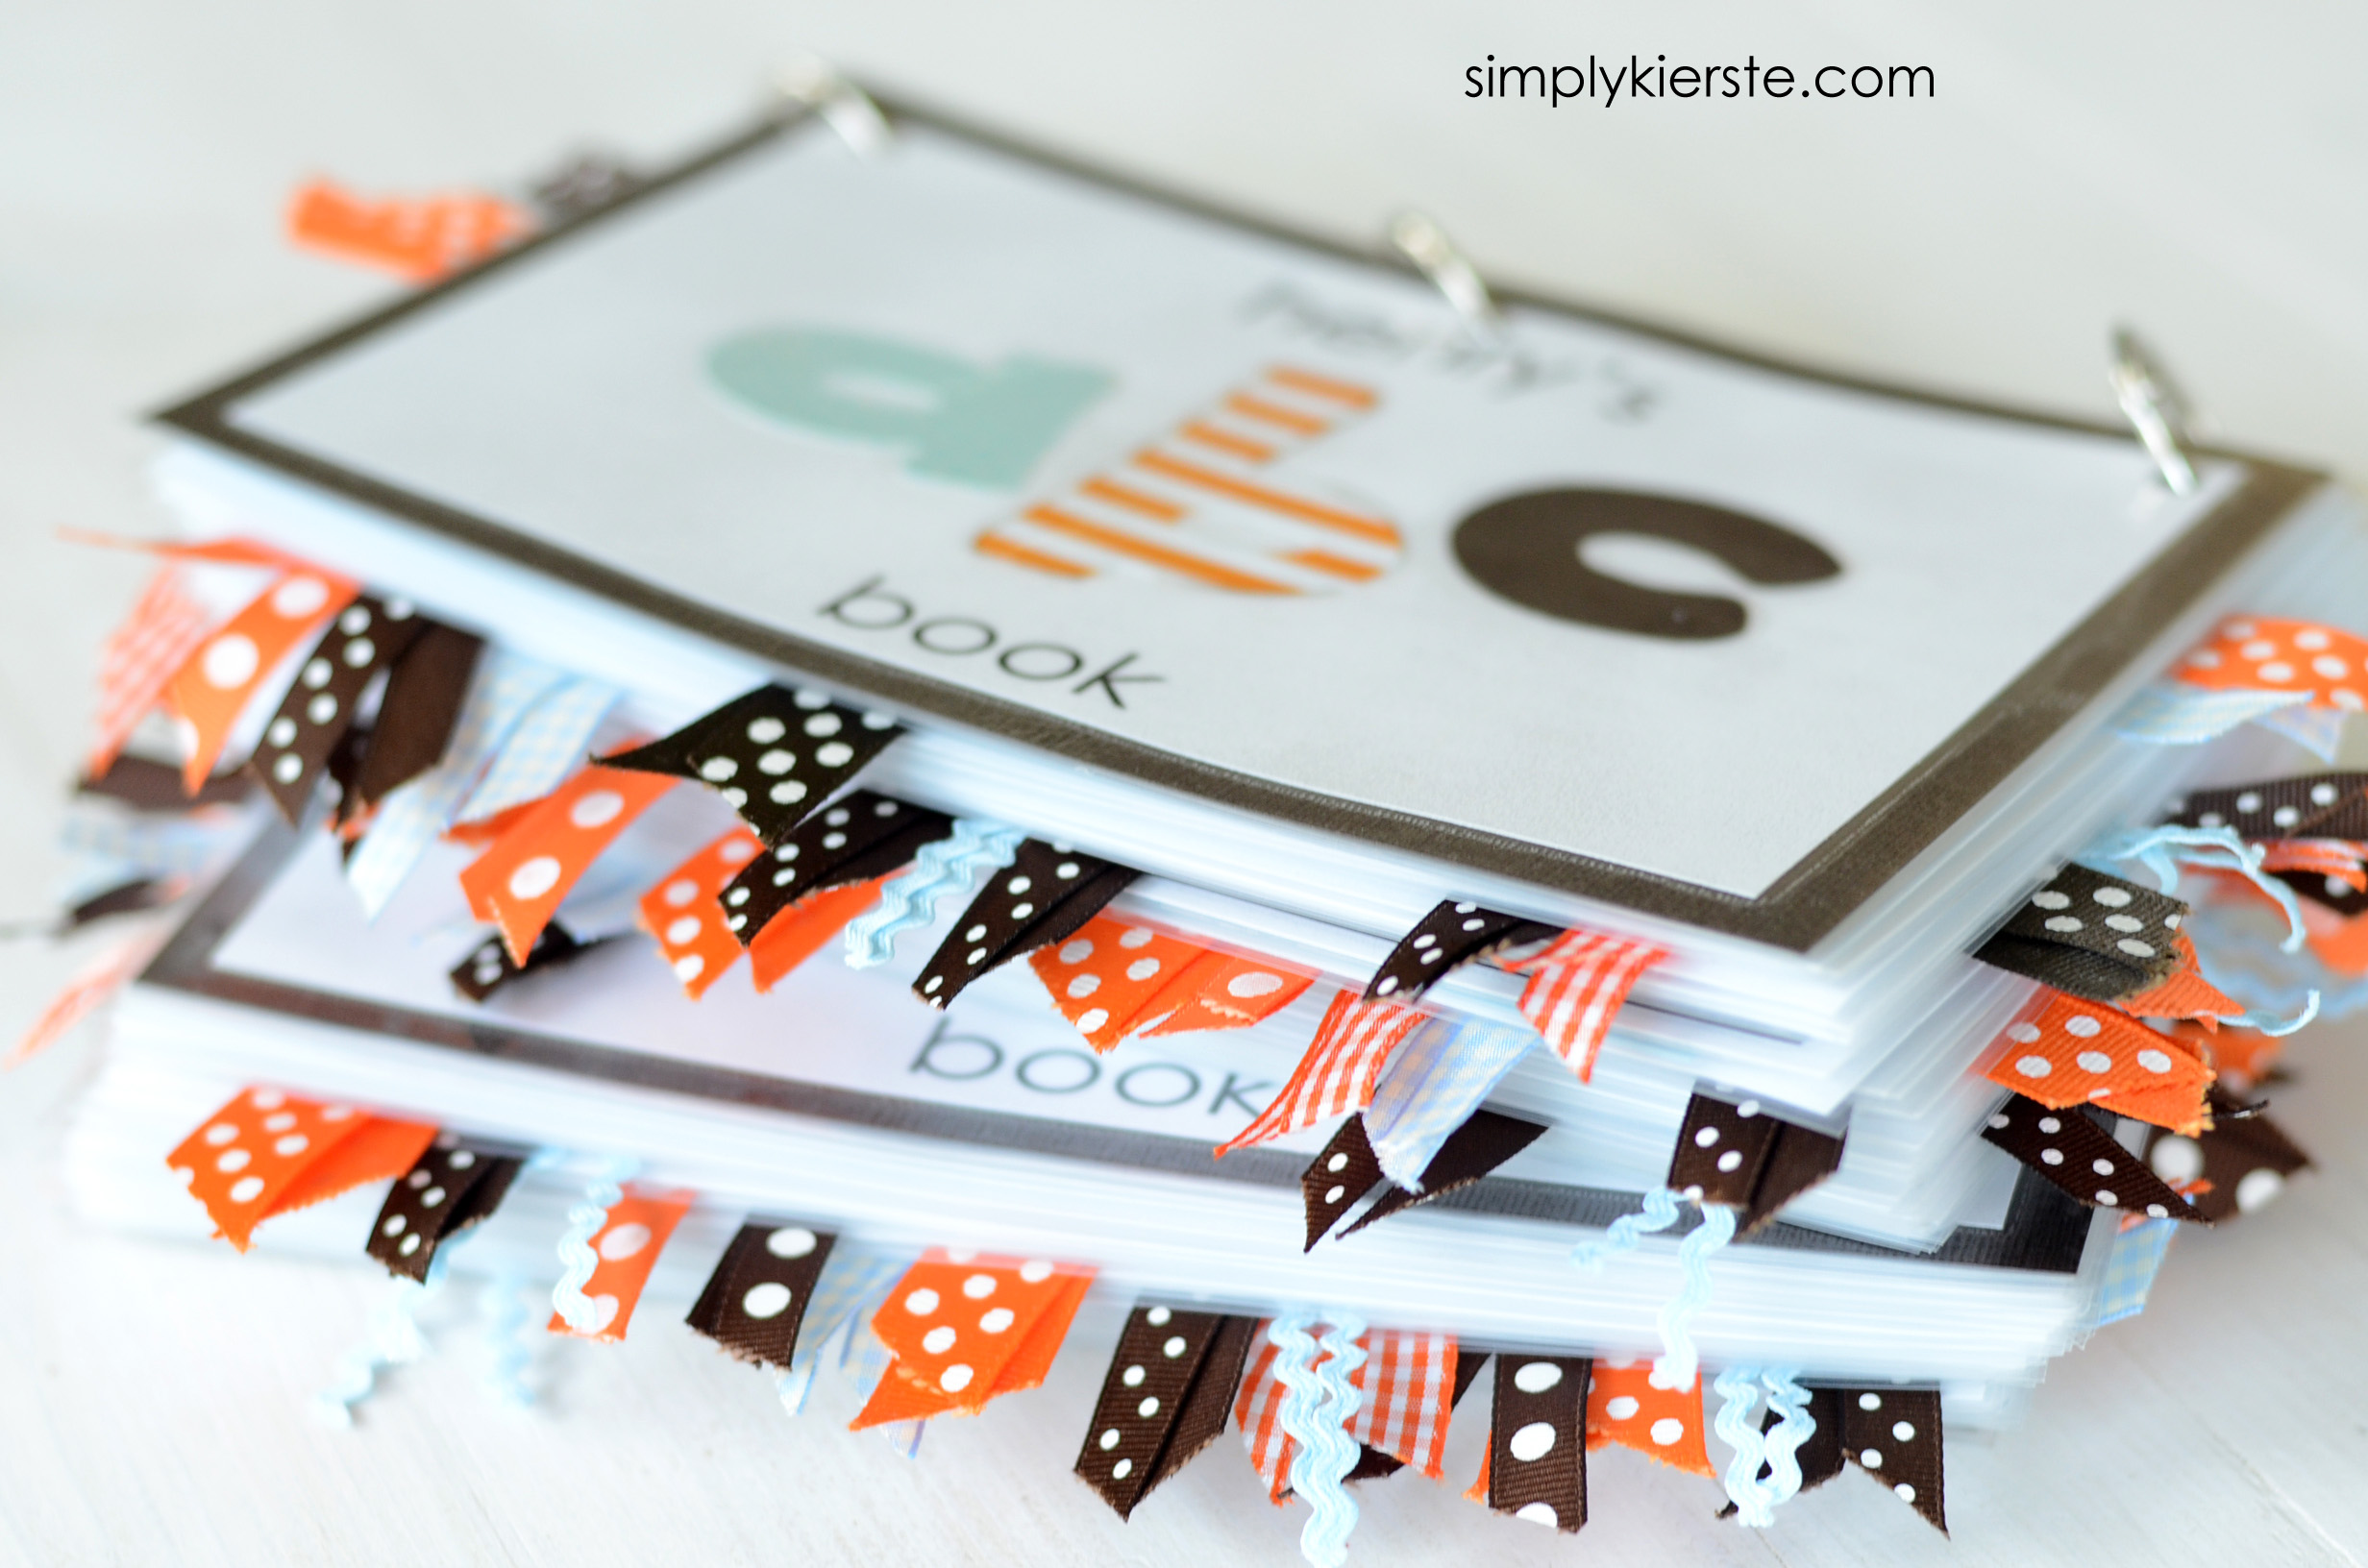
Then…there’s the ribbon. ☺ I adore the charm it lends to the books, and brings them from drab to FAB!!!
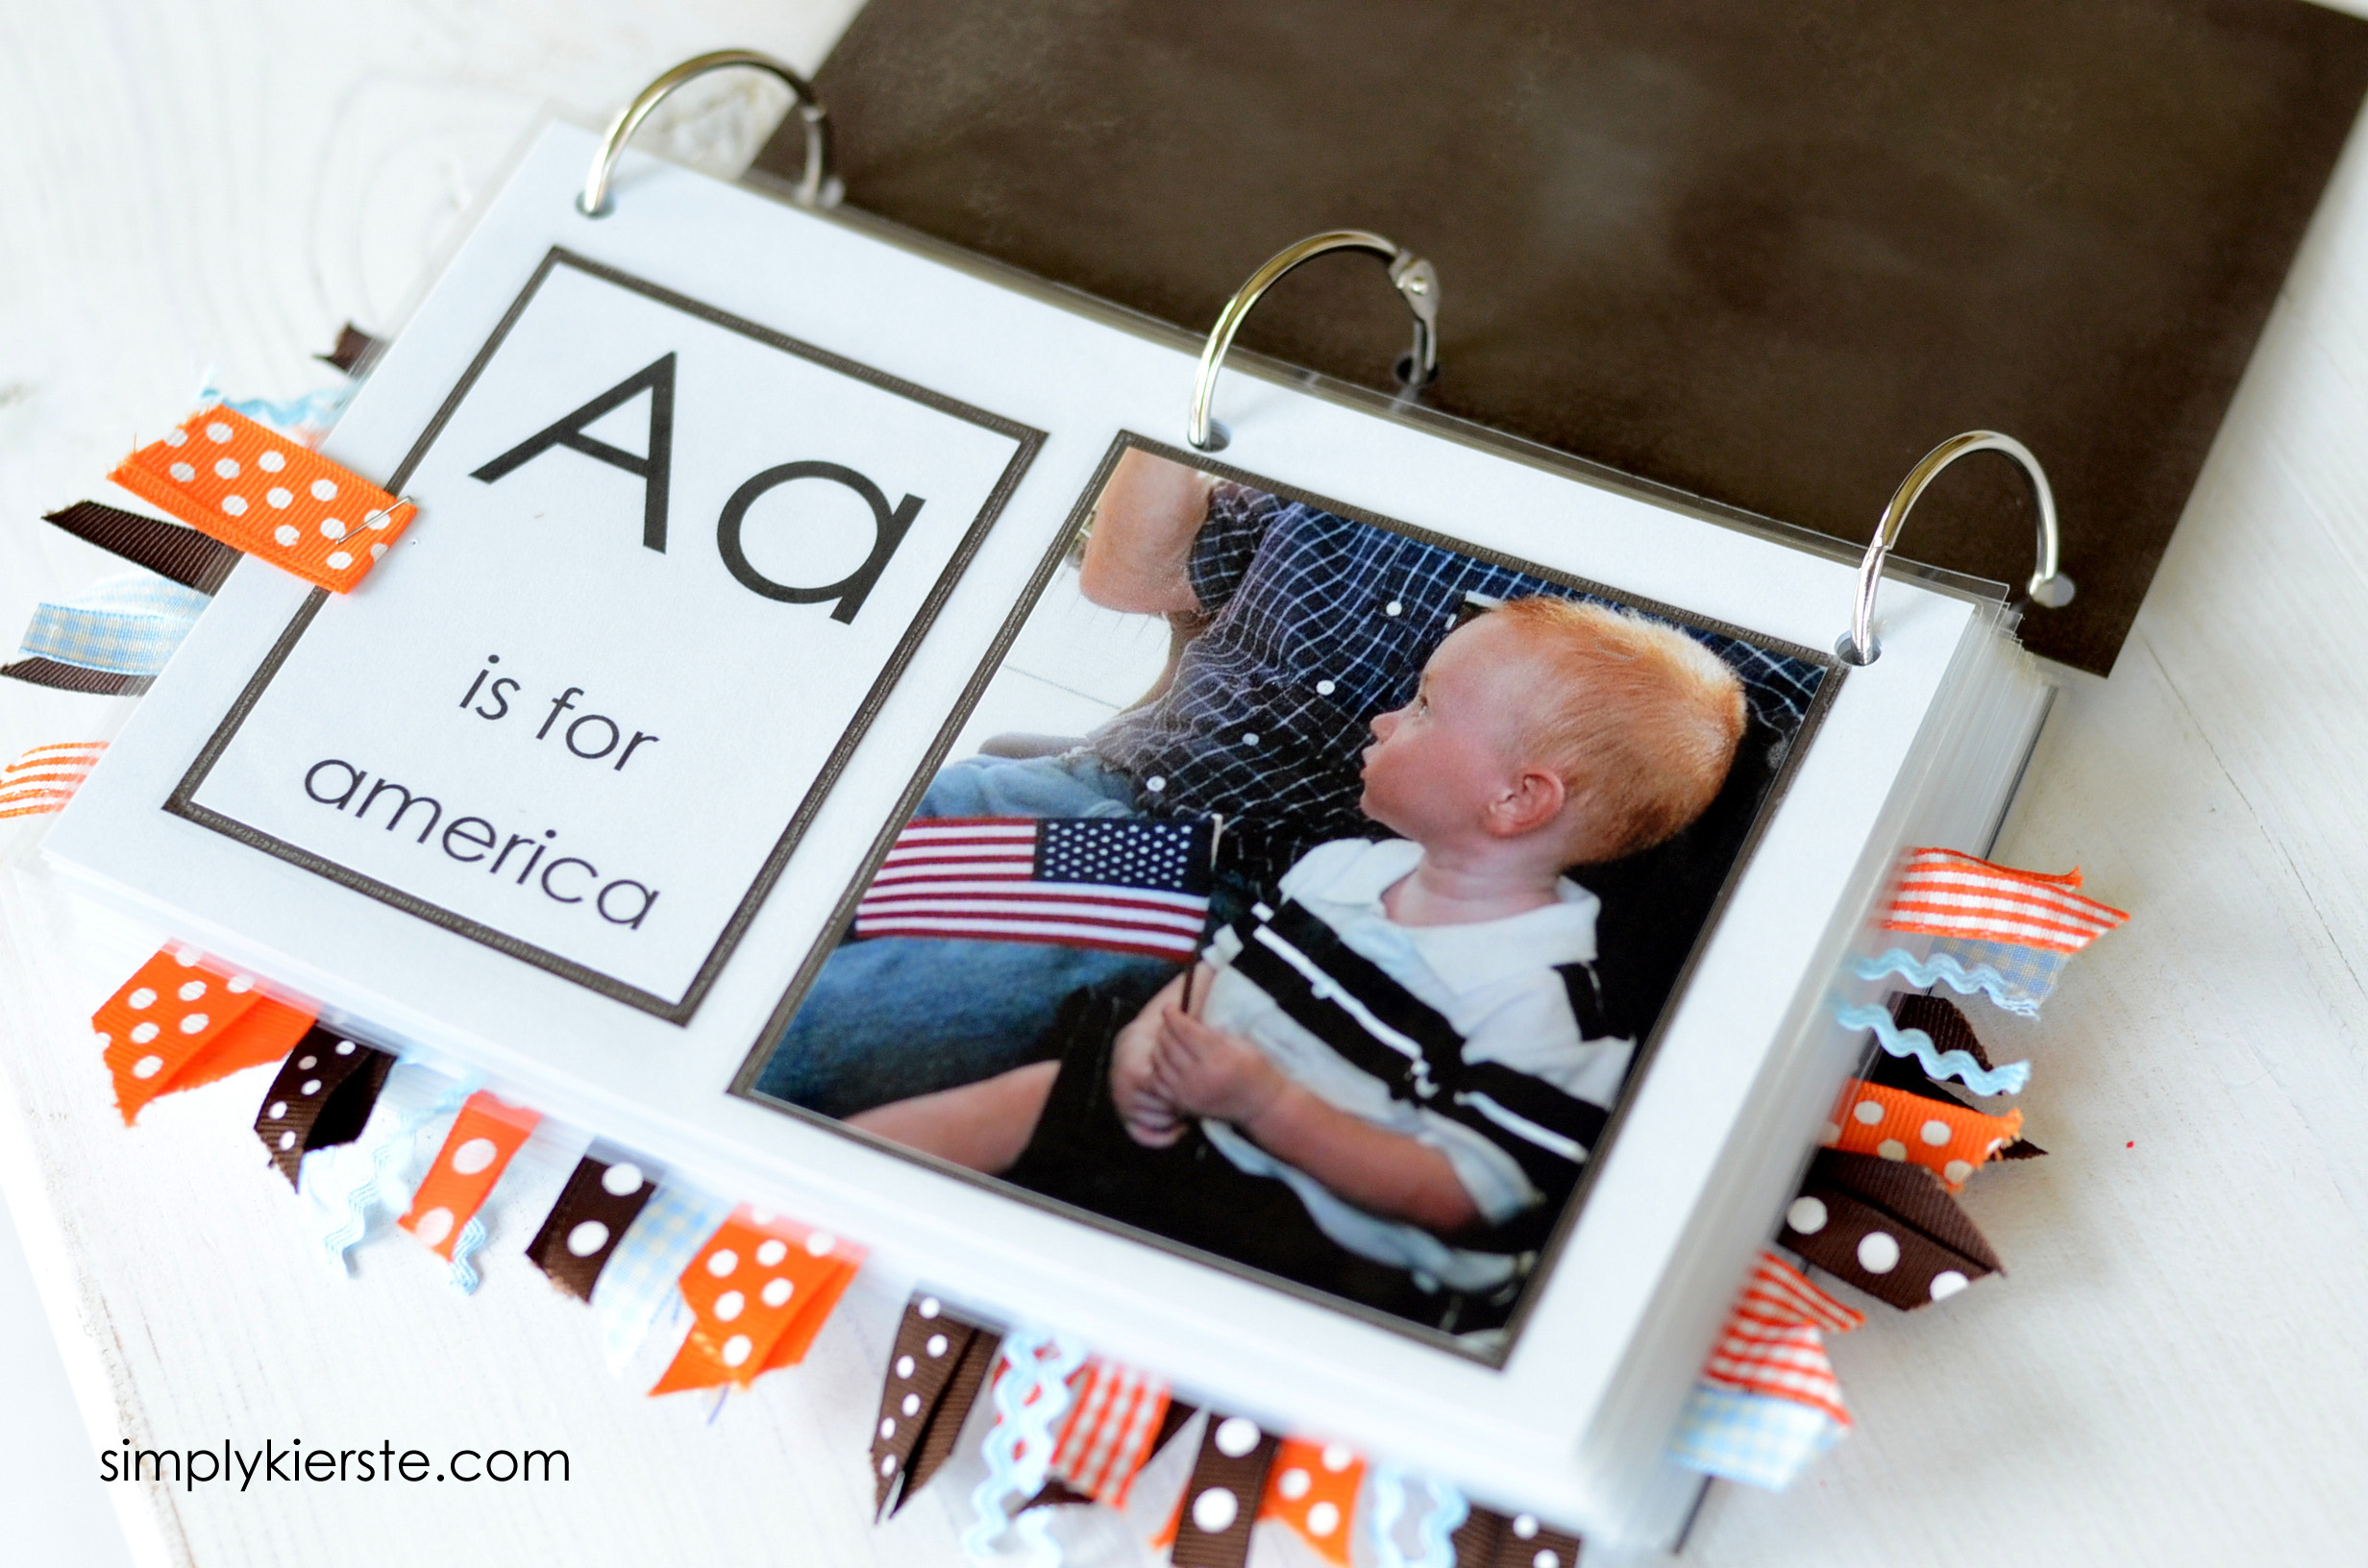
You can see I keep the pages simple, and it comes together pretty quickly once your pictures are gathered. I go through all of my digital pictures, choose the ones I want for each letter, then get them printed. When I’m selecting photos, I create a special file folder for each ABC book, and then name each picture A is for…, B is for …., etc. This way when I get the pictures, and I’m typing up my text, it’s easy reference to see what I decided, and a great checklist.
They are just SO fun, and really so easy to make!
Gathering the pictures took the longest amount of time for me, and I did it over a month or two. You could certainly speed that up if you need it faster though–that was just me working on it every so often when I got a chance. Once the pictures were done, I was able to put these books together in a couple of nights. The first night I compiled the pages, and the second night I did the lamination and ribbon.
{SUPPLIES}
-white cardstock (8.5 x 11)
-two coordinating cardstock colors
-scrapbook paper for cover embellishment
-paper trimmer
-double stick tape
-ribbon
-1.5 or 2 inch silver books rings (3)
-photos
-laminator (or you can take it to an office store for lamination)
-hole punch
-stapler
-scissors
{DIRECTIONS}
1. Decide on photos for each letter of the alphabet. Like I said earlier, it’s easiest to save each books’ photos in a specific file, with each photo named by it’s coordinating letter. This is especially helpful if you are gathering them over time, because you may not remember exactly what you did. Order the photos in 4×6 print size.
2. Cut 13 pieces of white cardstock in half, so they are 8.5 inches wide by 5.5 inches tall. You’ll end up with 26 halves, one for each letter.
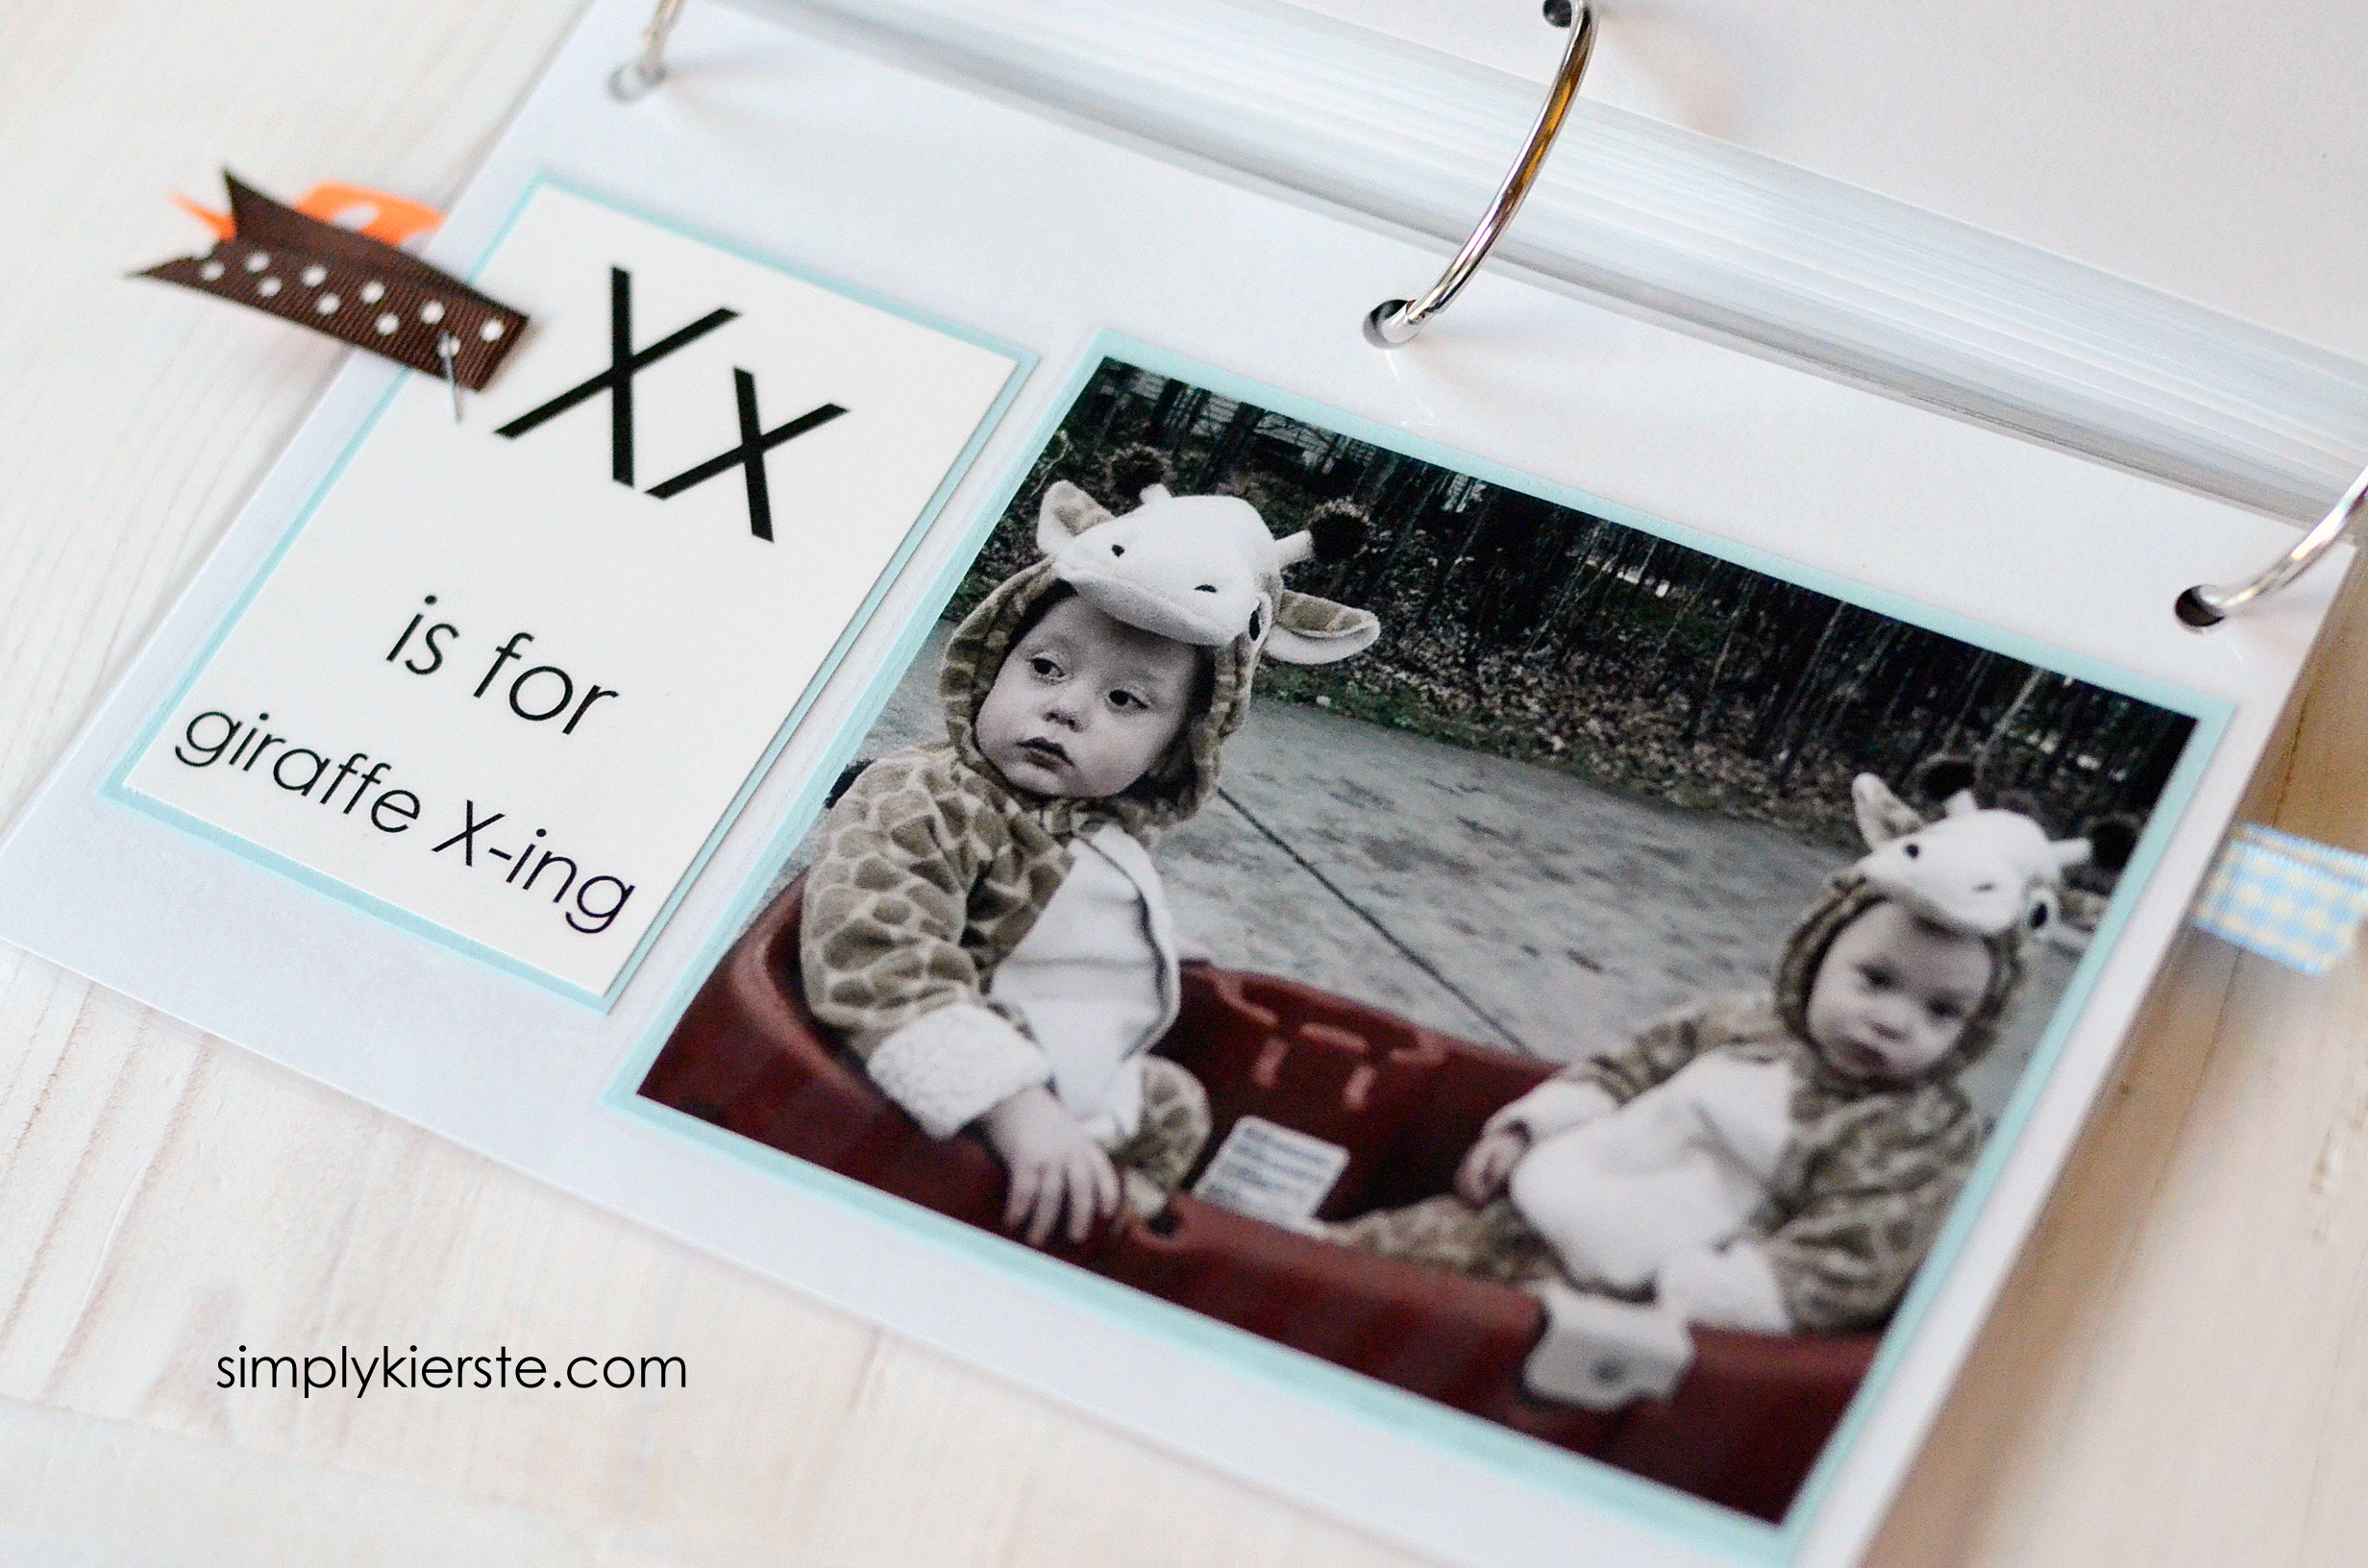
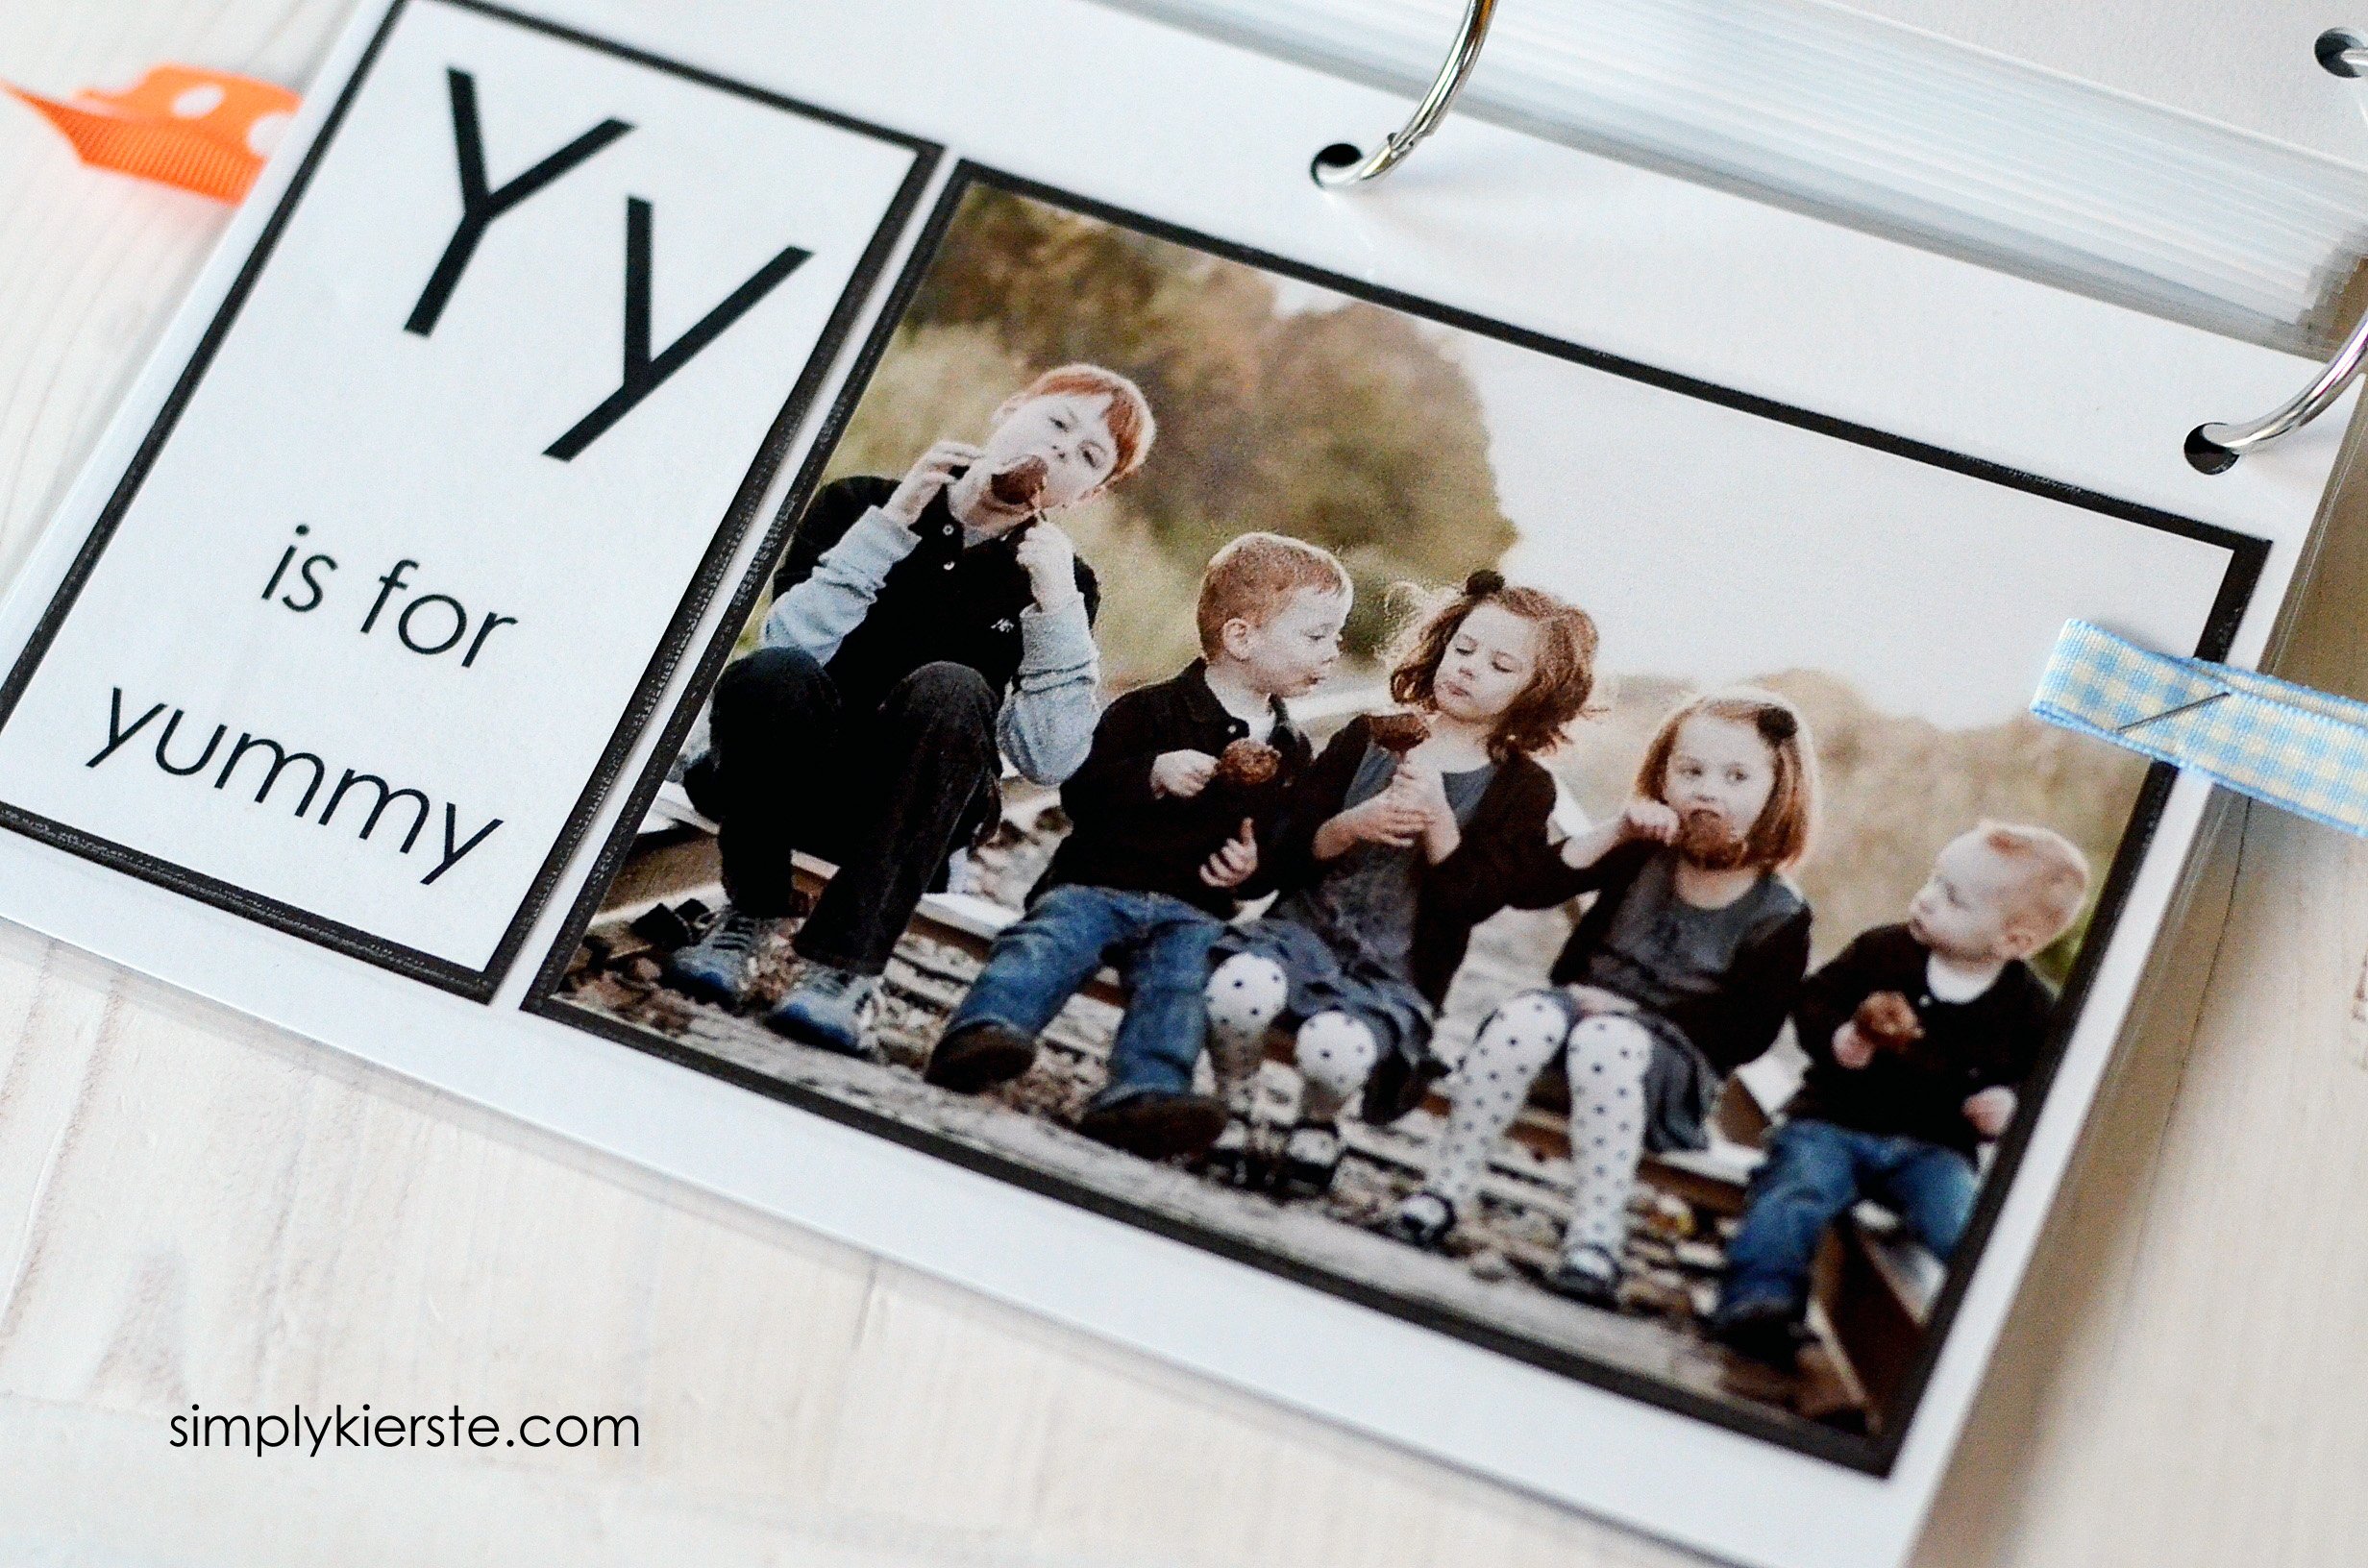
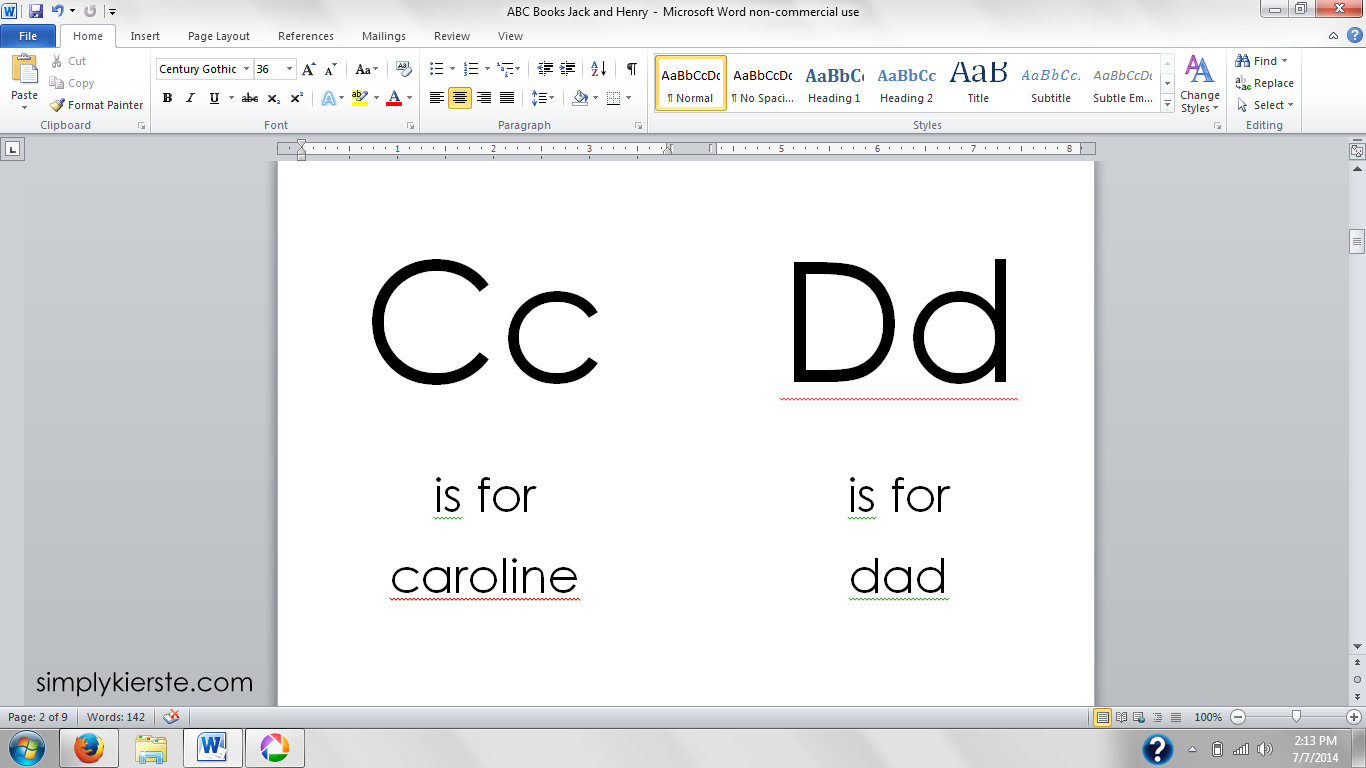
3. Create your text in a Word Document. I used the Century Gothic font. The font size will depend on the font you choose. Keep in mind that you will need to fit a picture that’s matted on cardstock, plus the letter text matted on cardstock within that 8.5 inches of space, which sounds like a lot, but it goes really quickly. I tried to keep mine to no more than three inches wide. I was able to keep most letter the same size font, but some letters are too fat (at least in most fonts), so I had to make a few smaller–W and M. The text below the letters I never let go wider than the letters themselves–I used them as a guide. Once I finished, I printed them on white cardstock.
4. Gather your supplies–paper trimmer, double stick tape, scissors, the printed text, white cardstock halves, and photos. Go letter by letter, and trim your photos and text as desired, mat them each on cardstock, and adhere them to the white cardstock. I used two different cardstock colors for matting–blue and chocolate brown–and I alternated from one page to the next.
5. Create your cover!! I used my Silhouette to cut out the “abc” letters (Gentle Redhead font) in different pieces of scrapbook paper. I printed the other text first on white cardstock, then added the abc. I cut an 8.5 x 11 piece of chocolate brown cardstock in half, and they were my front and back. I trimmed down the piece of white cardstock that had my embellishments on it, so that it would fit on the brown cardstock, and leave a little bit of an edge.
6. Once all my pages were done, I used my laminator to laminate them. If you don’t have a laminator, I would seriously consider getting one. I use mine ALL the time. They’re pretty inexpensive (mine is by Scotch, and was around $25 on Amazon), and I can’t tell you many times it’s paid for itself. If you don’t have one and don’t want to buy one, you can take them in to get laminated at a copy store or office supply store. I suggest a thicker lamination for durability. I did have to do mine twice to seal the edges really well, due to the layers of cardstock. I sent them through two at a time, then cut them out, and sent them through one at a time. I could have done just one at a time to begin with, but I would have used twice as many laminating sheets. It was worth it to me to just do it twice!
7. After they’re laminated and trimmed, make sure they are in the right order! I’ve done the binding a couple of different ways, but this time I used three silver book rings to keep the book together. Use a hole punch to punch three holes in each page. I did one page, then used it as a guide for all of the other pages, to ensure they would be in the same place. Then you can slide them on your book rings!!!
8. Now…the ribbon. ☺ I went page by page, and stapled a piece of ribbon in different places, so that when the book was closed, there would be ribbon around both sides and along the bottom. Once I had done each page, I found that there were some spaces that needed to be filled in, so I just added another piece or two to some pages!
You’re done!!! YAY!!!

I am so excited to read this craft idea today. My 2 granddaughters are coming this week to visit. I always plan crafts for them when they come. On my list today was to firm up the plans. This is just what I need!! I am grateful for the ideas that come from Kierste!! Thanks!
That sounds perfect!! I think they’ll love being a part of the process!! I’m glad you love it. :) xoxo
What a great idea! You make it look so easy to make. Definitely going to make this for my little guys!
It’s totally easy—really! I hope your little guys love them as much as mine do…but I think they will!! Let me know if you have any questions. xoxo
Absolutely adorable!! I love the pictures and ribbon. Love, love, love it!! Thanks so much for the awesome idea!!
You are so welcome, and I’m glad you love it too! The ribbon is always my favorite part. Oh, and the pictures, of course. :)
This is EXACTLY what I was looking for! I knew I wanted to create an ABC book for my boys using our own pictures, but I wasn’t sure how to go about it. Thank you!
Yay!! I’m so glad you found me!! :) xoxo
What were your letter ideas for Q, V, W, X? I’m going to make these for my grandsons and I’m stuck on those letters.
Q: Quiet (pic of napping, quiet time, etc.)
V: VERY tired, VERY cute, VERY…
W: Watermelon, “watching…” (whatever they were looking at)
X: eXcited :)
Hope that helps!