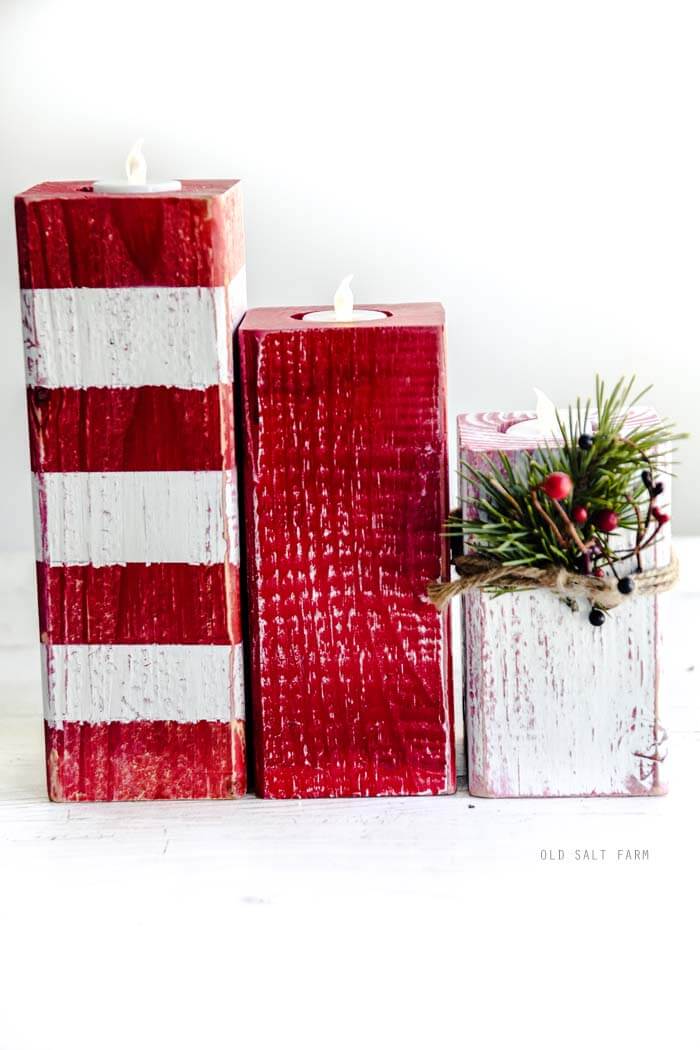
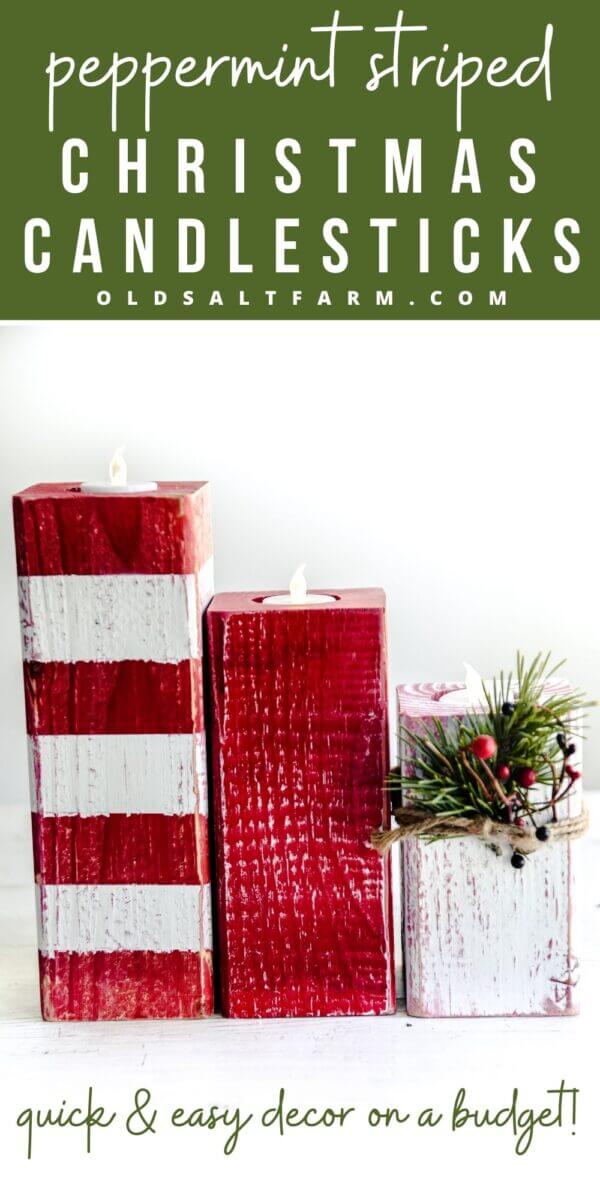
Christmas Peppermint Striped Candlesticks
Darling Peppermint Striped Christmas Candlesticks that are super easy to make, and perfect for your Christmas decor!
 I really love the striped and polka dot pumpkins I made this fall, and I thought the stripes would be perfect for the peppermint theme, and to add to my Christmas decor.
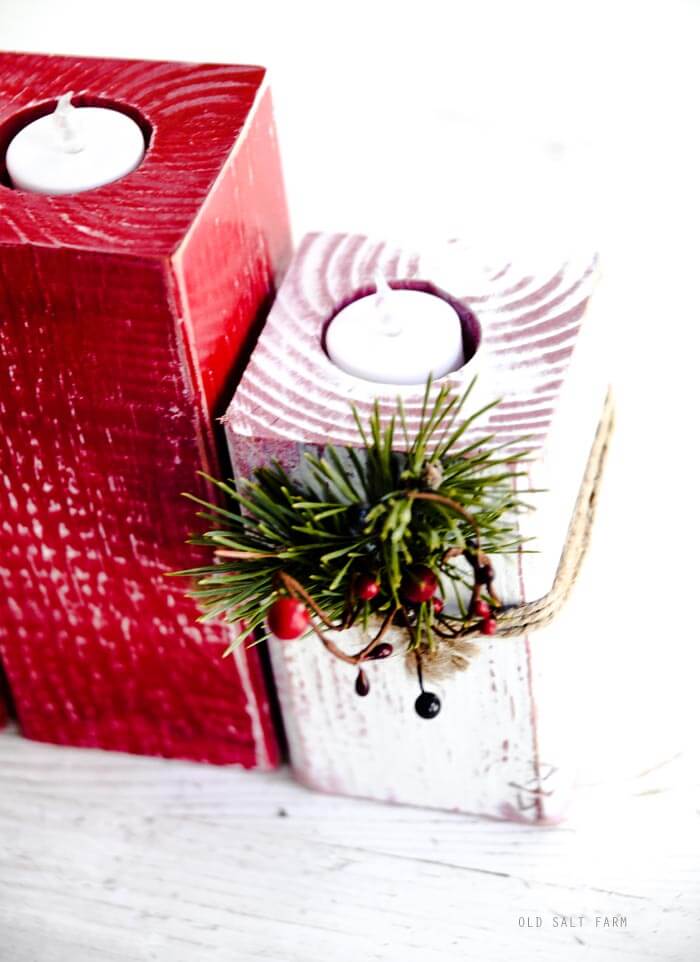
I made a set of three–a stripe, a plain white, and a plain red, then made them into candlesticks, by drilling a space for tea lights. They’re so quick and easy to make. They were done in an afternoon, and that includes drying time!
Peppermint Striped Christmas Candlesticks
Affiliate links are included below for your convenience. If you click on a link and make a purchase, I’ll receive a small commission at no extra cost to you.
SUPPLIES:
- -4×4 post, cut into 3 pieces, 10 inches, 8 inches & 6 inches (or other desired sizes)
- -Frog Tape
- -Spray Paint
- -Sander
- -Drill
- -1 1/2 inch spade bit
- OR 1 1/2 inch. Forstner bit
- -Twine/Jute
- –battery operated tea lights.
DIRECTIONS:
I used the same technique to make the stripes as I did with the pumpkins!
For the plain pumpkins, I like having the colors layered, so I painted the white post red first, then white, so when I sanded and distressed it, it would be white with red peeking through. The opposite would be for the red post. I also painted the entire striped post red first, then added the tape for the stripes and painted white on top. After the paint was dry, I used a sander to distress each piece.
I used a 1 1/2 inch spade bit (you can get them for as low as $6 as Home Depot) on my drill to create the opening for the tea lights. Sometimes a spade bit can be a bit tricky at that size–I used it because I had it–but a Forstner bit’s blade is designed a bit differently.

I have these on my kitchen table and LOVE them! They would be darling for party centerpieces, and can be used indoors safely if you use battery operated tea lights. They would also look cute on a mantel, entry table, window ledge, and probably anyplace. ☺ I’m crazy about stripes, admittedly!!

Don’t forget to check out my new book, Simply Tradition: 70 Fun & Easy Holiday Ideas for Families. It’s chock full of holiday traditions, ideas, and recipes for every family–and it makes a great gift!
These are so cute and clever! Pinning!
Thank you, Miss Kristen!!
Totally in love with these!! Pinned and shared on Facebook!
Thanks so much, Leigh Anne!!!
Seriously the cutest, girl!! Love these!
Thank you, girls. :)
I absolutely LOVE these Kierste. They are adorable!!
Mique, thank you!!! xoxo
Cute, cute, CUTE!!!
Thank you, Katie!!! For stopping by, and for your comment!!! xoxo
These are awesome, Kierste! I love it. Pinned!
Thank you, Mariel!!! xo
Hi Kierste,these are really the BomB!! so cute I love your work all ways amazing….Thank Merry Christmas….
Thank you so much!!! Merry Christmas to YOU!! xo
Such a great idea, I absolutely love these!
Thank you so much, Shelly!!! Merry Christmas!!
Super cute!! I’m in love with the stripes!
Thank you, Ingrid! I’m in love with stripes too!
These are super cute, thanks for sharing your fun idea!
You are so welcome! Thanks for stopping by!!
Love these…adorable!!!!
making them… might make one set with chevrons… hmmm
That would be adorable too!! Send me a pic if you do!!
These are really cute. What kind of spray paint did you use and how did you distress them? Could you use acrylic paint? Can you do the distressing with sand paper or do you need a power sander? Did you put some kind of finish on them after all was done?
Thank you! I used Krylon’s Cherry Red spray paint, and Rustoleum’s white spray paint. I used a power sander to distress them, which is infinitely easier and faster, but you could definitely use sandpaper. I would use a medium grit. I didn’t use any kind of finish, because they don’t get any wear or tear. Good luck!!! xo
Would you be able to use normal tlights or just the battery ones.
I just used the battery-operated ones, so I could use them safely in the house, and not worry about fire.
Hi Kierste,
I am going to do a Holiday Craft party and would like permission to make your candlesticks! My friends have seen them and want to make them :)
Christina
Of course!!! I’d love to see pics when you’re done!!! xoxo
and, we love them!
I’m so glad!!! :)
These are so darling they’ve inspired a girls night craft night with my besties!!! Thank you for sharing your creativity!
These are the perfect craft night project! Have SO much fun with your besties!
Super duper adorable!
Could I use acrylic paint on these? I am making them this week yay!
Yes, you can! You will probably need more than one coat for good coverage, so plan accordingly, but it will work! Have so much fun!!!
I love all your crafts! I’ve made the 4×4 pumpkins and now I’m about to finish these peppermint candle sticks! I can’t wait for the 4th of July flag 4×4’s! They are all super easy and super cute! Thanks Kierste!
You are so welcome! I have to say, they are some of my most favorite crafts too!!! xoxo
Iam making these candles how do I get the circle wood out I really hope someone reply
Thanks
Hi, Sherri! I used a router to take out the circle on the top–I explain more about it in the post!
Could you please tell me what kind of wood your posts were that you used. Thanks so much, love your stuff!
I used untreated 4×4 posts!!! Thanks so much for reading!!! xoxo
I’m making these today with 25 friends! Can’t wait to share the photos with you!
Oh my goodness, how fun!!! Can’t wait to see them!
These are so darling! I made the pumpkins with some friends this fall. We loved them so much, we are making these! Just a question. Could we use acrylic paint instead? I’m worried it is to cold for spray paint. Thanks!
Yes, you can definitely use acrylic paint! You may need an extra coat, so plan accordingly, but it will totally work. Enjoy!!
These are adorable, have been looking for some stylish but easy to make Christmas decorations and these are perfect!
So glad you love them too! Thanks so much for stopping by!! xoxo
Love these! Making them tomorrow for my daughter for Christmas! Can you tell me the names of the fonts you used for “peppermint Striped Candlesticks” please?
Sure! peppermint= Sacramento; striped= Ostrich sans inline; candlesticks= Ecuyerdax
Beautiful! I’m making these for my Ward Christmas Party Centerpieces!! So excited!! Did you use paint or spray paint?
Oooopss…I just ready the comments and there is the answer! Thanks Kierste!
Glad you found the answer! These will be perfect as centerpieces!!! xoxo
These are so cute
Thank you so much, Cyndi!! xoxo
Having lots of trouble trying to make the candle hole in the top. Looks all chewed up and not smooth like photo. Any tips?
Sometimes a spade bit in this size can be a little tricky. You can also try a Forstner bit (amazon affiliate link: http://amzn.to/2yHKdjy, and you could try Home Depot too), the design of the blade is different and thus should remedy the issue. Good luck!!!
Hi there! I made these and mine look much more rustic than yours, I don’t know why. I sanded the wood prior to painting, used acrylic paint and masking tape but the paint still
Bleed through so the lines are not perfectly straight. Then I sanded with a sanding block but it didn’t give enough of a rustic effect so then I did a sanding belt but not they look too warn out lol.
Not sure if I can some how send you a photo of mine and maybe you have a suggestion to get them looking more perfectly rustic? Lol
Sure! Send me a photo to simplykierste@yahoo.com!
Thinking about creating these with a mom’s group. We have about two hours on one evening. How much would you prep ahead of time? I am planning to have my husband and son cut the 4x4s to size and bore the holes. Would we have time to paint both layers – given the dry time needed? My fear is that stickers and tape put on too soon might pull up the base layer of paint. Also, we cannot use spray paint in our venue. What is your opinion of using chalk paint? It seems to dry fast and we could rub it with a clear xax afterward!
Hello! Two hours can be tricky for both paint layers to dry completely. But chalk paint is definitely an option, and acrylic-based chalk paint dries in between 20-30 minutes. That would give you enough time to finish the project, plus add your layer of wax. You can find chalk paint by Waverly or FolkArt at Michaels, Walmart, and Amazon–I’ve seen some really nice red hues! I would do a sample ahead of time, just to see how quickly it actually dries. When you choose your 2x4s, try to find the dryest pieces–that will help your paint dry faster too. Good luck, and have so much fun! Let me know if you have any other questions. xo