Easy DIY Thanksgiving Plates
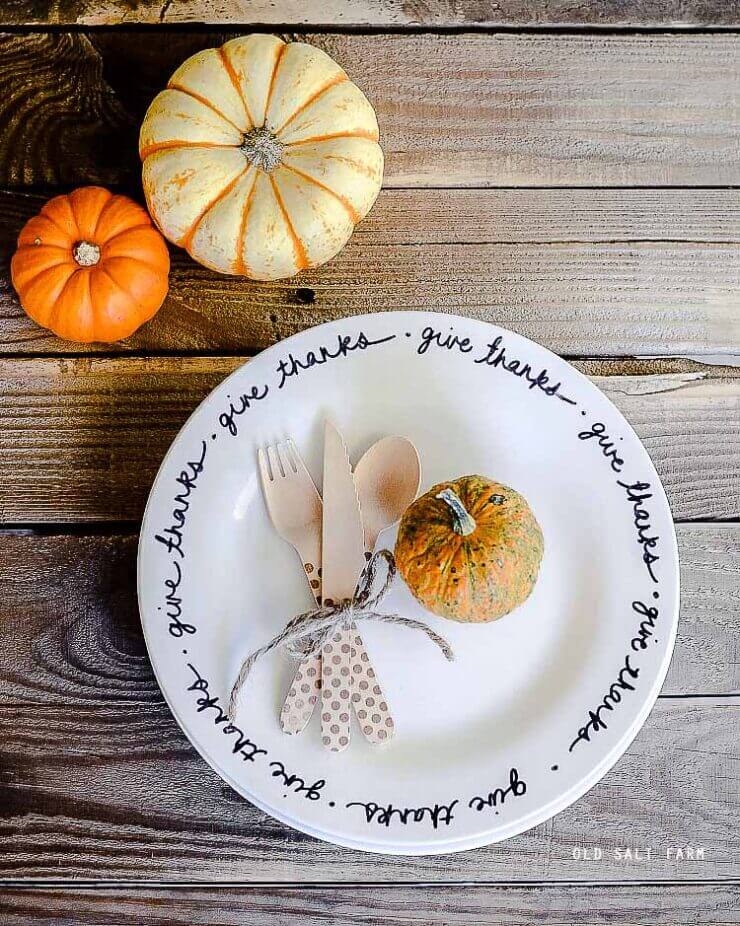
Make DIY Thanksgiving plates for dinner with your family and friends in minutes. It is SO easy, and very cost effective, and perfect for customization with names or thanksgiving text. Make a set of 12 for $15!
Gathering with friends and family is the best part of Thanksgiving. Favorite recipes like our Homemade Bread Cubes for Stuffing and Baklava Pie, making a Thanksgiving tree, and setting a Thanksgiving table are just a few of the things we look forward to. Years ago I made custom DIY Thanksgiving plates to be used every year for dinner. They turned out so cute, and best of all, they were SO incredibly easy.
The secret includes a Sharpie marker and the Dollar store. You’ll love the results, and can customize then any way you like!
Table of contents
Have you ever used a Sharpie to create designs on dishes before? It’s SO EASY! Seriously. I wrote “give thanks” all around the edges of my plates, and it took me less than 15 minutes to do all of them. After the ink dried, it’s into the oven for 30 minutes, and you’re done. That’s it!
I could have designed something, and done a stencil instead of writing it myself, but I honestly was feeling impatient. I also love the hand-lettered look, and think it adds a ton of cozy charm. You can make yours however you want to—whether you want to go the stencil route, or just free hand like I did.
Supplies
- White ceramic plates (make sure they’re oven safe!)
- Sharpie
Sharpie tips
- You can use just a regular Sharpie like I did, or an oil-based Sharpie will last longer than a regular one.
- I prefer the fine tip Sharpies, as opposed to ultra-fine tip or thicker. The ultra fine is harder to see the text, and the thicker sharpies make it trickier to write legibly on the plate. It is a personal preference though, and you can use your favorite.
- Sharpies are non-toxic, but their website recommends not writing where it will come in contact with food, so that’s why I stayed on the edges of the plate.
- I love the contrast of the black and white, which is why I chose it, but Sharpies come in all sorts of colors!
Plate tips
- You’ll need oven-safe ceramic plates
- And my secret to the best plates at the best price? The Dollar Tree. I’ve been getting high-quality ceramic dishes there for a long time, and they are only $1 each! You just cannot beat that price. I bought enough for 16 place settings, and spent—$16. I also bought the dishes for my Christmas plates there, and it’s my go-to place for white plates for all sorts of projects.
- I found a set of 12 white ceramic plates on Amazon for less than $30, so if you don’t have a dollar store, or can’t find them there, there are other options that aren’t super pricey. Check Walmart, Target, and even places like Hobby Lobby may carry them.
How to make
- Design and decorate your plate as desired. Let Sharpie ink dry completely.
- Place the plates in a cold oven, then turn it on to 350 degrees. Bake for 30 minutes, then turn off the oven and leave the plates inside until they’re totally cool to reduce any cracks.
How to wash
Even though your plates may be dishwasher safe (make sure you check before buying), washing them by hand will make the design last a lot longer! Since they are Thanksgiving plates, and using them likely once a year, they won’t get as much use, which will help them last. But
More fall ideas…


Enjoy your cute plates! Don’t you LOVE an easy, adorable project? My favorite!
Don’t forget to check out my new book, Simply Tradition: 70 Fun & Easy Holiday Ideas for Families. It’s chock full of holiday traditions, ideas, and recipes for every family–and it makes a great gift!

*Originally posted 2015.

