DIY Buffalo Check Wood Pumpkins
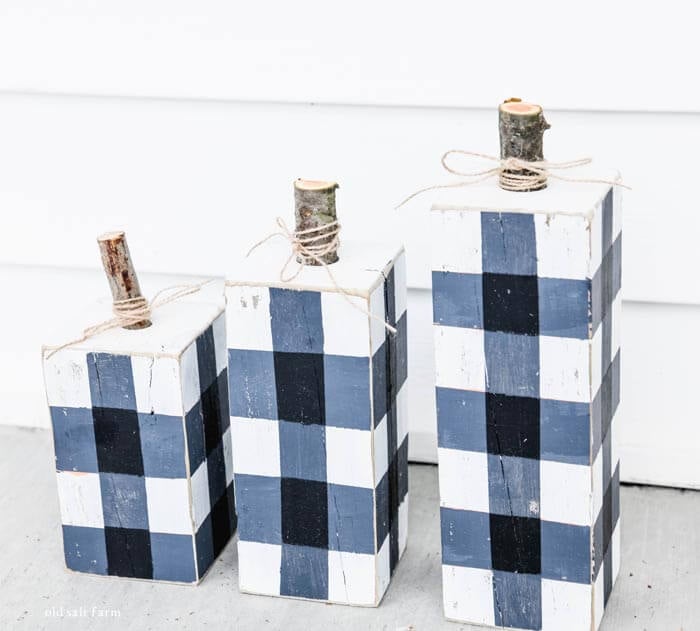
Make these buffalo check wood pumpkins in an afternoon! Made out of 4×4 posts, they’re inexpensive, perfect for the whole fall season, and absolutely adorable!
Years ago I made the cutest striped and polka dot pumpkins out of 4×4 posts. They were an instant hit, and even though you can now find knockoffs all over Pinterest and Etsy, this is the home of the original This fall I decided to make another version of these wood pumpkins, and painting on my favorite buffalo check pattern. I’m absolutely in love with how they turned out, and I can’t wait to show you how to make them too!
DIY Buffalo Check Wood Pumpkins
You’ll love how easy these are to make. The buffalo check pattern looks tricky when first glancing at it, but you can do it in just a few steps, with a bit of paint drying in between. I even made these in an afternoon, and it went really fast. There is lots of painters tape involved, but it’s a straightforward process with the cutest results ever!
Buffalo check has been all the rage for several years now, and I still see it everywhere. I’ve long been a fan of gingham and buffalo check (it was even part of my wedding decor more than 20 years ago!), and I’ll always love it. It makes me happy that it’s still so popular, and I figured it was about time I made a set of these pumpkins!
You only need a few things to make these wood pumpkins…
Affiliate links of products I use are included for your convenience. Please see my full disclosure here.
Supplies to Make DIY Wood Pumpkins
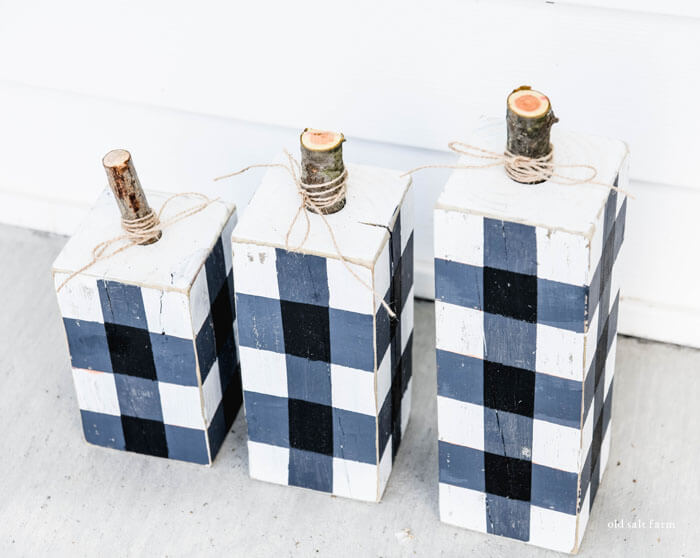
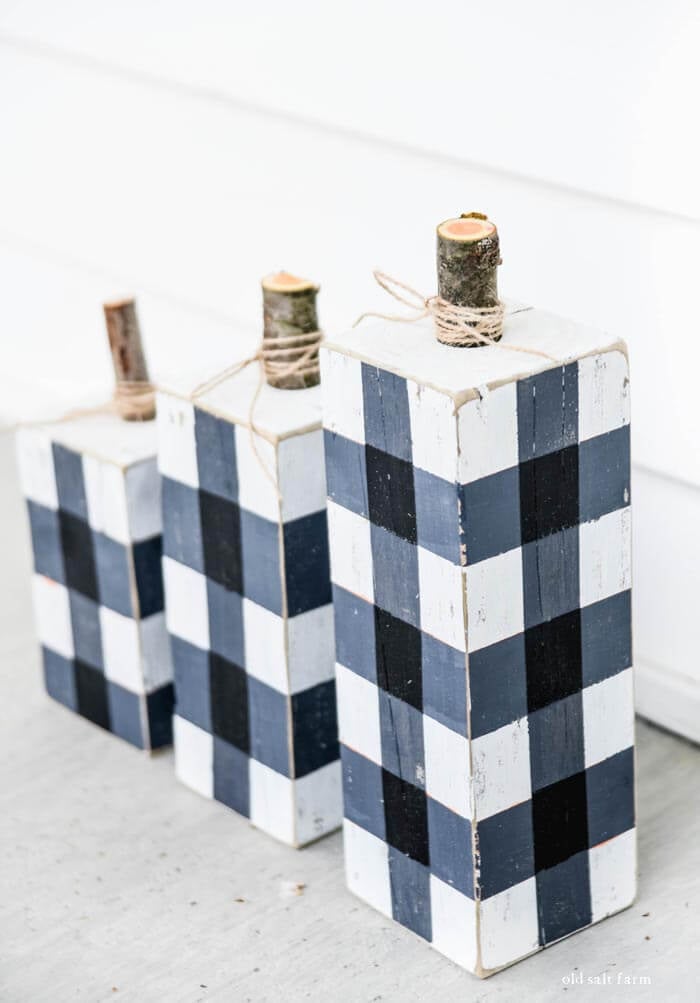
- 4×4 posts, cut to size: 6, 8, and 10 inches (or as desired)
- 3 colors of craft paint (light, medium, dark)
- foam brushes
- 1.4 inch painters tape (36 mm, Frog Tape)
- drill and forstner bit
- branches for stems
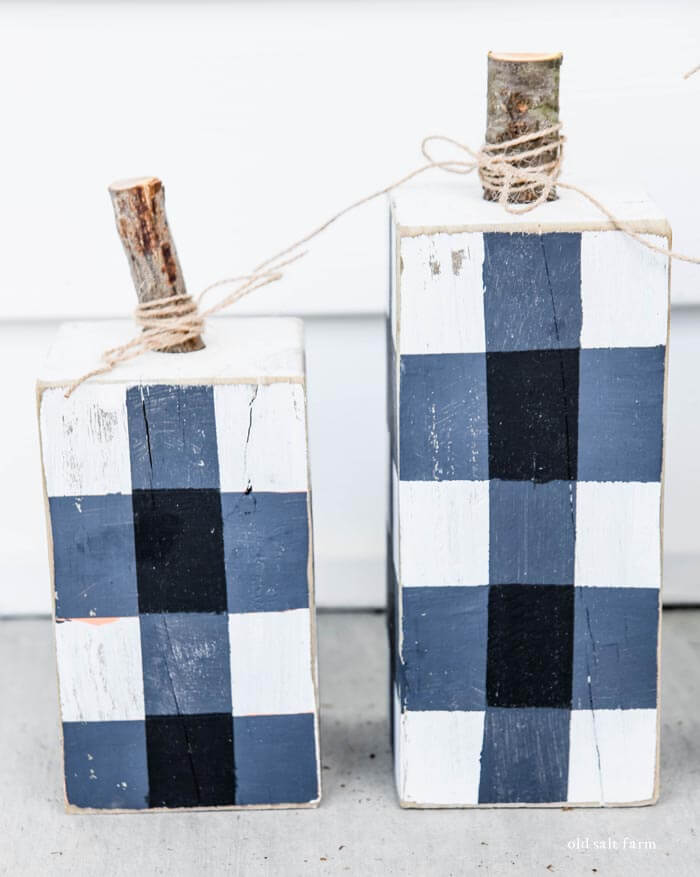
I chose to do a black and white buffalo check, and used white and black paint only. To create the medium shade for my third color, I mixed the black and white to create gray. If you’re using white as your lightest color, it’s super easy and a great idea to just mix it into your darkest color.
You can add more or less white paint to create the exact shade you’re looking for, and best of all, it will be a perfectly matched tone. You can also always choose three separate colors…whatever you like best!
For a more rustic and weathered look, just paint one coat for each step. This is what I did. If you like a more clean and solid paint look, you may need to add two coats.
How to Make Buffalo Check Wood Pumpkins
Join me as I made them, while watching this step-by-step tutorial!
I like to see directions written out, so I’m including them here, as well as the video that shows the whole process. It may make it easier to visualize some of the steps. Even though they’re simple, it’s nice to see how it works!
- Paint the 4×4 posts with your lightest color in their entirety, and let dry.
- Add painters tape going vertically from top to bottom, on each of the four sides of the post. Use a separate piece of tape as a spacer, so you get the most even stripes. Using the 36mm Frog Tape gives you pretty good spacing, with just a few minor adjustments.
- Paint the open areas with the medium color shade. If using white as your lightest color, mix it with your dark color to create the medium shade you love best. Let dry.
- Remove the tape. Place more tape going the opposite direction of the stripes you just painted–vertically on the posts. The tape doesn’t fit exactly right, so I eyeballed it and placed the tape so it would give me three even sections (two covered with tape, one without).
- Paint the open areas with the same medium color, and let dry.
- This time, do not remove the tape! You’ll be able to now see lines on your post–darker stripes of gray, and lighter stripes of gray. Re-tape over the lighter lines of gray you can see (this is where you originally taped the very first time).
- In the open areas, paint the darkest of your three colors. Let dry.
- Remove all the tape, and voila! Buffalo Check Wood Pumpkins!
- If you like a more distressed look, sand all the edges with a power sander.
- Use a forstner bit to drill holes in the top of your posts for the stems. (You can do this step in the beginning of the end.)
- Cut branches in the right width to the length you want. You may want to match your branches to the bit size if that’s easier!

You’re ready to display your pumpkins! They’ll look darling on a shelf, table, mantel, windowsill, front porch…or anywhere. Such adorable fall decor, from September through November! I love the black and white check, because I can utilize it for both Halloween and fall decor. Orange was initially the color I was planning to use, but I switched at the last minute. I may need to make another set!
