Farmhouse Wood Framed Christmas Ornaments
This is such a fun Christmas for our family! The last two years our Christmas decorations have been in storage, along with the rest of our things, while we were in the home building process. It’s so wonderful to have them back, and the past few days we’ve loved going through them and becoming reacquainted! Most of the ornaments are on my tree are handmade, and every year I make a new one. This year I was inspired by my favorite farmhouse sign, and I made these adorable Wood Framed Farmhouse Christmas Ornaments that I just love!
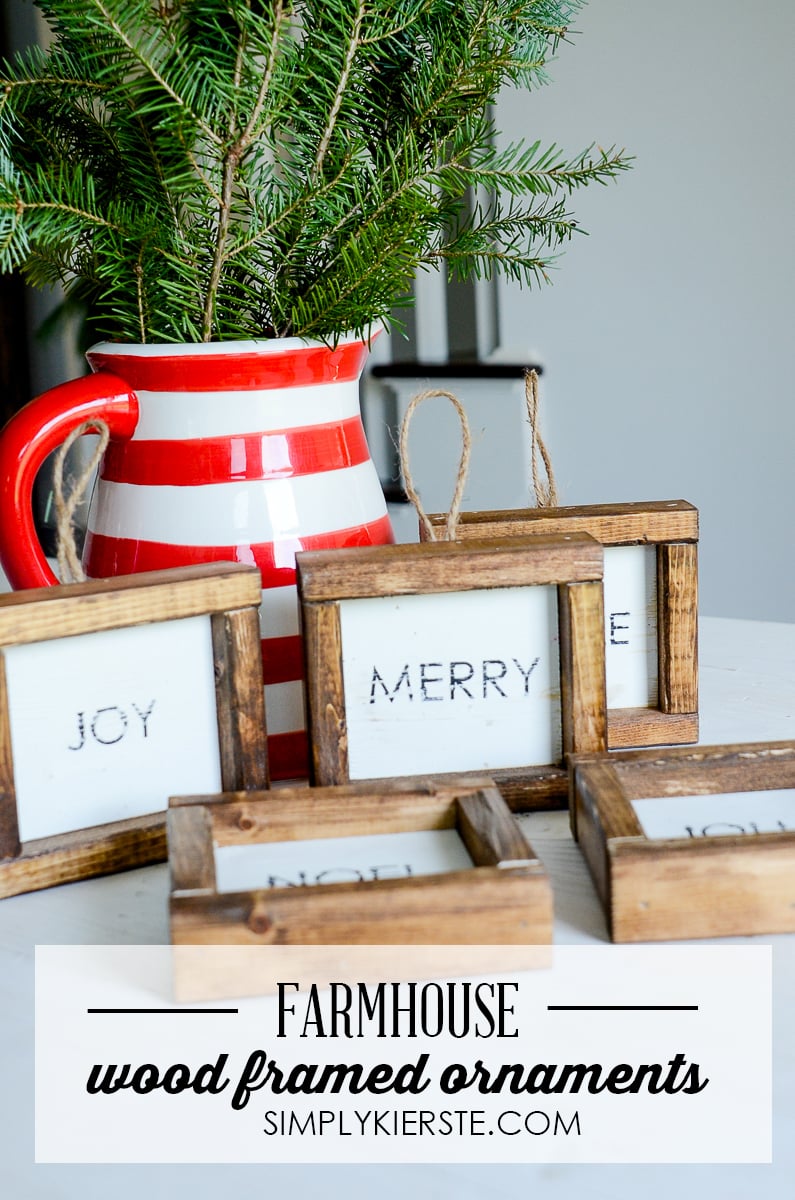
Aren’t they darling? I keep staring at them on my tree! And the best part is is that they couldn’t be easier to make. I made them in an afternoon, and that’s even with the drying time.
![]()
I used Christmas words: Merry, Jingle, Jolly, Noel, and Joy. If you wanted to switch it up and give it some personalization, like names or initials, I think it would be so cute! What about a teacher’s name? She could hang it on a tree, or even have it sit on her desk. Either way, it’s adorable!
![]()
FARMHOUSE WOOD FRAMED CHRISTMAS ORNAMENTS
SUPPLIES: (affiliate links included below)
-1×2 furring strips
-1×4 board
-white paint
-black paint (or other desired color)
-stencil (I used vinyl)
-sander, or sandpaper
-twine/jute
DIRECTIONS:
Cut the 1×4 board into 4 inch lengths. Since a 1×4 is really around 3.5 inches in width, it will give you a piece of wood about 3.5 x 4. You can go smaller if you want to, but I wouldn’t go bigger if it’s intended to hang on a tree–it will be too heavy.
![]()
Stain the wood tops and furring strips. (I used Minwax Provincial.) Once the stain is dry, apply white paint on the wood pieces (NOT the furring strips). Let dry completely.
![]()
![]()
Apply your stencil, and use the black paint and foam brush to cover the stencil well. You can also use other colors if you like–red would be super cute for Christmas too!
Once the paint is dry, do any sanding you would like to do to distress the wood and the words. I wanted mine pretty distressed and the words even a little faded, but you can definitely do less distressing if you want to. Wipe off the excess dust.
Cut your furring strips into four pieces,, and in the lengths you need to go all the way around your ornament. For detailed directions on this, you can see my DIY Framed Wood Farmhouse Sign post!
The last step is to cut a piece of twine, fold it into a loop, and staple it to the back of the top furring strip on the ornament.
And you’re finished!
![]()
![]()