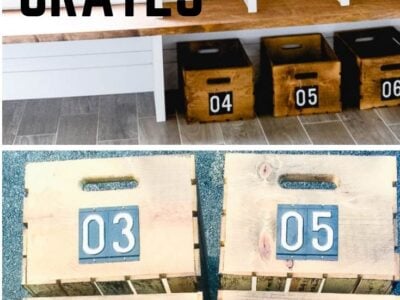
Easy DIY Numbered Crates
Easy DIY Numbered Crates, perfect for a mudroom, bedroom, pantry, office, and more!
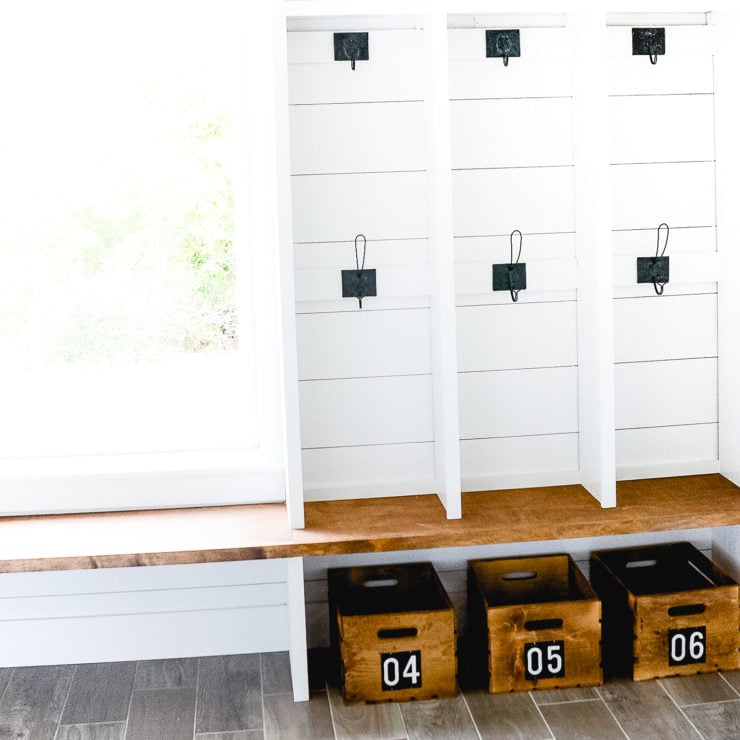
Before we moved in to Old Salt Farm, I had a huge project list. I wanted to get as many things done ahead of time as possible, and one of the items on my list was numbered crates for the lockers in the mudroom. (I think the locker area is one of my most favorite places in the house, and we designed and built it to meet our needs.) I decided on using crates because they’re durable, adorable, and inexpensive!
Aren’t they perfect? Buying baskets can really add up, plus because the room is white, I wanted to add some wood for contrast. I LOVE LOVE LOVE how they turned out, and they are SO SO simple to make! It’s an easy afternoon project, with no special tools required.
DIY NUMBERED CRATES
SUPPLIES:
(affiliate links included below for your convenience)
-stain (I used Minwax Provincial)
-lint free cloth
-numbers (info below on where I got mine)
-hammer
DIRECTIONS:
*Stain your crates! I used Provincial by Minwax, which is my favorite. It’s a medium brown color with no red, which is what I did throughout my home. If you are doing them by hand, I suggest using a lint free cloth. I actually used a paint sprayer, which is kind of my best friend. I stained 15 crates in less than 30 minutes! It’s the best money I’ve ever spent–it has saved me hours and hours of time!
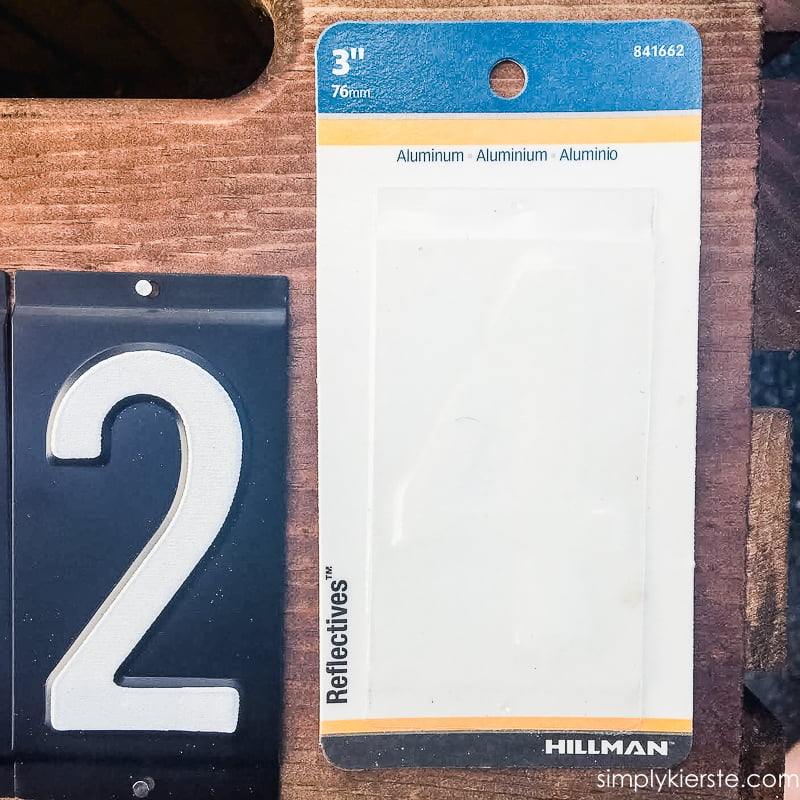
*Once your crates are totally dry, you’re ready to add your numbers. I had thought about painting on the numbers, which I love too, but I wanted something different–something that would stand out against the stained crate. I found the CUTEST numbers at Home Depot where they have all the house numbers, and I knew they would be perfect!
My kids each have their own number, which is attached to just about everything–their shoe basket, towel hook, kitchen stool, etc. It’s just so much easier for them and for me, so we all know where everything goes. They are numbers 1-6, and then I decided to add a 0 in front of each number to mix it up a bit. LOVE!
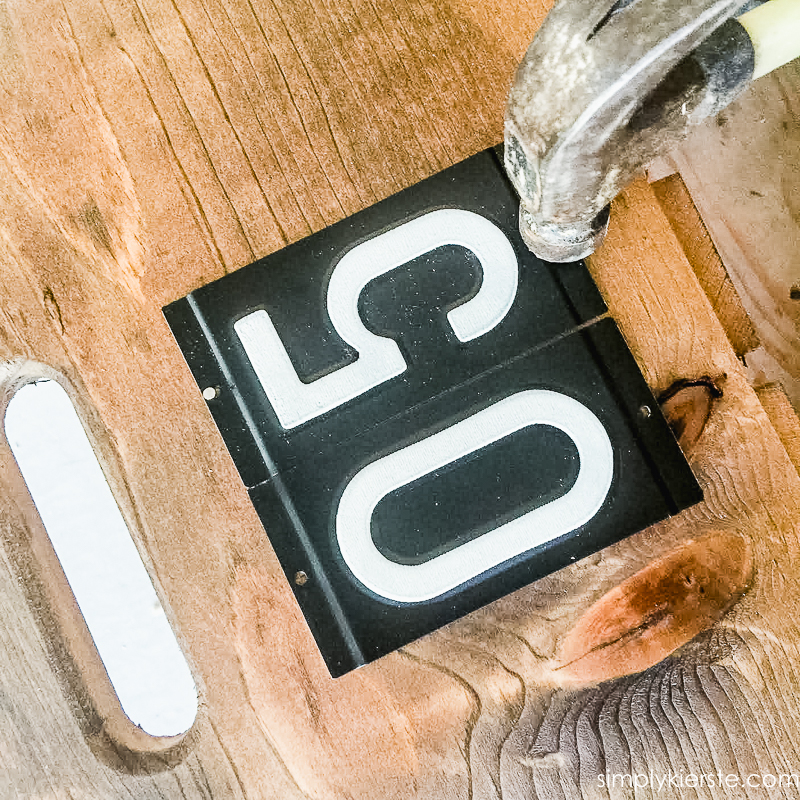
I used 3/4 inch nails to attach the numbers. They’re just a little too long for the crate, so don’t hammer them all the way through, or they’ll poke out the back. We couldn’t find any nails that were shorter, but had a big enough head for the holes, so this was the best answer.
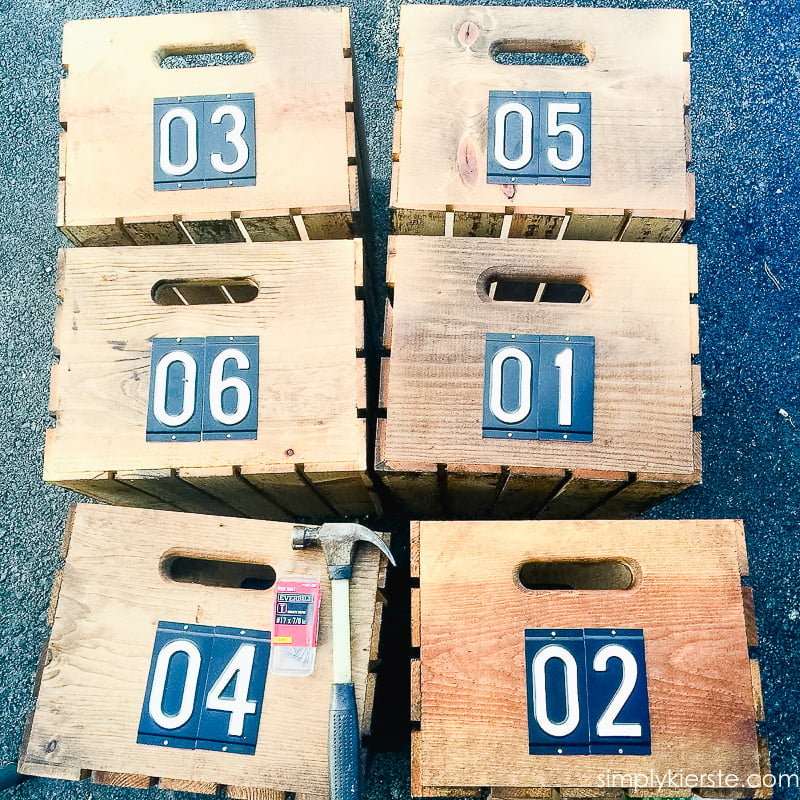
And that’s it! Seriously easy and adorable. And the total cost? $10 per crate! I bought the crates at Michael’s with a coupon, and the numbers were $1 each (total of $2 per crate).
They are absolutely perfect for the space, and are just what I was looking for!

I’ve been looking for an organization solution for my mudroom area and this is perfect! I LOVE the crates! Totally doing this! Thanks for sharing!
YAY! So glad you love them too!! xoxo
Very nice touch to a beautiful mud room!!
Thank you so much!! xoxo
Every thing you do is all some Thank’s showing us way do thing’s…
Thank you so much!! xoxo
Are the hooks from IKEA?
No, they’re from Hobby Lobby!
Hi there. I just came across your blog a few weeks ago and get so excited every time there is a new post! I recently just started blogging because our family of 5 is building a new home on 10 acres. Our styles are so similar and its seems our home adventures are similar as well. While we just finally received our building permit I have been going through all of your posts so I can prepare for what’s to come! I was wondering if you by chance have any recommendations on farmhouse ceiling fans? My husband is adamant on our bedroom having one and I just can’t seem to find one to fit “the look” I am going for. Thanks in advance and I am so excited to follow along with you!
We actually don’t have one ceiling fan in our entire house!! I wish I had more info for you. But I know I’ve seen posts on them, so if you google farmhouse ceiling fans, I’ll bet you find something. Good luck on your own home building adventure! I’m so excited for you! It’s definitely a journey, but totally worth it. xoxox
Thank you so much
You’re so welcome!!
Love your mud room. I live in Iowa, “in the country,” with three kiddos, and a mud room is a must. I do not have a flooring fetish, but once I saw this post, I have to ask…
What kind of flooring are you using in the mud room?
Yes…the flooring in the mudroom was very carefully chosen! It’s a wood tile–looks like hardwood, but it’s really low maintenance tile! I choose grey with a dark grey grout, and they don’t show dirt. I love love it, and it’s perfect in the mudroom!! xoxo
Where did you get the mud room light?
It’s from Amazon!!! I absolutely love it—it’s one of my favorite lights in the whole house! http://amzn.to/2izhSnw (affiliate link)
Where did you get the hooks that are at the top of your mudroom lockers. I already have the same ones you have on the bottom section, but don’t know where to get just the half hooks like it looks on top.
My husband and I are getting ready to start our dream farmhouse this year. I love your home!
Rebekah Embree
Hi, Rebekah! Both sets of hooks are from Hobby Lobby. but I don’t think they sell the top ones anymore!