How to Hang Outdoor String Lights on DIY Posts
An easy way to hang outdoor string lights, these DIY posts can be placed any where you need them to be, transforming your outdoor space, making it more beautiful and functional. Create a cozy space for entertaining family and friends in an afternoon!
Affiliate links are included below for your convenience. When you click on a link and purchase something, it helps support this blog, at no extra cost to you.
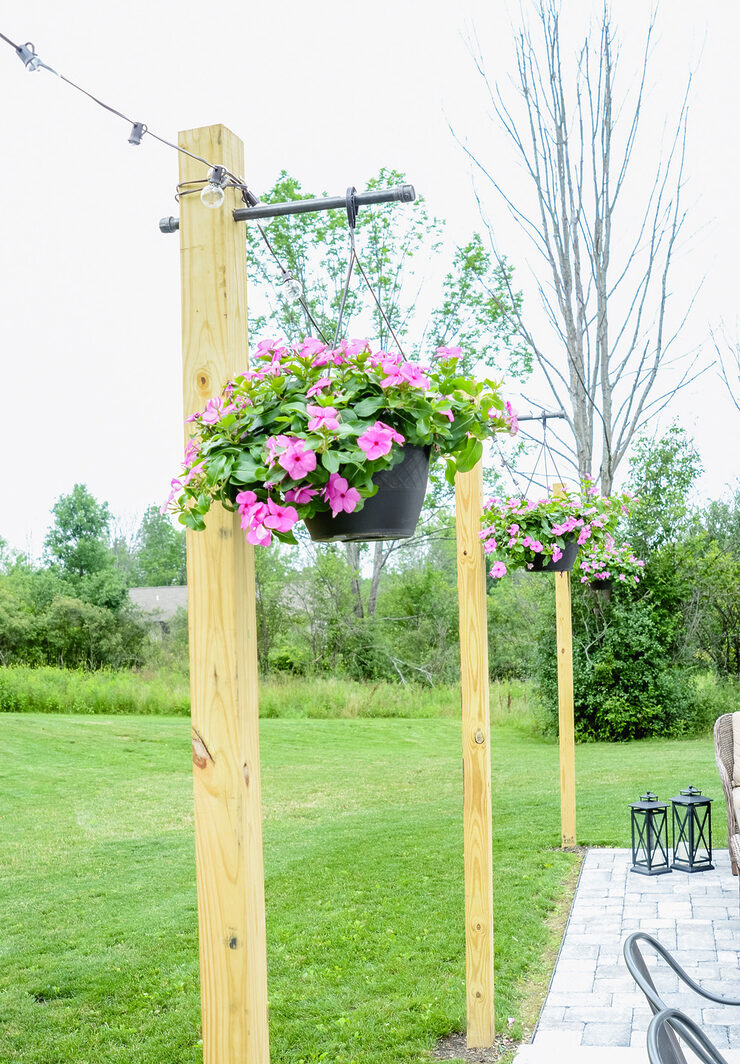
Even before we moved into Old Salt Farm, I knew that I wanted outdoor string lights on our patio. But with no trees close enough to hang them from, we had to come up with a different plan. We lined the patio with posts to string the lights. Adding bars to hang flowers was the perfect touch, and I love having them out there through the spring, summer, and fall. Best of all, this is an easy weekend project.
We have a patio, but you can do the same thing with a deck– just add the light poles around the edges in the same way. Using solar string lights has made a world of difference. It also eliminated the need for an extension cord having to go across the patio, or an outlet with a plug nearby. We have them in several places around our yard, including up by the fire pit area in the woods.
Not having to worry about cords has been such a lifesaver, and it makes it look so much nicer if they’re not in the way. We don’t live where it’s sunny all year, and it snows about half the time! But that’s never been a problem, because we don’t use the patio during the winter, and there’s always enough light from the spring through the fall months.
Table of contents
Project Time and Cost
Total cost for 4 posts: right around $100 (this depends on lumber costs, which can vary in price)
Average project time: 2-3 hours + drying time for the cement
Supplies
- 10 ft. or 12 ft. pressure-treated 4×4 posts
- Quikrete Fast Set Concrete Mix (we used 40 pounds per post)
- Shovel or Post Hole Digger (Auger)
- Outdoor String Lights
- Black Steel Pipe–flange and caps, 3/4 inch (to hang the flowers on)
- Post and pipe level
- Hanging Flowers
How to make
- Decide where you want your posts, and how many you need. Make sure you buy pressure-treated lumber! Depending on how far down your posts need to go, so you may want to get a longer post. I suggest having them be about 8 feet above ground, so they’re high enough for lights. See #2 below, for info on how far down your post needs to go.
TIP: If you use pressure treated lunber and want to paint or stain the wood, you have to wait until the posts are completely dry–about a month or so.
- Dig the holes for your posts. How far do you go down? That will vary by location. Check the frost level in your area, and you’ll want to dig down that far. (Here’s a map you can look at, or ask your local hardware store.) If you don’t have to go too far–18 inches to 2 feet–you could use a shovel. Any farther down than that, and you may want to consider renting a post hole digger (auger) from your local hardware store or tool supply company. Even though we live in rural area, we’re lucky to have a tool supply company very close. We have a trailer so we can pick rented tools up, but check with the store about delivery, which they will often supply. If you’re going down 4 feet, it’s a very big 2-man auger, and you’ll need two people that can handle. I was able to do it with my husband, but I definitely got my workout in for the day!
- Mix and pour cement. We used 40 pounds per post. The fast setting concrete mix dries very quickly, so you can just hold the post level for a few minutes, and it will be dry enough to walk away. You will have a few more minutes to make adjustments if you need to (won’t be completely solid for a couple hours). A post and pipe level is extremely helpful to ensure that your post is totally straight–makes it so much easier, and I highly recommend it!
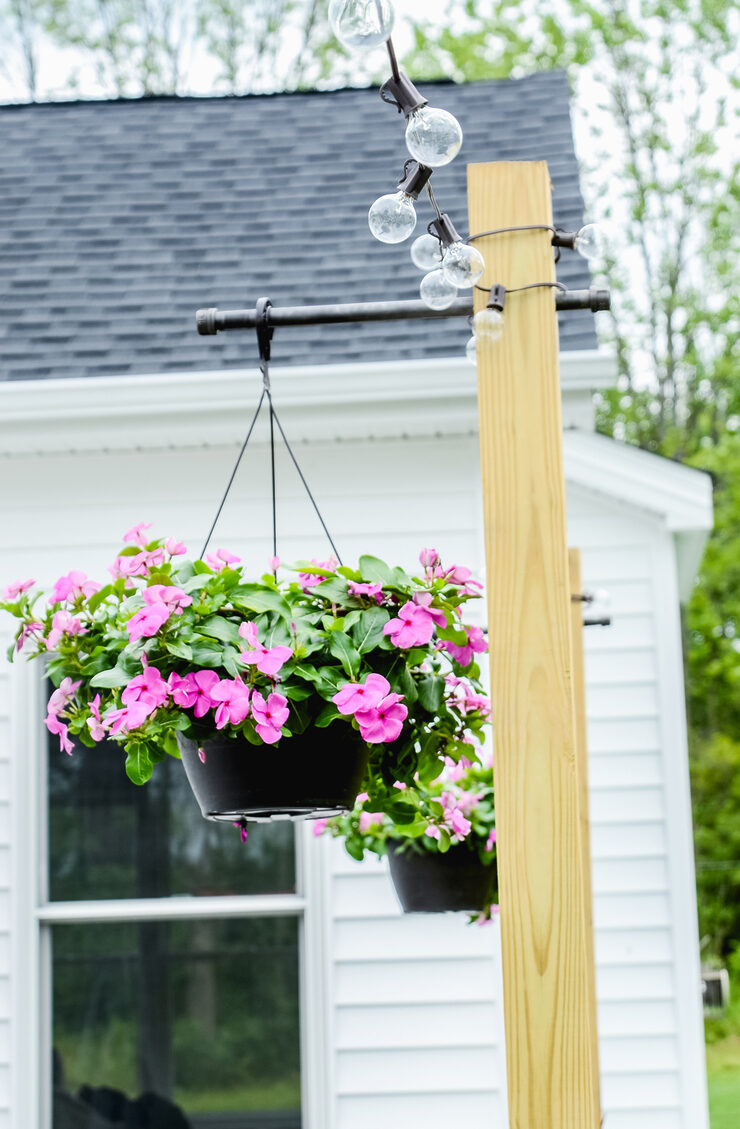
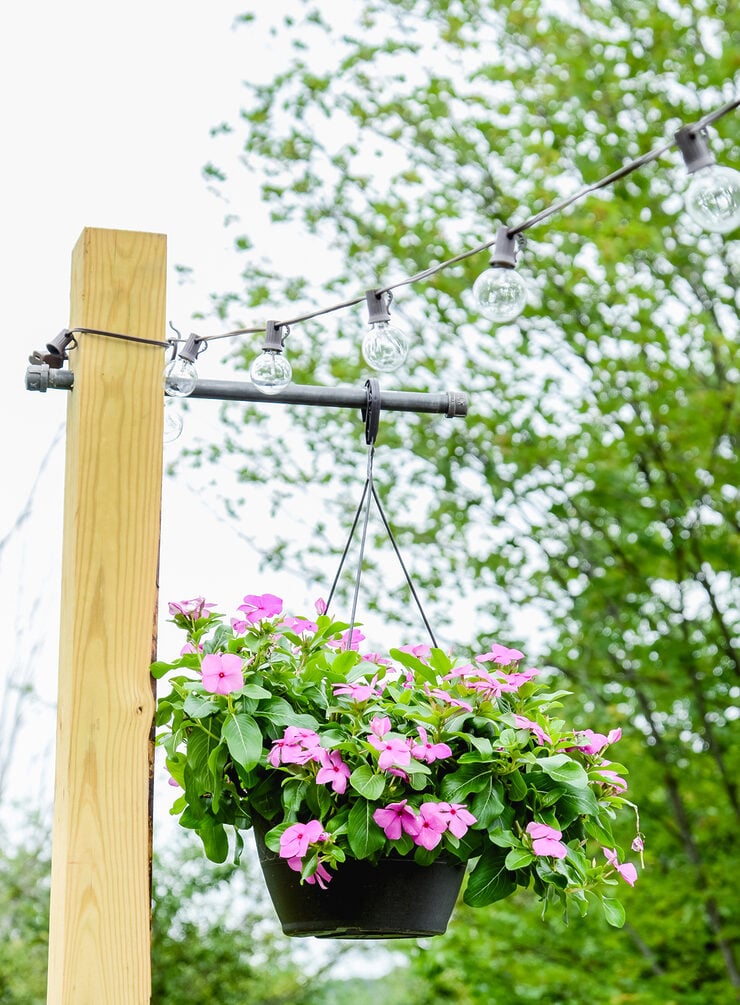
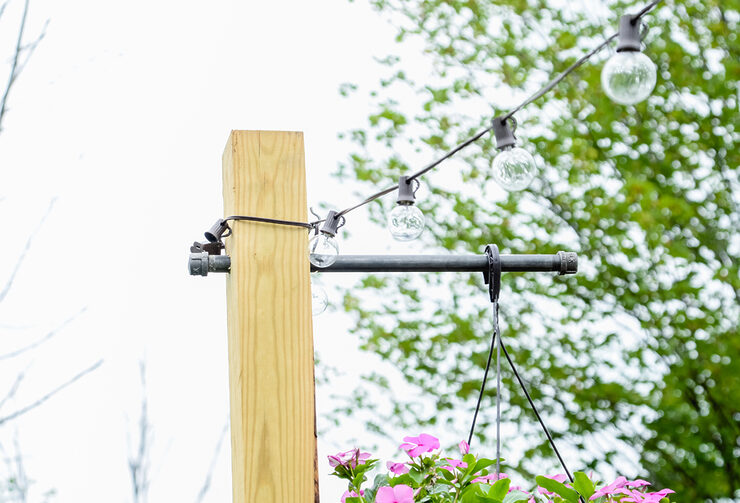
- Add the pipe to your post by using your drill and 7/8 in. spade bit to drill a hole where you want the pipe to be–we did ours 6 inches from the top. Screw on the caps.
- Hang your lights – If you’re using lights that plug in: We started on the end that didn’t have the outlet nearby, making our way toward it. I had a couple of strands in order to make it long enough, but it was a little too long, so we wrapped the lights around the top of the posts a couple of times to make them fit. We also used cup hooks to keep the lights on. If you’re using solar lights, you don’t have to worry about the outlets.
And you’re set! You’ve got a beautiful addition to your patio or outdoor space.
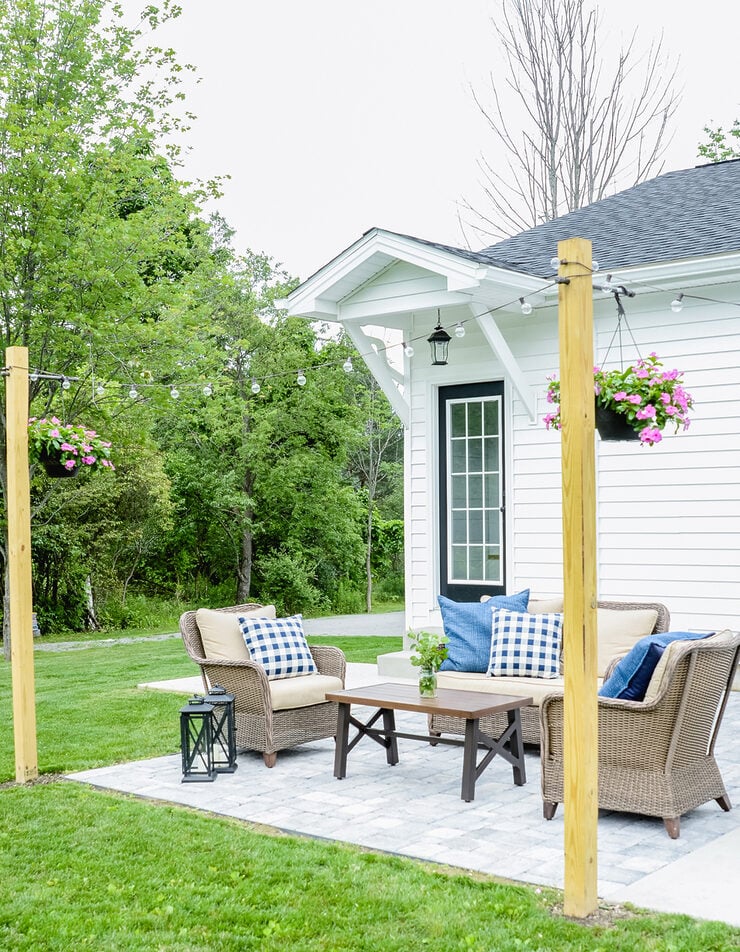
They are so lovely during both the day and at night. When I look out my windows, I see the bright colored flowers and lights going across the patio, and I love sitting out there. At night they light up our whole patio with a lovely glow, offering a cozy atmosphere for hanging out with our family and friends. This one project completely changes the look and ambiance of the space–what a different it makes!
FAQ
You could certainly modify this tutorial and place your poles in planters to hang the lights, if you’d rather not put posts in the ground, and if that suits your needs better. There are pros and cons to both, but for us, the posts have been the perfect fit. If you do use planters instead, they will be quite heavy, and likely very difficult to move, so they won’t necessarily be more moveable. The planter version would work better in a rented home where you aren’t able to dig holes or leave anything permanent.
More outdoor projects

Thanks so much for stopping by! Join me on Instagram for even more ideas and inspiration…I’d love to see you there. 🖤

*Originally posted 2017