• Home
  • Blog
  • Project Gallery
  • About Me
    • About Old Salt Farm
    • Contact Info
  • Terms of Service & Privacy Policy
  • My Book
    • Email
    • Facebook
    • Instagram
    • Pinterest
    • Twitter

Old Salt Farm

Farmhouse + DIY

  • DIY
    • DIY Home Decor
    • Paint & Stain Projects
    • Re-purposed Projects
    • Woodworking
    • Outdoor Projects
  • For the Home
    • Old Salt Farm
    • Farmhouse Style
    • Home Decor & Styling
    • Cleaning
    • Organization
    • Entertaining
    • Crafts
      • Printables
      • Fonts
      • Silhouette
      • All Crafts
      • Kids’ Crafts
  • Holidays
    • 4th of July
    • Back to School
    • Christmas
    • Cinco de Mayo
    • Easter
    • Fall
    • Halloween
    • New Year’s Eve
    • Spring
    • St. Patrick’s Day
    • Summer
    • Thanksgiving
    • Valentine’s Day
    • Winter
  • Family Life
    • Kids’ Ideas
  • Gift Ideas
    • Birthdays
    • Father’s Day
    • Mother’s Day
    • Teachers
    • Thank you
    • Thinking of You
    • Weddings
    • Babies
  • Lifestyle
    • Travel
  • Recipes
    • Appetizers
    • Breads
    • Breakfast
    • Crockpot
    • Cookies & Bars
    • Desserts
    • Main Dishes
    • Soups
    • Snacks
    • Drinks
    • Holidays
    • Game Day
  • The Farmhouse Finder
  • Shop

Feb 1, 2017

DIY Photo Pencil Pouch

This post is sponsored by Adobe Photoshop Elements. All opinions are 100% mine.

I love pencil pouches. They are good for so many things, not just pencils!  My kids love them for school, of course, but I love to fill them with things like makeup and lotion, headphones and chargers, or first aid supplies when I’m on the go with my kids. I also like having one for each of my kids for travel bags, with crayons, small notebooks, and other supplies.

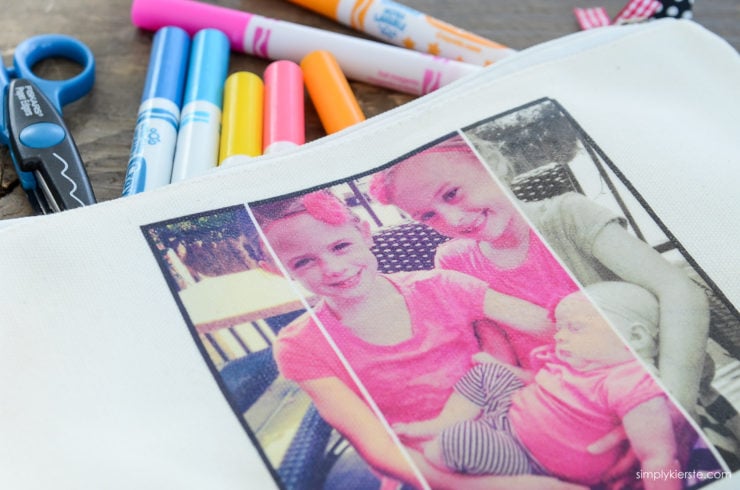
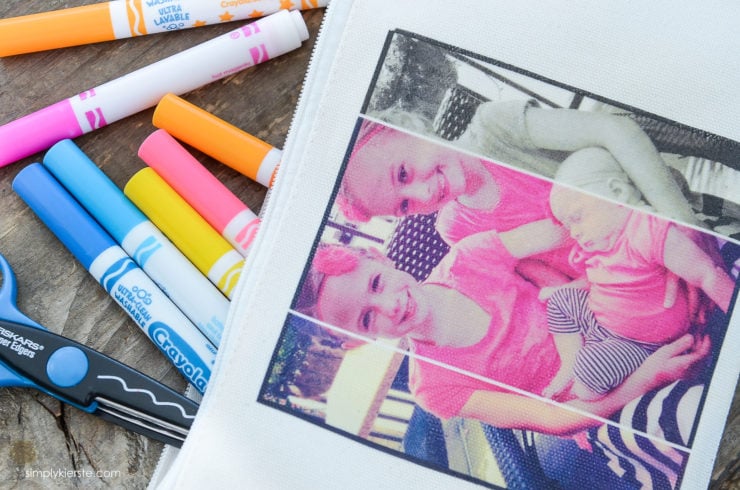
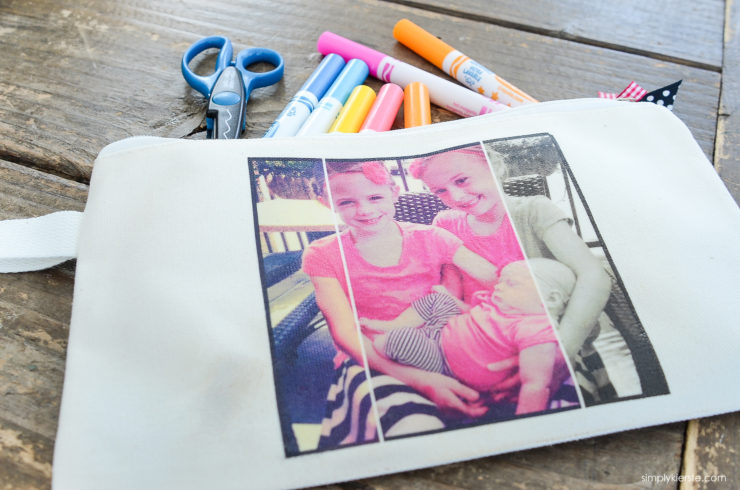
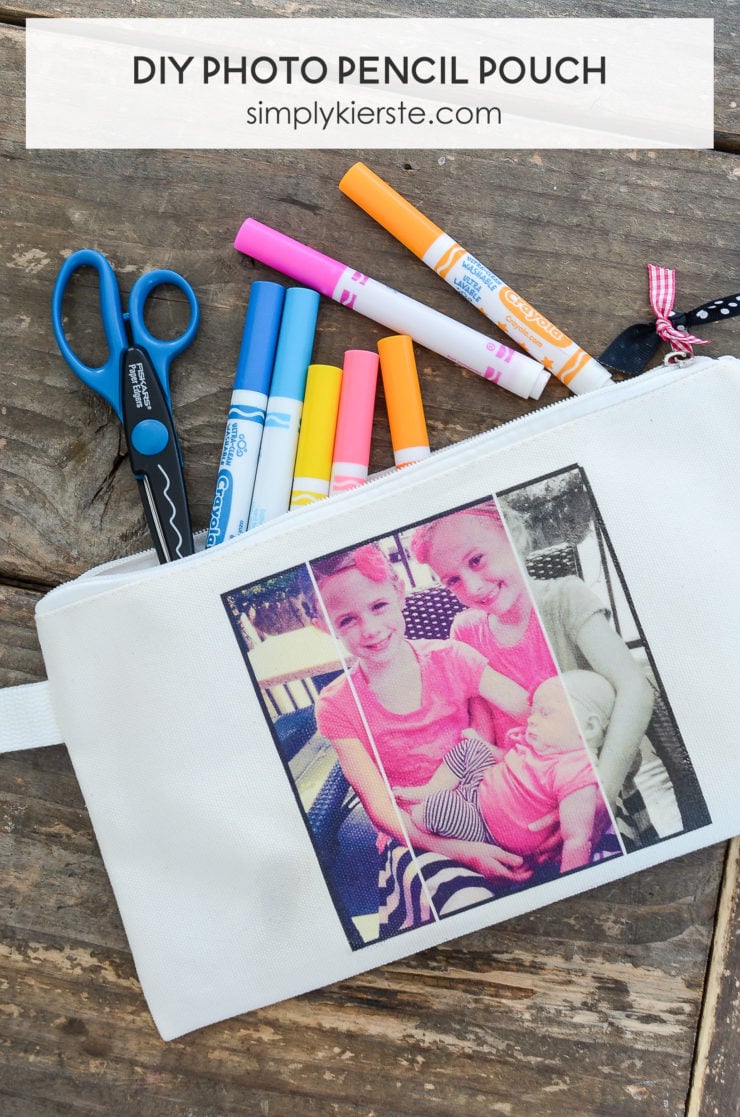
I found some really adorable canvas pencil pouches, and thought it would be so fun to add pictures of my kids to the front!

DIY Photo Pencil Pouch | simply kierste.com

I just love how this one turned out, so I’m going to make one for my boys with their football or soccer pictures, and my girls with their dance or volleyball pictures.   Best of all, this darling pencil pouch can be made in less than 30 minutes–so quick and easy!

DIY Photo Pencil Pouch | simply kierste.com

What makes this project so unique is how I edited the pictures. I used one of my new favorite features in Adobe Photoshop Elements 15, called Effects Collage. It takes your picture and divides it into sections (you choose how many), then adds a different filter to each section. The end result is so fun and different than the usual, which is what I was looking for. This picture is one of my favorite Instagram pictures, and I knew it would be perfect for this project. I absolutely love this picture of my three girls, and being able to put it on something I can look at all the time is the best!

BEFORE: 

DIY Photo Pencil Pouch | simply kierste.com

AFTER:

DIY Photo Pencil Pouch | simply kierste.com

Isn’t that so cool? I love the mix of black & white and color. It only takes just a few clicks to do! Editing all my photos was the first step in this project; let me show you how easy it is…

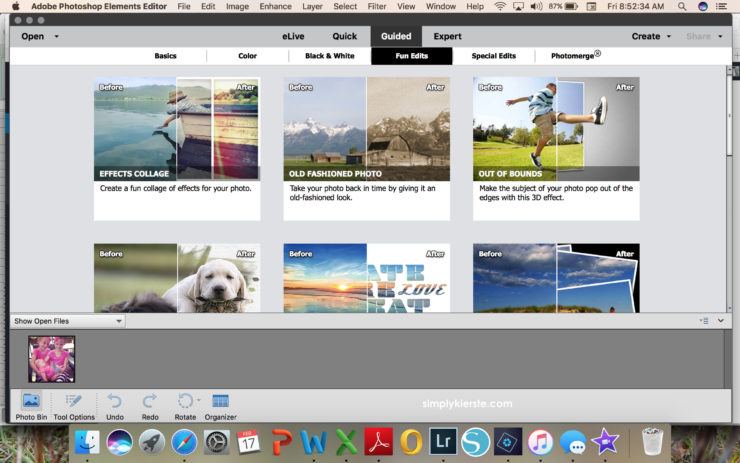
Open up a photo in Photoshop Elements, click on Guided > Fun Edits > Effects Collage.

DIY Photo Pencil Pouch | simply kierste.com

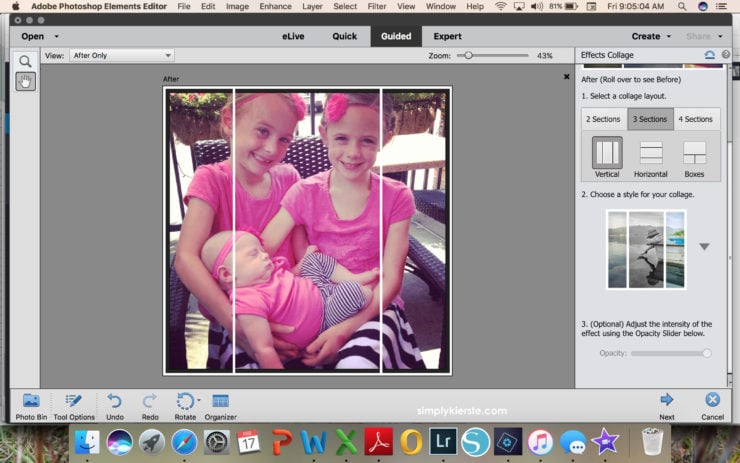
You get to select how many sections you want, and whether you want them to be vertical, horizontal, or boxes. I usually try a few different options, to see which one works best with my photo.

DIY Photo Pencil Pouch | simply kierste.com

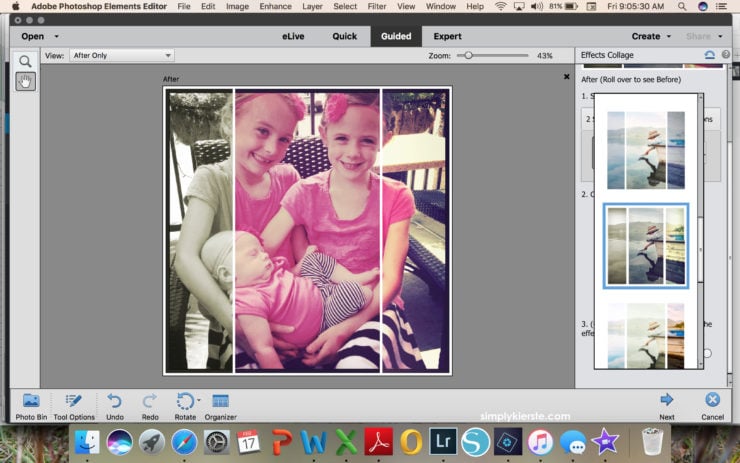
Once you’ve selected those options, you’ll choose a style for your collage. There are quite a few to choose from, all with different combinations of filters.

DIY Photo Pencil Pouch | simply kierste.com

So fun, right?!

For this project, you may need to reverse your image before saving. After you print your photo on to the transfer paper, you’ll flip it over to iron it, meaning the image will be reversed when you iron it on. If you don’t reverse it first before printing, the photo will look backwards when ironed on.  In some photos it won’t matter, but in others it will, so it’s worth just taking a look to see if it’s necessary. There’s a super easy way to do it! Click on Image (the top tool bar) > Rotate > Flip Horizontal.  This will make a mirror image of your photo, so when you iron it on, it will look right!
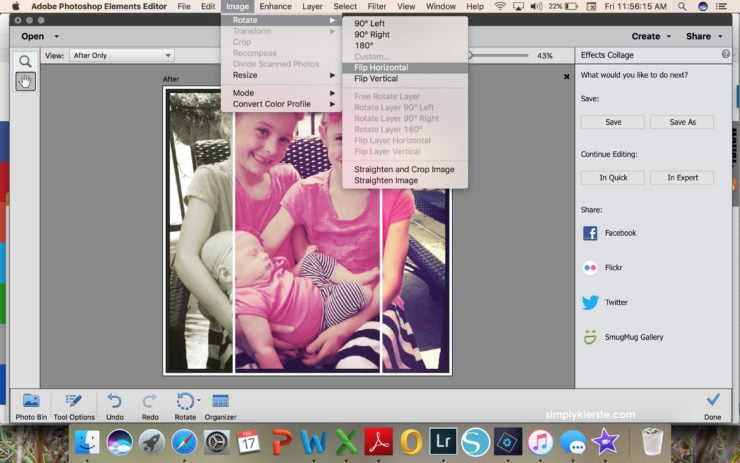
DIY Photo Pencil Pouch | simply kierste.com

At this point, you’re finished and ready to save. If you want to resize it first, then all you need to do is click the Expert tab, then Image > Resize > Image Size. Input your desired dimensions, then File > Save or > Save As. I don’t always need to resize first, but for this project I did, since I needed the photo to fit on my pencil pouch.

Once your editing is finished, you’re ready for the rest of the project. Here’s what you’ll need to finish your pencil pouch, and how to do it!

DIY PHOTO PENCIL POUCH


SUPPLIES:

-canvas pencil pouch

-photo transfer paper

-iron

-Adobe Photoshop Elements 15 free 30-day trial


DIRECTIONS:

Edit your photo in Adobe Photoshop Elements, insert it into Word and print onto the photo transfer paper. Make you’ve reversed your image if necessary!

Follow the directions for the transfer paper you’re using, including how to correctly iron on your photo.

DIY Photo Pencil Pouch | simply kierste.com

DIY Photo Pencil Pouch | simply kierste.com

Share and save for later!

  • Share
  • Email

Filed Under: All Crafts, Crafts, Kids' Crafts | 2 Comments

« Previous post
Next post »

Lovely comments

  1. Lorrin @ embracetheperfectmess.com says

    Mar 3, 2017 at 8:48 pm

    This is super cute! I love that you found those canvas pouches. I made photo pillows, and they were fun, but a much bigger time commitment than this because I had to sew them afterwards. These are perfect though because they are quick, and like you said, you can use them for all kinds of goodies other than pencils. Great post!

    Reply
    • Simply Kierste Design Co. says

      Mar 4, 2017 at 9:01 pm

      Thank you so much, Lorrin!!! xoxo

      Reply

Leave a Reply Cancel reply

Your email address will not be published. Required fields are marked *

Recipe Rating


This site uses Akismet to reduce spam. Learn how your comment data is processed.


search

COPYRIGHT POLICY

The images, tutorials, and content on oldsaltfarm.com are protected by copyright laws. DO NOT distribute or copy the content without written permission. You may not use any images without permission. DO NOT edit or remove watermarks from any image. Pictures are not to be changed or altered in any way, shape or form without my consent. Please do not copy text or reprint recipes without my permission. All ideas and printables are for your personal use only. By downloading any files or printables, you accept that they are FOR PERSONAL USE ONLY. My patterns, ideas and tutorials are NOT intended for resale or re-distribution.

Interested in sharing one of my photos or projects? Fill out my Old Salt Farm Feature Agreement.

Please contact me with any questions. oldsaltfarm@gmail.com

© Old Salt Farm (Kierste Wade)

CREATE AT YOUR OWN RISK

Any and all content on this website is created for inspiration purposes only. Creating with my suggested methods, products, instructions, tutorials, and tools is at your own risk. Please ensure you are following proper guidelines with anything used, and seek professional advice if you don’t know how to do something.

Old Salt Farm is for entertainment purposes only. All tutorials and demonstrations are not intended to be professional advice, nor substitute as such, and I make no guarantees as to the procedures and information here.

Read my full disclosure here.

AMAZON DISCLOSURE

Kierste Wade (Old Salt Farm) is a participant in the Amazon Services LLC Associates Program, an affiliate advertising program designed to provide a means for sites to earn advertising fees by advertising and linking to amazon.com. Amazon offers a small commission on products sold through their affiliate links. When you make a purchase after clicking on one of those links, I earn a small commission that helps support this blog, at no extra cost to you. Read my full disclosure here.
Copyright © 2021 Old Salt Farm, Custom site by Moonsteam Design.

Cookies

This website requires the use cookies. By using this site, you are agreeing to our Privacy Policy.