An easy way to create circular text in Photoshop Elements
Quickly and easily create circular text in Photoshop Elements in no time with this step-by-step tutorial.

Affiliate links are included for your convenience. Please see my full disclosure.
Creating circular text may look hard, but it really is so easy with Photoshop Elements. In just a few steps, you can make your own text circle. It’s a helpful skill when designing projects like tags, stickers, printables, images that will be printed on products, and more. Here’s the one I whipped up for this example…so quick and easy!
Table of contents
How to create circular text
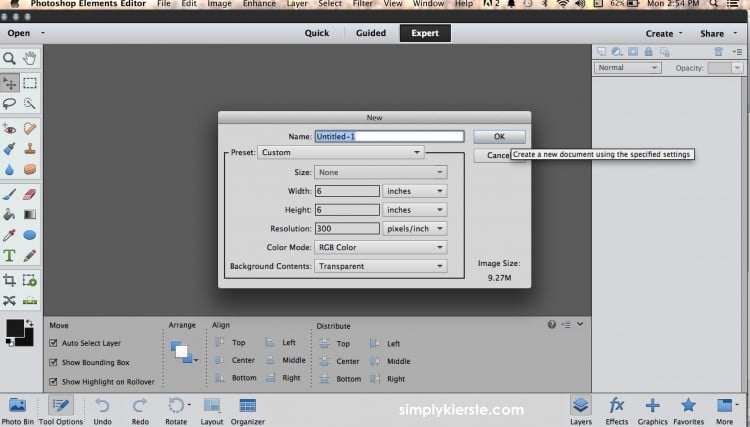
1. Open a new file by going to File > New > Blank File. Size it to be 6×6 inches, a resolution of 300, RGB Color, and Transparent. You want the size of your file to be double what the circle will end up being, so if you want a larger circle, then just double it. For example, if you want a 7 inch finished circle, then you would actually type in 14×14 inches. I almost always do 6×6, because I usually make my finished circles 3 inches or less.
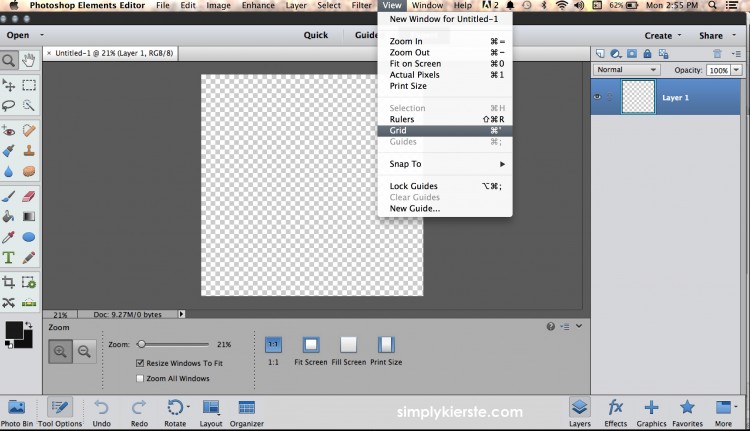
2. Select View, then Grid. This helps you type in the right spot–directly in the middle!
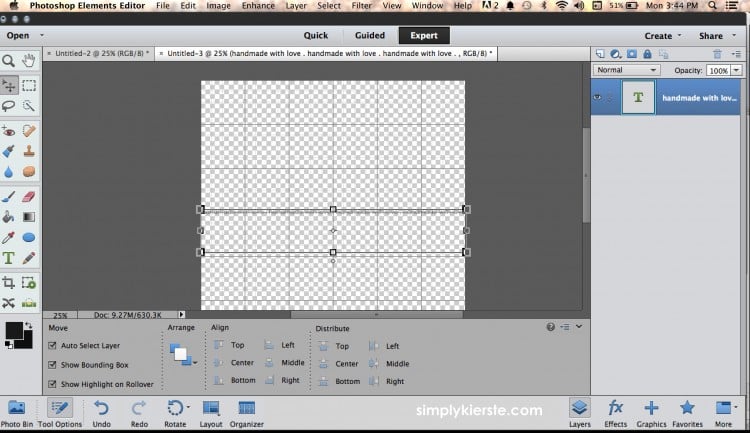
3. Click on your Text tool (mine is the green “T”). Select the font, size, and color of your text (I chose Century Gothic, font size 9, gray), then type right in the center of your box, going from one edge all the way to the other–as close as you can. My text is really small, but it is there! I wrote “handmade with love”, with a dot separating each of them. I wanted at least four of them to go around the circle, otherwise it would have to stretch out the text too much in order to make it fit around the circle.
Note: If you are using a dot to separate text like I did, make sure on the last word, you put a dot after it. It’s going to be in a circle, so you will need a dot there. This is what mine looks like:
handmade with love . handmade with love . handmade with love . handmade with love .
Click CTRL-T or CMND-T (Mac) to use the Free Transform tool. Click on the edges of your text box to pull the text so it meets the very edges if necessary. Your text might not go all the way to the edges, but you don’t have enough space to add any more complete text, so this will help you with that.
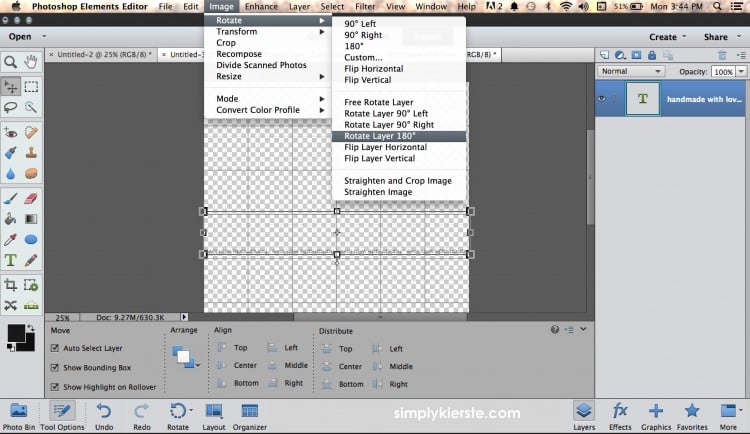
4. Go to the Image menu, and select Rotate > Rotate Layer 180.
5. Now we need to change the text a little, so it won’t stretch out of shape when it’s formed into a circle. Click CTRL+T or CMND+T to once again use the Free Transform Tool. Make sure that you uncheck the box that says Constrain Proportions. Leave the width the same (100%), and change the height to 400%. You may end up having to play around with the 400 number, depending on how it looks at the end (if the circle isn’t complete, or overlaps). You’ll know what I’m talking about at the end, unless it works out perfectly, which is what we’re hoping for! I’ve had to change that value anywhere from 250%-450%, but 400% worked for this particular text.
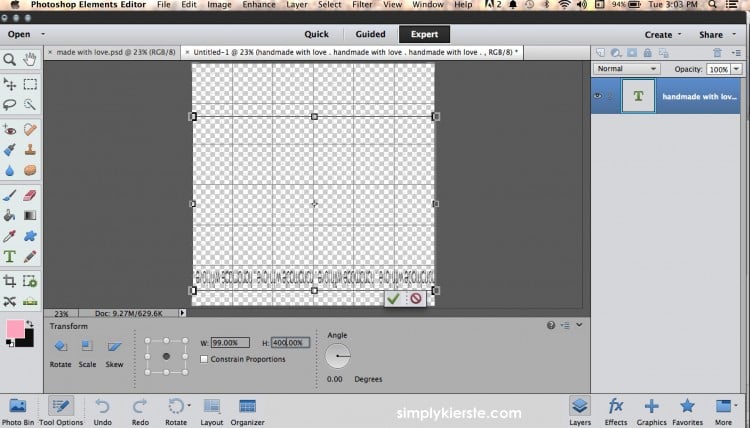
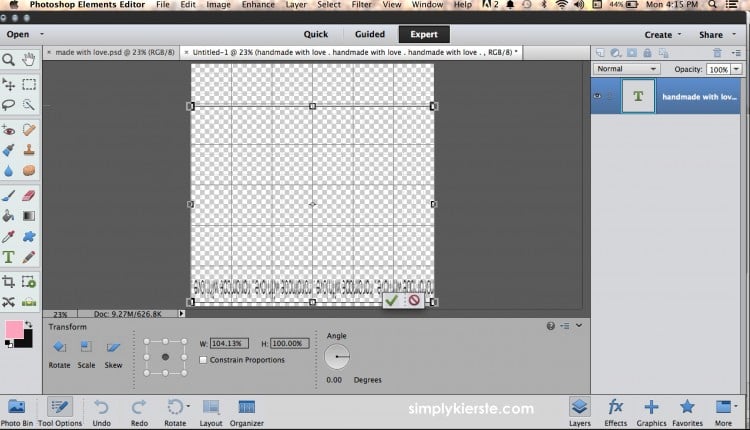
Click the green check mark to approve it, then look at your text. This is a vital step!! If the text doesn’t meet the very edges, then click CTRL+T or CMD+T, click on the little boxes on the side, and pull the text so it’s right at each edge. If you are using a dot to separate your text like I did, you can even pull the last word to the very edge so you can’t see the dot. It’s still there, and will show up when you make your circle, but it makes it so that your words are close enough together to make a complete circle.
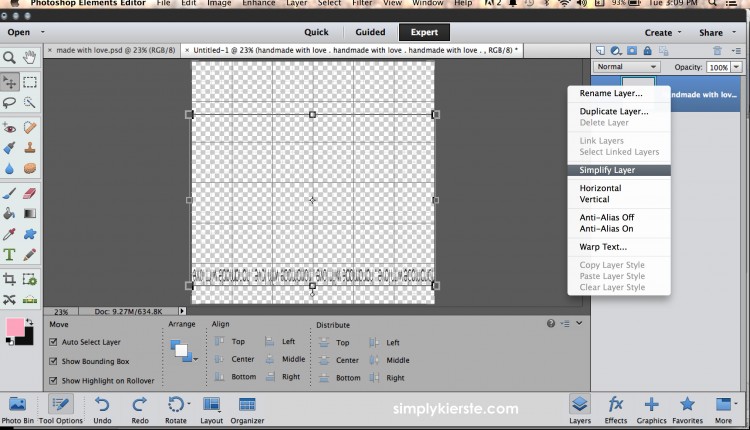
6. You need to simplify the layer before you can proceed, so right click on your text layer in the Layers Panel, and select Simplify Layer.
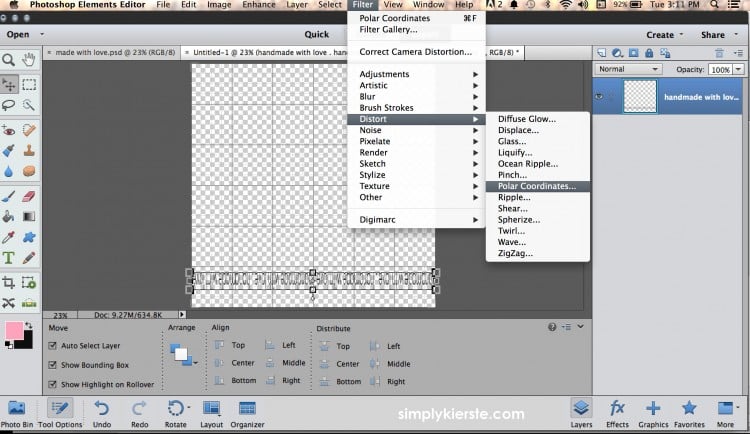
7. Now to make the circle! Click on Filter > Distort > Polar Coordinates. Check Rectangular to Polar in the box that pops up.
8. And this is what you’ve got!!
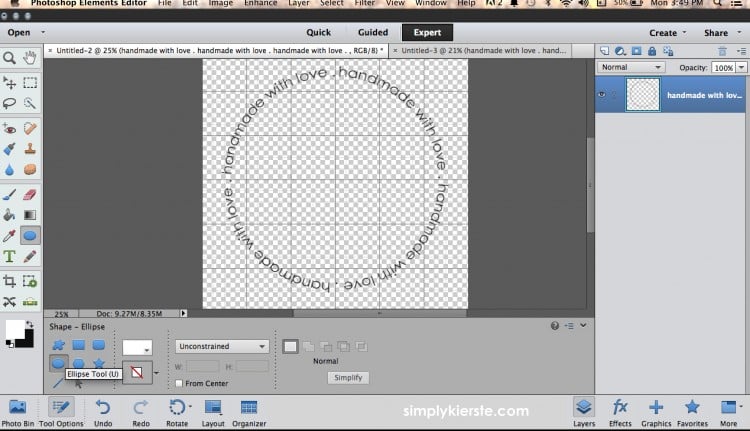
Now what? I’ll show you what to do if you want to add a white (or whatever color) circle to finish making your tag.
9. Do you see the white and black squares on the bottom left? Your circle will be whatever that top square is, so if it’s not the right color, click on it, and select a color. I wanted mine to be white (#ffffff), but you can choose any color. Once your color is right, then select the Shapes tool (it’s next to the eyedropper), and make sure the Ellipse tool (circle/oval) is selected. If you hold the shift key down while you’re drawing, it will make a perfect circle! Draw it big enough to cover your text, although it doesn’t have to be perfectly on top–you can easily fix this after you draw it.
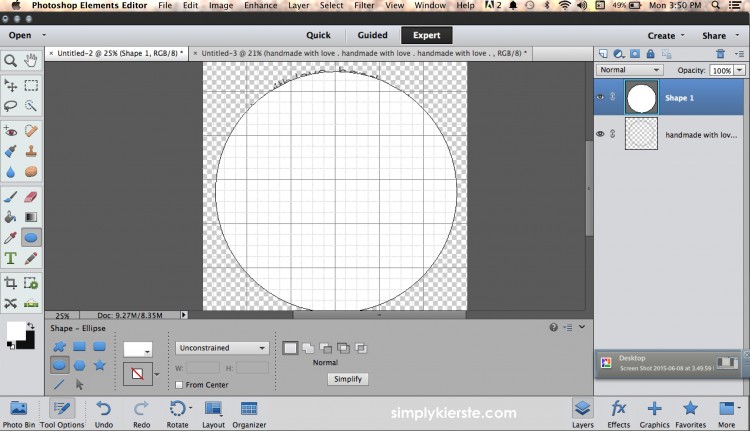
10. To make the text on top of the circle, go over to your Layers Panel on the right, and drag the shape so it’s underneath the text. You can compare this picture with the one above it, where you can see that the shape is on top, which is why you can’t see the text. You can also now click and drag the circle so it’s centered on your text.
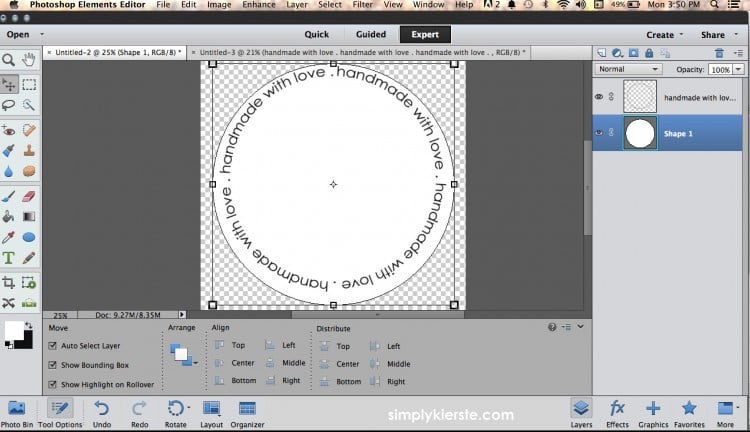
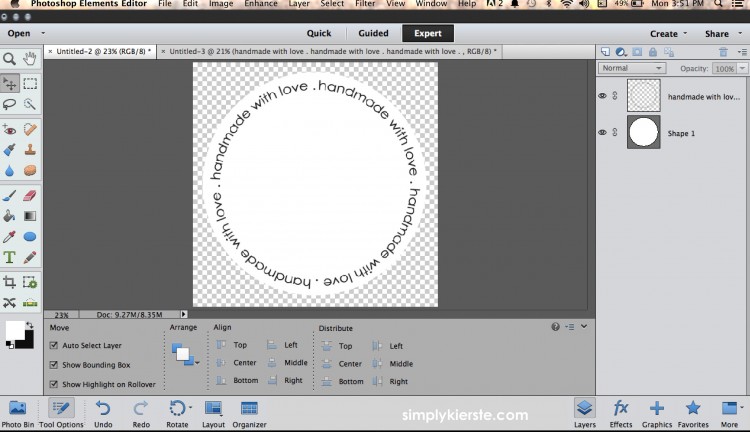
11. Now you’re set to finish your design! I used the text tool to change up the fonts and colors to create my tag, and I LOVE it!
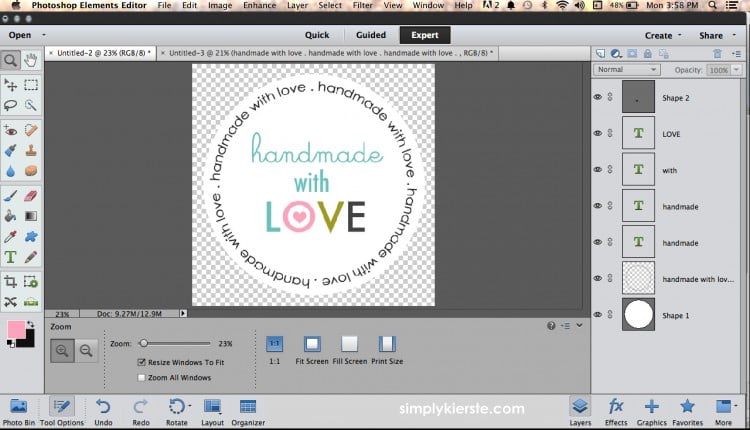
Be sure to save it as a PSD file first, so if you want to go back and make changes you don’t have to start all over again. Then you can save it as a .jpg or .png, whichever you like.
Printing for tags
Wondering what to do next, and how to get them printed? I open up a new Word file, and make two or three columns, depending on how big I want my circle tag to be. Then I insert the picture I just created (the .jpg or .png) into my file, re-size as necessary to get it as big as I want it, then copy and paste to fill the page. I print onto either white card stock if it’s going to be a tag, or 8 1/2 x 11 full sheet white labels, which I LOVE. I use a (affiliate link) 2 inch circle punch to cut them out. I almost always size my tags to 2 inches–it’s a great size for just about everything, and I love my punch so much that it makes it super easy.
You might also find this Photoshop Elements cheat sheet helpful–a list of shortcuts all in one place!
Fonts
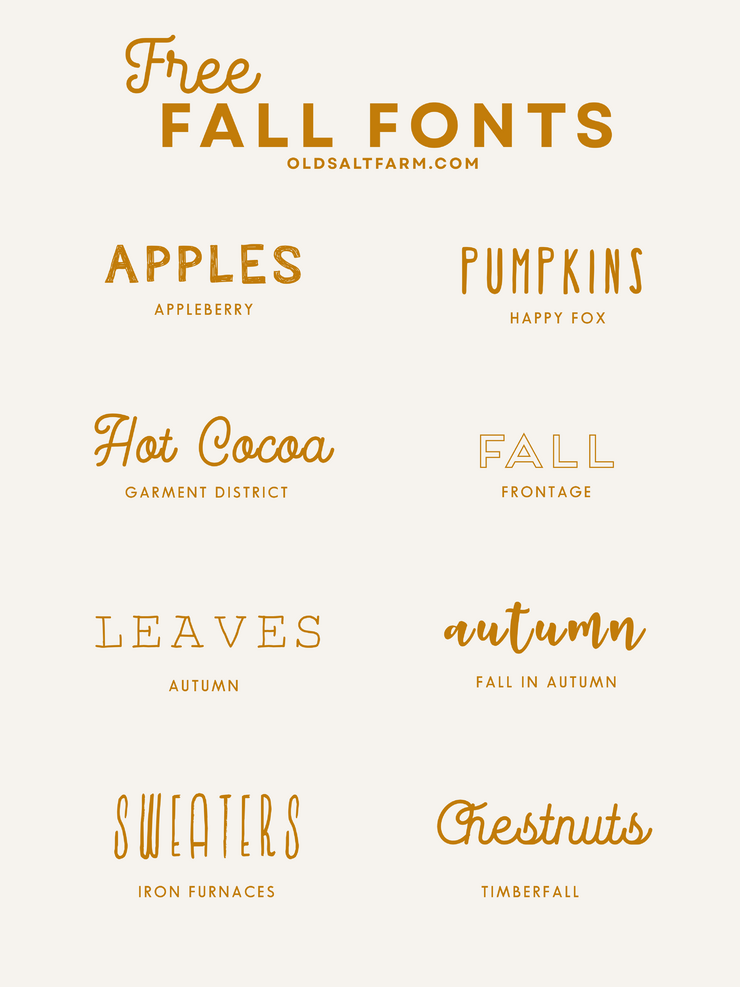
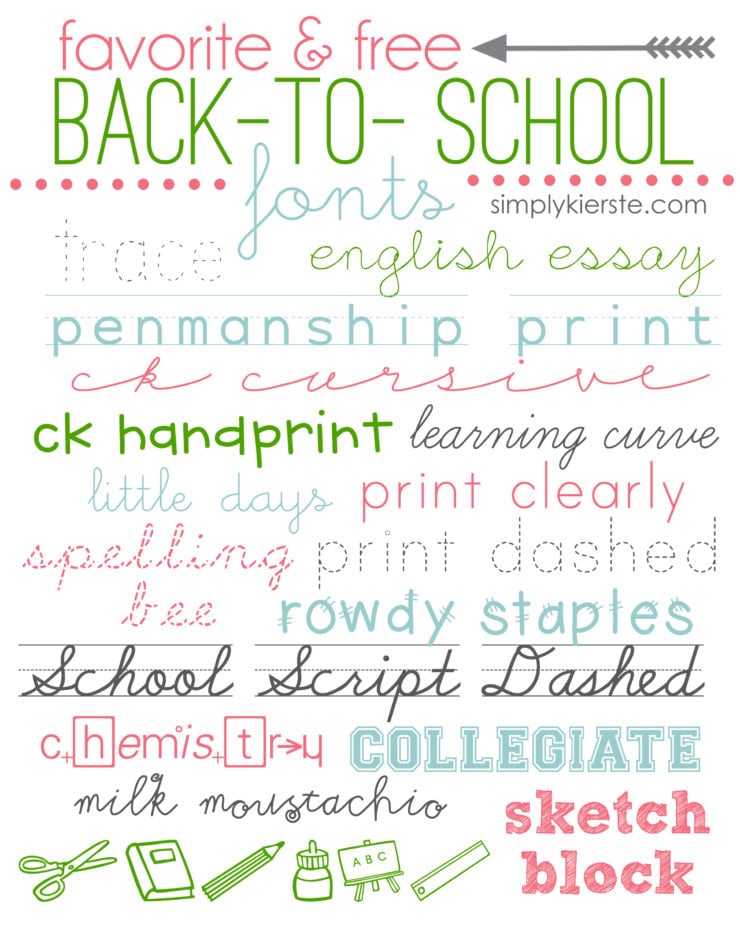
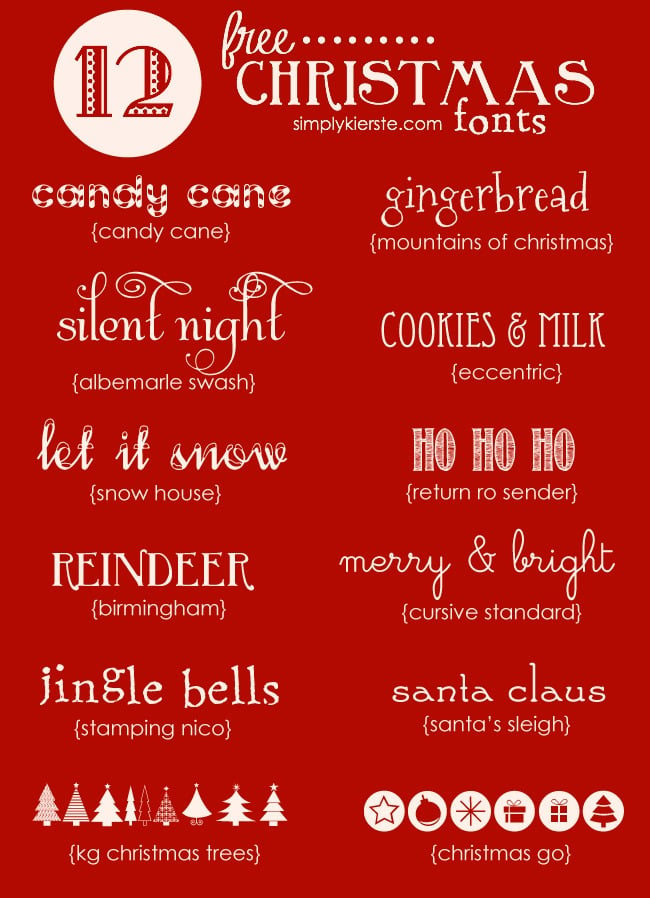
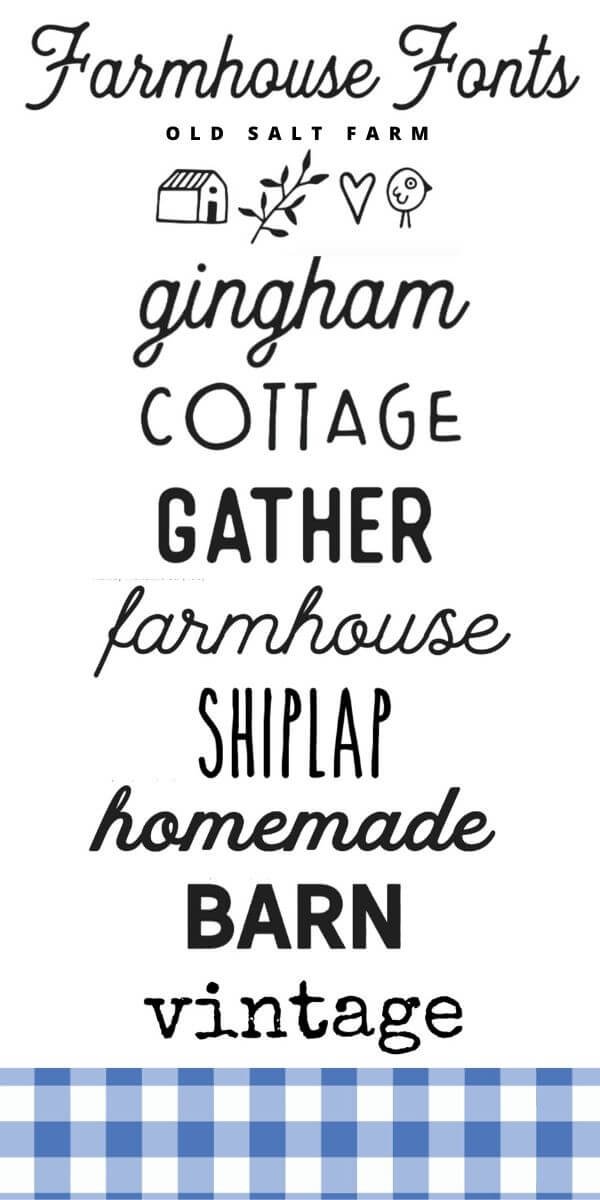
Fonts are so important when creating a design with text, and I have so many favorites for all seasons and times of year. Check out these collections of fonts that are all free to download!
Thanks so much for stopping by! Join me on Instagram for even more ideas and inspiration…I’d love to see you there. 🖤

Originally posted 2015.