• Home
  • Blog
  • Project Gallery
  • About Me
    • About Old Salt Farm
    • Contact Info
  • Terms of Service & Privacy Policy
  • My Book
    • Email
    • Facebook
    • Instagram
    • Pinterest
    • Twitter

Old Salt Farm

Farmhouse + DIY

  • DIY
    • DIY Home Decor
    • Paint & Stain Projects
    • Re-purposed Projects
    • Woodworking
    • Outdoor Projects
  • For the Home
    • Old Salt Farm
    • Farmhouse Style
    • Home Decor & Styling
    • Cleaning
    • Organization
    • Entertaining
    • Crafts
      • Printables
      • Fonts
      • Silhouette
      • All Crafts
      • Kids’ Crafts
  • Holidays
    • 4th of July
    • Back to School
    • Christmas
    • Cinco de Mayo
    • Easter
    • Fall
    • Halloween
    • New Year’s Eve
    • Spring
    • St. Patrick’s Day
    • Summer
    • Thanksgiving
    • Valentine’s Day
    • Winter
  • Family Life
    • Kids’ Ideas
  • Gift Ideas
    • Birthdays
    • Father’s Day
    • Mother’s Day
    • Teachers
    • Thank you
    • Thinking of You
    • Weddings
    • Babies
  • Lifestyle
    • Travel
    • Style
  • Recipes
    • Appetizers
    • Breads
    • Breakfast
    • Crockpot
    • Cookies & Bars
    • Desserts
    • Main Dishes
    • Soups
    • Snacks
    • Drinks
    • Holidays
    • Game Day
  • The Farmhouse Finder
  • Shop

Mar 6, 2013

Easy personalized Hershey kisses

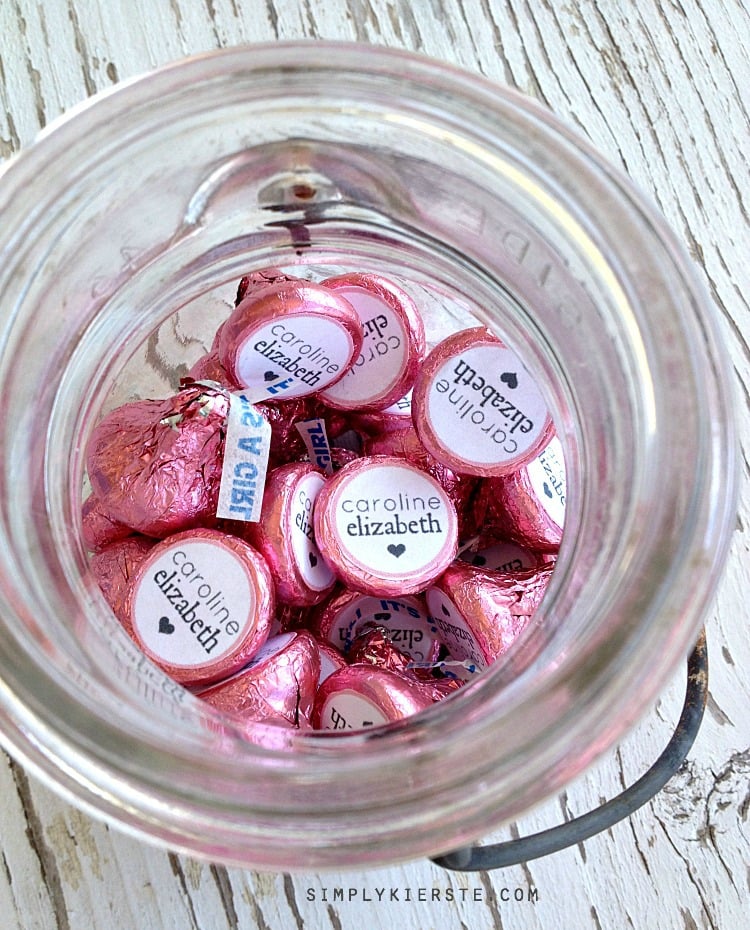
Miss Caroline Elizabeth is almost here, and I really wanted something fun to give visitors at the hospital and at home when I had the baby–something small & simple, and with her name on it.  We’ve all seen Hershey Kiss stickers for every season & holiday, and I’ve always loved them, so I thought designing one as a tiny baby announcement would be PERFECT! I’m including a tutorial today that shows you how to make your own stickers–for any name you like.

Personalized Hershey Kisses | oldsaltfarm.com

The idea came to me when I was in Michael’s, and saw bags of Hershey kisses that said “It’s a Girl” and “It’s a Boy”. I immediately fell in love with them, and knew adding her name to the bottom was exactly what I was looking for.  If you can’t find them at your local Michael’s store, just google them–lots of links come up where you can buy them online…or use regular kisses!

caroline kiss 4  sk

Usually I use Photoshop to create something like this, but I know there are many of you who don’t use or have Photoshop, and I wanted everyone to be able to make these, and personalize them.

So…I created the basic circles for you in three colors–pink, blue, and yellow–and I’m going to show you how you can make your own without Photoshop. And it’s EASY–you can totally do it!!!

SUPPLIES

–Full Sheet White Labels ( I LOVE these! I always have some on hand!)

–3/4 inch circle punch or scissors

-computer & printer

DIRECTIONS

step 1: 

Download one or all of the following circles (jpg files), and save them to a folder on your hard drive.

Yellow Circle

Blue Circle

Pink Circle

step 2: 

Go to www.picmonkey.com.  It’s a site where you can edit your photos and create collages–for free! There are some options that they offer only for their subscribers, but there is a lot you can do just using the free stuff.  When you get there, click on “edit a photo”, and you’ll be able to browse and open the circle jpg file you just saved.

UPDATE:  If you want a different color, it’s easy to do! Go to picmonkey.com, click on “edit”,  then upload this blank image  after saving it to your computer. When it opens, it will be a square shape, and look like a gray checkerboard. That means it’s a transparent image.  Click on the butterfly icon on the left (overlays), and then on “geometric”.  Select the circle.  It will be black, and small.  Click on the circle, and drag the edges to make it bigger, to fill the square.  Change the color to whatever you want the outline of your circle to be.  Open another circle, make it white, and make it bigger–all the way to edges of the colored circle, leaving as much of a border (thick circle line) as you want!  Then you can proceed with the rest of the steps.  Let me know if you have any questions!

step 3: 

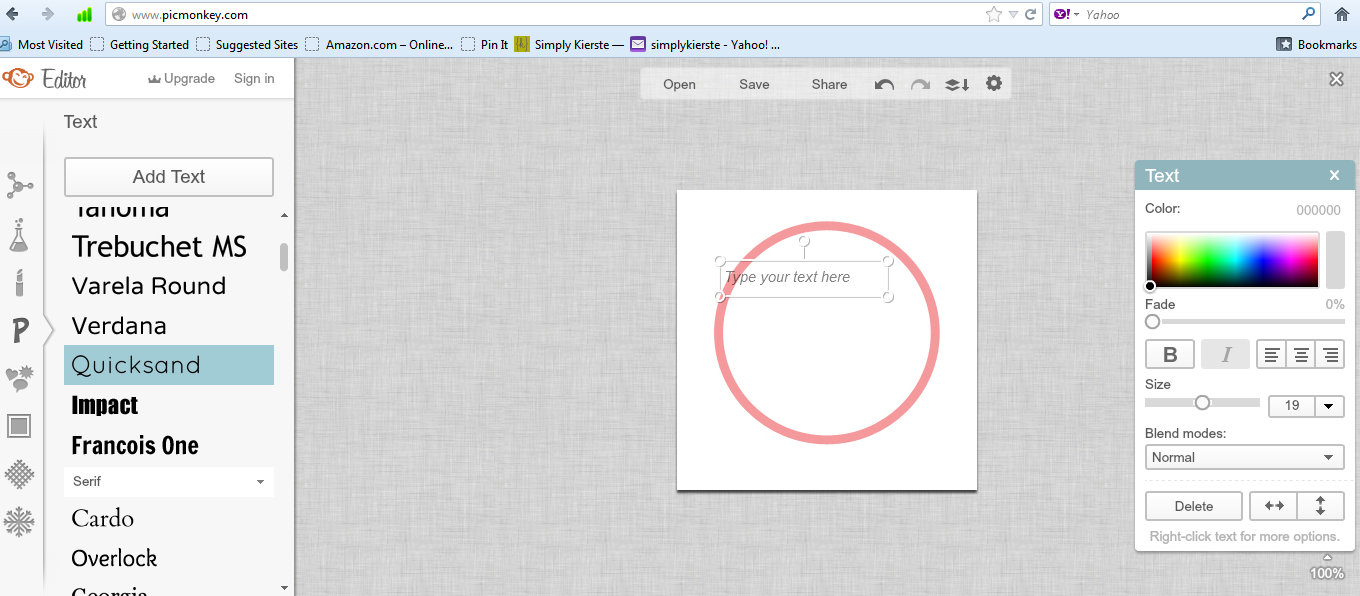
This is what your page will look like once you’ve opened your file.  On the far left, you’ll see a bunch of options like crop, rotate, resize, et.  Those will be for photos you want to edit.  To the left of those, are several icons that run down the side of the page.  If you click on the “P”, it will open up the text options, which is what you want to do first.

caroline kiss step 1

step 4: 

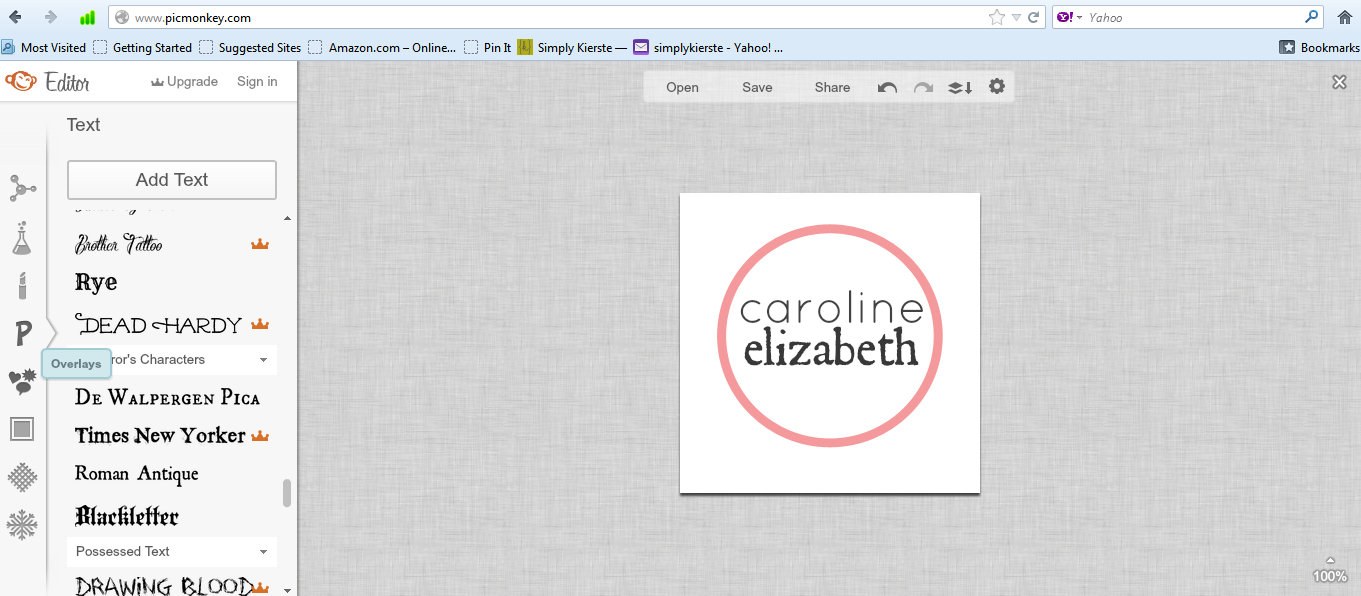
Now you can select the font(s) you want to use, then click on “add text”.  A box will pop up (the one on the screen on the right), where you can also select color, and change the size to fit in your circle.  I did this twice–one for the first name and one for the middle name.

caroline kiss step 2

step 5: 

When you’re finished with your text. you’re ready to add a fun shape or embellishment.  The icon right underneath the P is a cluster of three small shapes, and when you hover over it, it says “overlay”, as you can see on this screenshot.  Click on it, and it will open a ton of options for embellishments.

caroline kiss step 3

step 6: 

I chose the hearts options, and as you can see, there are quite a few to choose from!  Select the embellishment you want, and a small box pops up (on the right of my screen) that gives you options for colors.

caroline kiss step 4

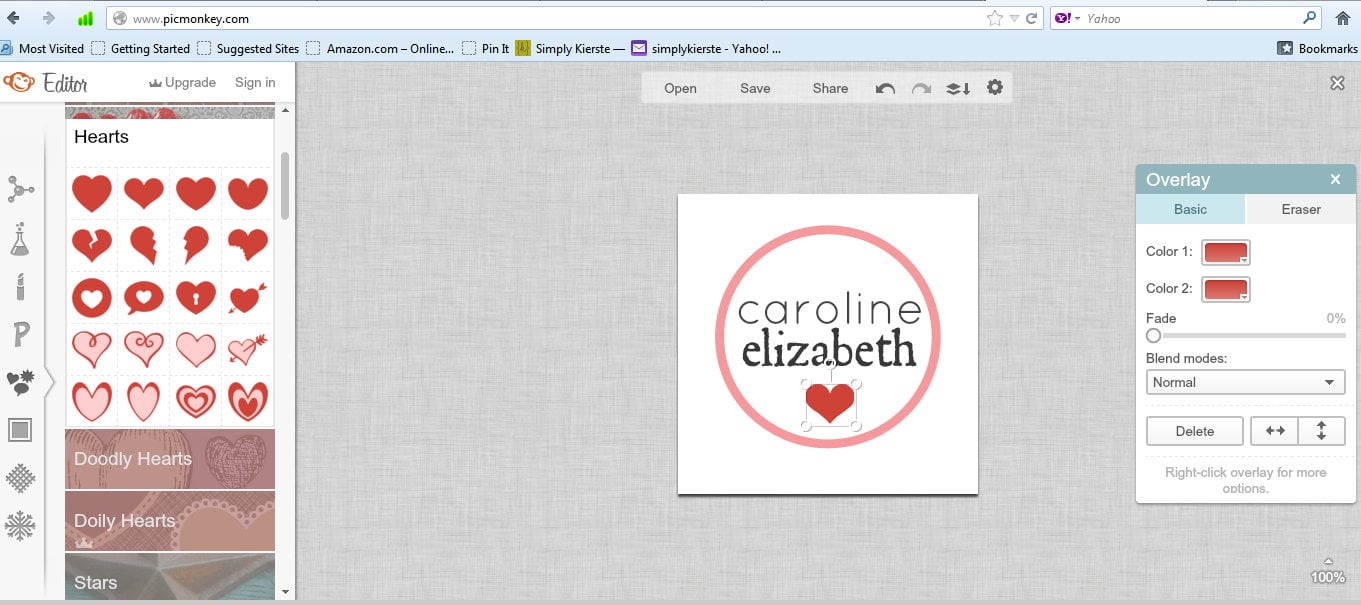
All done!! At the top of the screen, it gives you the option to save–go ahead and save it to the file of your choice.

caroline kiss step 5

step 7: 

Now you’re ready to create a whole sheet of the cuties–so you can print and punch!  Open up a new Word document (or compatible–these instructions for for Word), and choose “Insert”, then “Picture”.  You’ll be able to browse for the circle image you just created, and insert it into Word.  I created the circle to be the right size, so you shouldn’t have to re-size it—it should be 3/4 inch. It for some reason it’s not, go ahead and re-size it.  Copy the image you just inserted, then paste it (Ctrl V) over and over, until it fills the page.
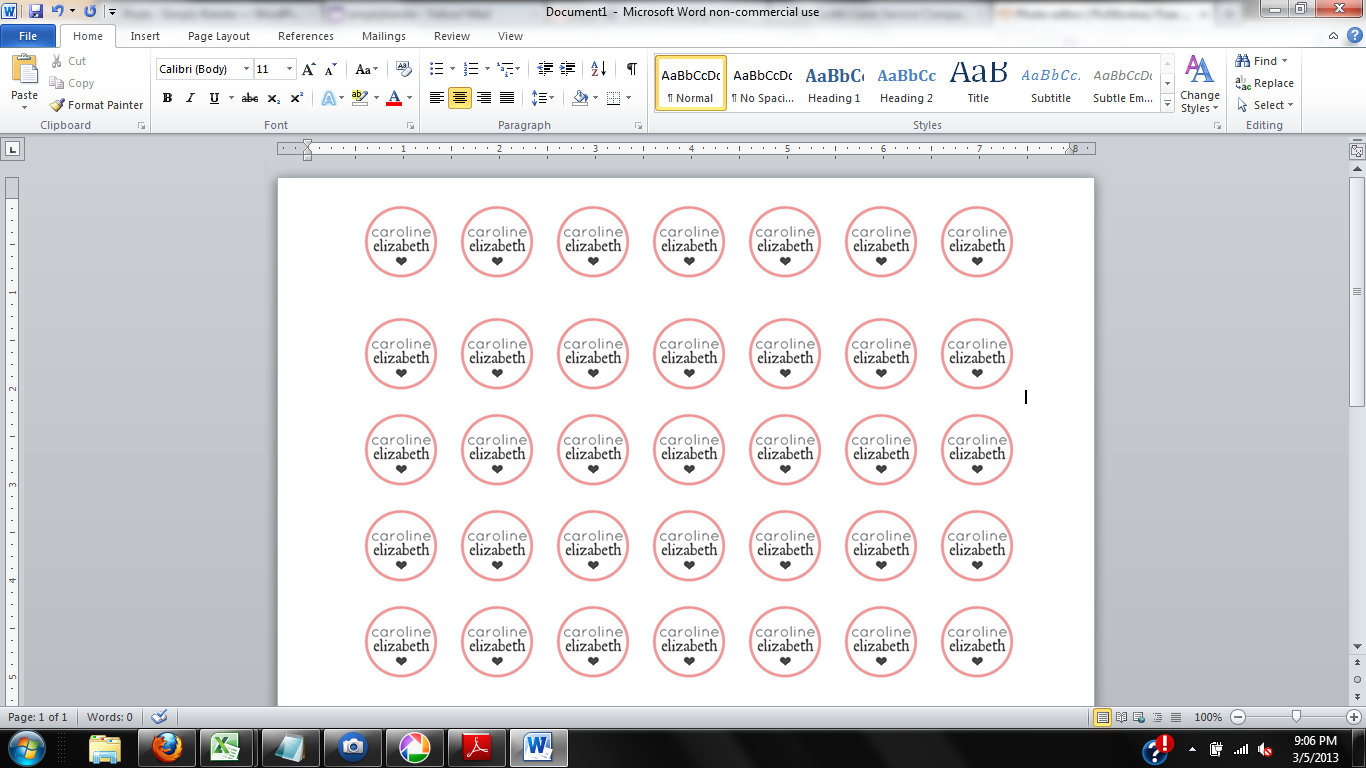
caroline kiss step 6

step 8: 

Print your file onto a white full sheet label. Use a 3/4 inch circle punch to punch out the circles, or cut them out with scissors.   Stick a circle onto the bottom of each Hershey kiss!

 baby name hershey kisses | oldsaltfarm.com

I made a few other circles so you can see just a couple of the millions of possibilities…

jack kissjack dragonfly kiss 2henry kiss snail
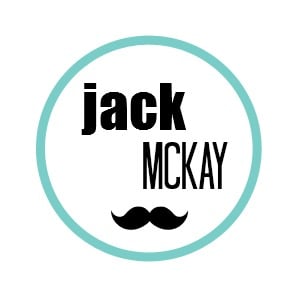
Aren’t they CUTE????  I LOVE it!!!  These would also be really cute labels for a million other things…just re-size the circles in Word to whatever size you like, print, and cut!  Easy personalized Hersey Kiss stickers…birthday parties, baby showers, wedding showers or receptions, the sky’s the limit!!

{kierste}

Share and save for later!

  • Share
  • Email

Filed Under: Babies, Crafts, Family Life, Gift Ideas, Kids' Ideas, Printables | 26 Comments

« Previous post
Next post »

Lovely comments

  1. Elena says

    Mar 6, 2013 at 6:06 pm

    Absolutely adorable!!! Thanks for the tutorial:)

    Reply
  2. Jennifer says

    Mar 7, 2013 at 8:11 am

    So stinken cute!! We’re due in July, pinning away for future reference!

    Reply
  3. Deanna says

    Mar 7, 2013 at 9:10 am

    Oh, my goodness!!! One more thing to add to my fun and crazy to-do list for the next 4 weeks. LOL! Thanks for this ADORABLE idea!!! I LOVE IT!

    Reply
  4. Wanda says

    Mar 7, 2013 at 5:44 pm

    My ‘babies’ are now 15 and 12 and if I were ‘to go there’ again, I would so use this idea but those kisses are really too cute to take the wrapper off of and eat….so sweet…God Bless You as you await the arrival of your little one….

    Reply
  5. Deanna says

    Mar 11, 2013 at 10:24 pm

    You are going to die laughing…..I bought two bags so I could get this checked off my list… (we’re having a girl!, after 3 boys) and guess how many pinks there were in the first bag????

    ONE! ONE PINK KISS!!! And my circle punch is too big….so…..off to figure something else out. LOL!

    Reply
    • simply {kierste} says

      Mar 12, 2013 at 11:17 am

      What??? One pink kiss in the whole bag of It’s a Girl Hershey Kisses? That is SO CRAZY! I would totally take them back! My circle punch was also too big, so I cut them out with scissors-it took less than an hour to do the whole thing, even doing it that way.

      Congrats on your baby girl–SO fun!!!! XO

      Reply
  6. kim says

    Mar 20, 2013 at 10:51 pm

    Thanks so much for the tutorial! I made a bunch tonight for my daughter who will be having her baby girl on Saturday. :0) Can’t wait to surprise her with them. Congrats to you on your new baby daughter. What blessings! xo

    Reply
    • simply {kierste} says

      Mar 21, 2013 at 8:38 am

      How fun! You’ll have to let me know what she thinks!!! Congrats to you too!!! xo

      Reply
  7. Linda says

    Jun 22, 2013 at 10:18 am

    Hi Keirste, LOVE LOVE LOVE you!! Great tutorial, just wanted to let you know Staples sells circle labels in 3/4 size so you can print right on them, peel and stick!! <3 Thanks for you amazing blog!!

    Reply
    • simply {kierste} says

      Jun 24, 2013 at 10:45 pm

      Linda, thank you for your kind words!!! I also appreciate the info about the 3/4 inch circle labels. Have you ever printed on them before? Is it easy to get everything lined up correctly to print in the centers of the labels? That would save so much time!!! xoxo

      Reply
  8. Crissy says

    Jul 23, 2013 at 5:28 pm

    Hi! These are so cute and were also very easy to do! Thanks for the tutorial! I was wondering if you would consider putting other color circles up also for other holidays? Basic black, green, red…etc.? Or is there an easy way to create the circle myself?

    Reply
    • simply {kierste} says

      Jul 23, 2013 at 9:11 pm

      I’m so glad they worked for you!! Thanks for asking about ones for the holidays…I’ll put that on my list! :)

      Reply
  9. Christine says

    Aug 31, 2013 at 9:35 am

    Thanks for sharing!! I made hello kitty sticker with your tutorial and they were lovely!

    Reply
    • simply {kierste} says

      Aug 31, 2013 at 9:56 am

      That sounds so cute!!! We love Hello Kitty at our house. :)

      Reply
  10. anne says

    Oct 23, 2014 at 10:58 pm

    ah!! this was awesome! thank you!

    Reply
    • Simply Kierste says

      Oct 24, 2014 at 10:11 am

      You are so welcome!!!! Thanks for stopping by!!! xoxo

      Reply
  11. Melinda Hartsfield says

    Mar 20, 2015 at 9:13 pm

    I cannot figure this out for some reason :( I created the image just fine, but didn’t know I was supposed to size it first before saving it. The resize option doesn’t allow for 3/4 or .375 as the size = it’s only in pixels? I had already inserted the save image into word but when I resized it to .375 it was so very tiny? I’m not sure what I’m doing wrong? HELP!

    Reply
    • Simply Kierste says

      Mar 22, 2015 at 9:51 pm

      You’re doing it exactly right, but it’s not .375, it’s .75 That will make a big difference! Let me know if you need any more help! xoxo

      Reply
  12. Lisa Saylor says

    Jun 29, 2015 at 10:38 pm

    Hello,
    I am trying to copy your Hershey Kiss label idea for my son’s HS graduation party. I am using Picmonkey for the first time and having some hiccups. Please help! After I have saved, how do I go back to change something. I printed one circle to test it and the text is too small, but I cannot figure out how to make it bigger without starting over again. There must be a way, but I do not see it. I am clicking on the text, the overlays, but it is not giving me an option to change anything. Love your website and appreciate your help. Thanks…Lisa

    Reply
    • Simply Kierste says

      Jun 30, 2015 at 9:05 pm

      Hi, Lisa! When you click on the text, the text box should pop up, and there’s a place where it says “size”, and a slider button that you can move back and forth to change the size. Or, you can type in a number if you prefer. Let me know if that works!!

      Reply
  13. Jackie says

    Apr 23, 2016 at 9:42 am

    Thank you!!!! This is THE BEST, most comprehensive tutorial out there.. Saved me time and money.

    P.S. Two sets of twins?!?! You are a superwoman. I have twins…I know :)

    Reply
    • Simply Kierste says

      Apr 24, 2016 at 9:42 pm

      Yay! I’m so glad you found me, and that I could help!! And I always love hearing from a fellow twin mom! :) xoxo

      Reply
  14. Makaila Prewett says

    Jul 17, 2016 at 1:24 am

    First off I have to say this tutorial is amazing! I’m helping my sister with her wedding favors and this is a life savor:) I have a question though. I’m pretty sure I messed up the sizing when trying to fit a good amount on a single sheet of paper. What size should I make them while in Word to work with the 3/4″? It says they’re at 1.1 right now and it shows seven across like in your photo. I’m not very savvy when it comes to crafting so I hope I’m not royally screwing it up!!!
    Thank you!!!

    Reply
    • Simply Kierste says

      Jul 19, 2016 at 3:24 pm

      Hello there! When you say “1.1” is that inches? What are you looking at? I look at the grid to the left or top of my document, which is in inches. When I do the first one, I re-size it to be 3/4 of an inch, and look at the inch mark at the top as a marker. Another easy way to do it is create a document and format it to be 3 columns, and then change the margins until the open space of the column is 3/4 of an inch. Then when you insert the photo it will automatically fit into that space.

      Lastly, another way you can make sure it’s 3/4 of an inch is to save it that way when you create it. Are you using picmonkey? You can resize or crop the image to be a specific size, and if you save it to be that size, when you insert it into Word, it will maintain that size.

      Did I help? Or answer your question? If not, please let me know!!

      Reply
  15. Lisa says

    Jun 23, 2018 at 2:32 pm

    Picmonkey won’t let me save anymore. Have to pay for subscription! What a bummer. I’m crafty once every few years. Not enough to warrant paying. Any other similar sites out there that you know of?
    Thanks…Lisa

    Reply
    • Simply Kierste Design Co. says

      Jun 25, 2018 at 9:51 pm

      Darn!! Try Ribbet, Canva, Pixlr, Fotor, Picfull, BeFunky…hopefully one of these will work for you!

      Reply

Leave a Reply Cancel reply

Your email address will not be published. Required fields are marked *

Recipe Rating


This site uses Akismet to reduce spam. Learn how your comment data is processed.


search

COPYRIGHT POLICY

The images, tutorials, and content on oldsaltfarm.com are protected by copyright laws. DO NOT distribute or copy the content without written permission. You may not use any images without permission. DO NOT edit or remove watermarks from any image. Pictures are not to be changed or altered in any way, shape or form without my consent. Please do not copy text or reprint recipes without my permission. All ideas and printables are for your personal use only. By downloading any files or printables, you accept that they are FOR PERSONAL USE ONLY. My patterns, ideas and tutorials are NOT intended for resale or re-distribution.

Interested in sharing one of my photos or projects? Fill out my Old Salt Farm Feature Agreement.

Please contact me with any questions. oldsaltfarm@gmail.com

© Old Salt Farm (Kierste Wade)

CREATE AT YOUR OWN RISK

Any and all content on this website is created for inspiration purposes only. Creating with my suggested methods, products, instructions, tutorials, and tools is at your own risk. Please ensure you are following proper guidelines with anything used, and seek professional advice if you don’t know how to do something.

Old Salt Farm is for entertainment purposes only. All tutorials and demonstrations are not intended to be professional advice, nor substitute as such, and I make no guarantees as to the procedures and information here.

Read my full disclosure here.

AMAZON DISCLOSURE

Kierste Wade (Old Salt Farm) is a participant in the Amazon Services LLC Associates Program, an affiliate advertising program designed to provide a means for sites to earn advertising fees by advertising and linking to amazon.com. Amazon offers a small commission on products sold through their affiliate links. When you make a purchase after clicking on one of those links, I earn a small commission that helps support this blog, at no extra cost to you. Read my full disclosure here.
Copyright © 2021 Old Salt Farm, Custom site by Moonsteam Design.

Cookies

This website requires the use cookies. By using this site, you are agreeing to our Privacy Policy.